Magic Shrimp

Rune Westphal designed a nice shrimp pattern. It’s like a Perfect Leo Shrimp from Kern Lund with an translucent rear body.

This is my first attempt with this pattern. I tied the front and the mouth part a bit different with CDC and Arctic Fox. It’s not perfect, but for the first try, I’m quite satisfied.

Magic Shrimp

Here, you can see the tying video of Rune:

[youtube width=“600″ height=“400″]https://www.youtube.com/watch?v=UKMmtfuB9tg[/youtube]

Sedge Pupa Step By Step Tutorial

I posted this pattern some weeks ago on my blog and on Facebook and I was asked, if I could do a step by step tutorial about it. So, here it is. I hope you like it as much as I do.


Materials:

  • Hook: Maruto C47 BL # 12
  • Weight: Tungsten Bead Black Nickel
  • Thread: Dyneema
  • Body: Thread-Underbody, olive marker pen,  Flashabou, Polish Quills green
  • Resin: Bug Bond Lite
  • Dubbing: SLF light olive and cinnamon
  • Wings: Flashabou Mirage colored with a brown marker pen
  • Wing Case: Pheasant
  • Legs: Partridge

Put the hook with the tungsten bead in the vise.


Form the unterbody with your thread and tie in the Flashabou and Polish Quill.


Color the underbody with an olive marker pen and wind the Flashabou and then the Polish Quill around the body and secure it with your tying thread.


Put some Bug Bond Lite on the body and cure the resin with your Bug Bond torch. Then, tie in some strands from a pheasant tail feather as shown.


Dub some SLF light olive on the fly and tie in the brown colored Flashabou Mirage. Cut the Mirage like shown on the photo.


Dub the rest with SLF in cinnamon till you reach the tungsten bead.


Cut a „V“ out of  a partridge feather and tie in the fibres of the partridge as legs. Then fold the pheasant strands to the front to create the wing case and catch it with your tying thread. Put a drop of Bug Bond Lite on the wing case incl. the thread with which you catch the pheasant. Cure the Bug Bond Lite with your Bug Bond torch and cut the thread. You’re done! The Bug Bond Lite makes it super strong! You don’t need to do whip finish!


That’s it! Now grab your fly rod and catch some nice trout or grayling or whatever you like to catch with nymphs and pupas!

tight lines!

Holger

Czech Nymphs

To be honest, I’m not a fan of czech nymphing. I just love to cast with a flyrod. Czech nymphing is super effectiv, no doubt about that. It’s just too less casting for my liking… ;-)

The Czech Nymphs on the other hand are pretty cool flies. I didn’t fish them much in the past, but I want to try them in the next season, especially the ones with a little hot spot. This is quite hard for me, because I got a lot more faith in natural colors. Maybe I was wrong all the time, we’ll see….

Czech Nymphs should be weighted AND as slim as possible to sink fast. That’s not the easiest task. You have to find the right amount of dubbing. Less is more!

I look forward testing them in a nice stream for trout and grayling. :-)


The last fly of 2013

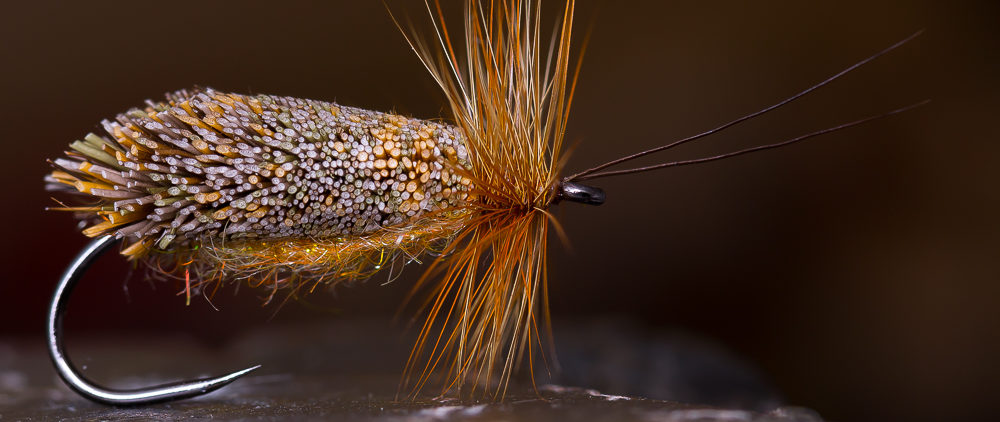
This Caddis Pupa, tied on a Daiichi Klinkhamer hook # 14 was the last fly I tied in 2013.

The Soft Brown Grizzly


Another all around seatrout fly. This pattern is inspired by the famous fly „Omøborsten“. This fly is mainly tied out of soft Keough grizzly saltwater hackles, which pulsate strongly in the water. I made a little video at the end of the tutorial, where you can get a slightly impression, how the fly mowes in the water.

Materials:

  • Hook: Partridge CS 54 # 6
  • Weight: Lead Wire
  • Tail: Dubbing & Keough Grizzly Saltwater Hackle
  • Ribbing: Mono
  • Body: SLF Dubbing & SLF Prism Dubbing, Keough Grizzly Saltwater Hackle
  • Front: Keough Grizzly Saltwater Hackle
  • Hot Spot: Fluo Thread


Wind the lead wire around the front part of the hook and secure it with super glue. Then create a little dubbing ball at the end of the fly.


Tie in a really big and soft hackle.


Wind the hackle around the hook shank.


Tie in some pheasant tippets.


Tie in the mono for ribbing. Then split the thread, put the dubbing in the gap and spin the bobbin to twist the thread and the dubbing. Wind the Dubbing around the shank.


Tie in another hackle…


…wind it towards the end of the fly. Secure the hackle by ribbing the it with the mono. Then brush the body, so the dubbing strands are mixed with the hackle fibres.


Tie in another big hackle at the front. This big front hackle pushes the water and creates much turbulance.


Create a nice little hot spot with your fluo thread and varnish it. That’s it!

tight lines

Holger Lachmann

click to play the video[vimeo]http://vimeo.com/36655237[/vimeo]