Freshwater Shrimp with the new Gammarus Foil by Pro Sportfisher – Step By Step

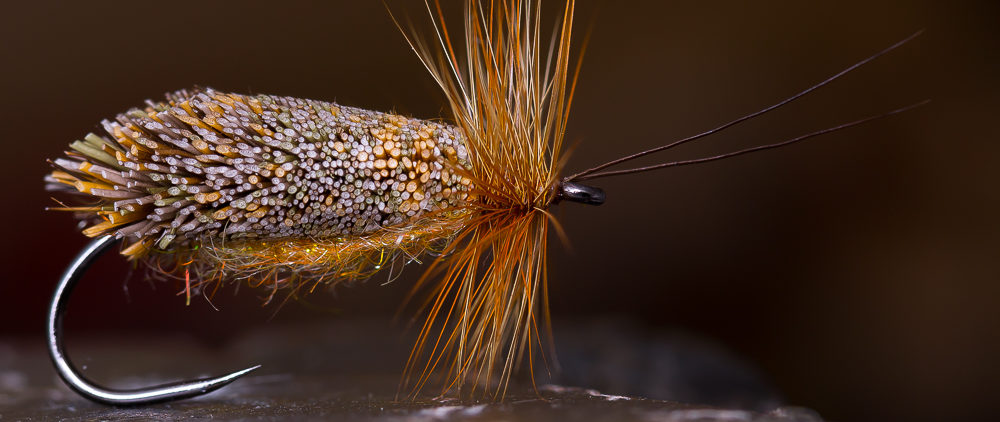
This is a really natural looking freshwater shrimp. Easy to tie and very durable. It’s tied with the new multi colored Gammarus Shrimp Back from Pro Sportfisher and Bug Bond.

You can get the Gammarus Shrimp Backs in different colors and sizes. Here, I used the brown color in small.

It was never easier to tie a super realistic pattern in such a short time. I believe, that it’ll catch fish from Finnland to Italy!


Materials:

  • Hook: Tiemco 2487 # 12
  • Weight: Lead Foil
  • Ribbing: Mono 0,14
  • Back: Pro Sportfisher Gammarus brown # small and Bug Bond UV Resin
  • Dubbing: SLF Squirrel Spikey Dubbing mixed with Hends Spectra Dubbing
  • Tail: CDC Feather
  • Thread: Dyneema


Take the hook, push down the barb and put it in your vise. Cut a stripe of lead out of the lead foil and create a nice lead body.


Take a CDC feather and cut off a „V“ from the tip. Tie the feather in as shown.


Take a shrimp back from the sheet and tie it in at the end. Tie also in the mono for the ribbing.


I used for this Gammarus a mix made out of Squirrel Dubbing and Spectra Dubbing. A natural color with a little bit of flash. Dub a not to slim body.


Fold the Gammarus foil to the front and catch it with you tying thread. Then, rib the body with the mono. Catch the mono, cut it off and finish the tying with a whip finish.


Now, take your Bug Bond and coat the back of the shrimp and cure it with the Bug Bond torch.


Pick out some beards and fibres with your dubbing needle to imitate the legs.


The finished shrimp, ready to fish.


The shrimp when wet. I don’t think, that a fish can resist.

Tight lines

Holger
Mini Sculpin Step By Step


I was invited to tie at the Dutch Fly Fair last weekend. A small Mini Sculpin pattern was lying on my desk in front of me while tying. It was less then 5 cm long. A lot of people liked it, especially Walter Bayer from Ireland (great flytyer) and Roger Enger Lie (great caster) from Norway and I had to promise to them, that I will do a step by step tutorial of this little guy.

So guys, this one is for you! ;-)


Material:

  • Hook: Gamakatsu SC 15 # 4
  • Weight: Tungsten Bead
  • Tail: Pine Squirrel Zonker
  • Pectoral Fins: Pine Squirrel Zonker
  • Head: Senyo’s Laser Dub
  • Eyes: 3-D Eyes


Put a tungsten bead on the hook.


Tie in a piece of pine squirrel zonker as a tail.


Put some pine squirrel hair in the clamp, then split the thread and put the hair in the gap.


Rotate the bobbin to twist the hair and the thread. Put a litlle bit of water on the hair, so it’s easier to wrap it around the hook shank.


Tie in bunches of Senyo’s Laser Dub. Remember, this is a up side down pattern, so tie in the bright color on top of the fly and the dark color underneath. You can create different shades by using different colors. Finish the tying with a whip finish behind the tungsten bead.


Now, start the cutting to create a sculpin head. The easiest way is to begin with the flat underside.


Before the cutting is finished, use some superglue to fix the 3-D eyes on top of the sculpin head and press the eyes into the Laser Dub to give the head strength. Now, you can do the final cutting.

That’s it! A small sculpin which swims down on the bottom of the river, because of the tungsten bead.

Note: Please press down the barb of the hook! Trouts will take the sculpin very aggressively!

tight lines

Holger Lachmann