
CDC-Snack For Sea Trouts – fly tying video
2

[vimeo width=“600″ height=“500″]https://vimeo.com/175105808?ref=fb-share&1[/vimeo]
[vimeo width=“600″ height=“500″]https://vimeo.com/173220992[/vimeo]
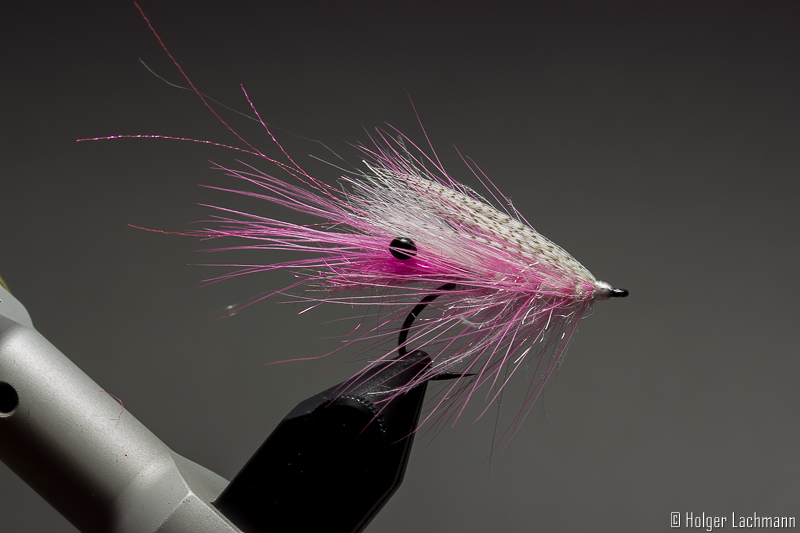
The step by step tutorial about the PINK FLUFFY is destroyed. It don’t know why, but it was not shown right on the blog. So I did it again and I gave the fly a new name, because I didn’t like Pink Fluffy anymore.
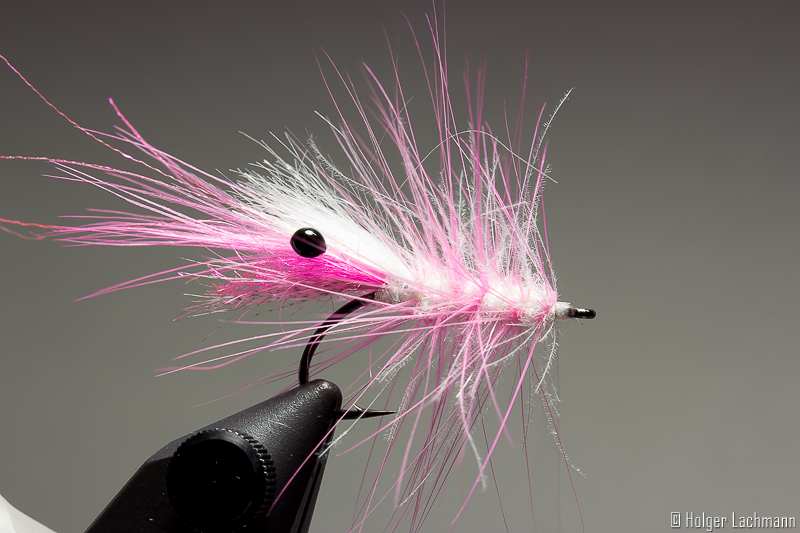
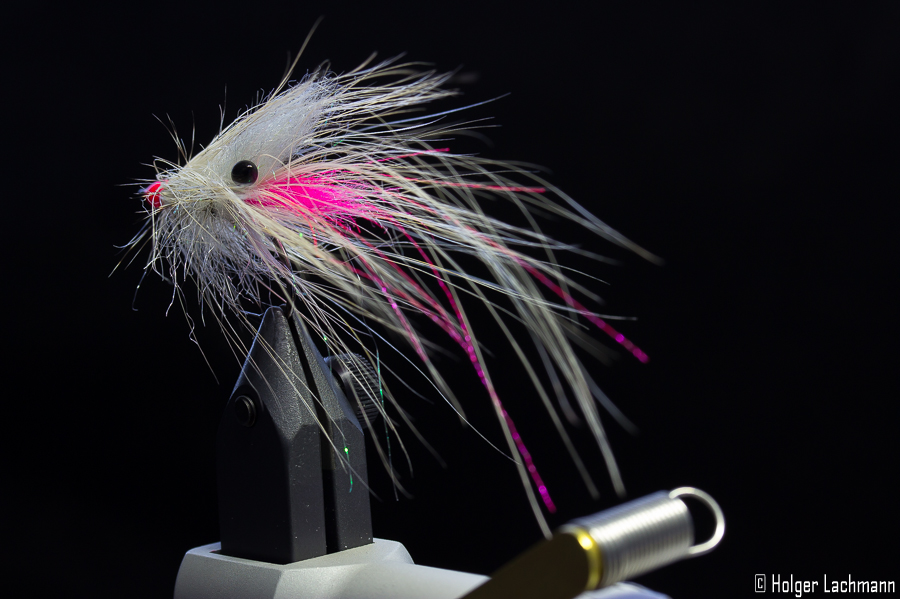
So I called the fly „DETLEF“ – also known as the fly formerly known as PINK FLUFFY. Why? Don’t know , it just fits.
[vimeo]https://vimeo.com/150781439[/vimeo]
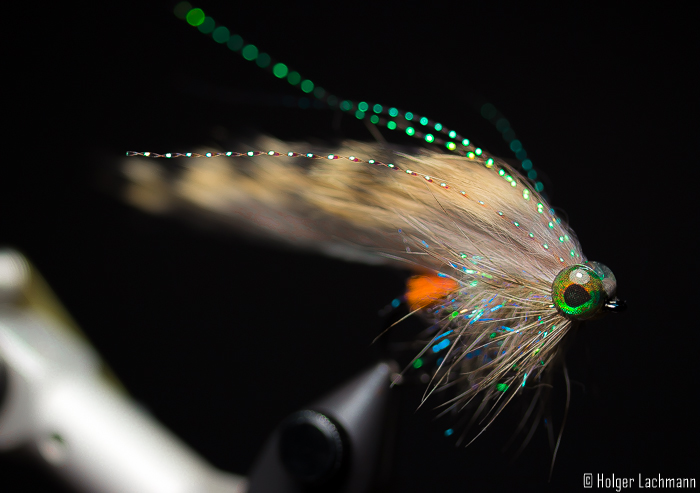
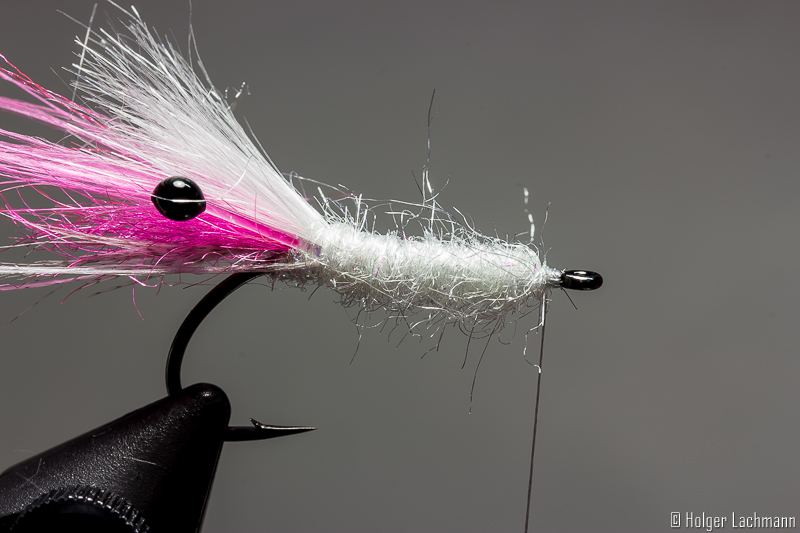
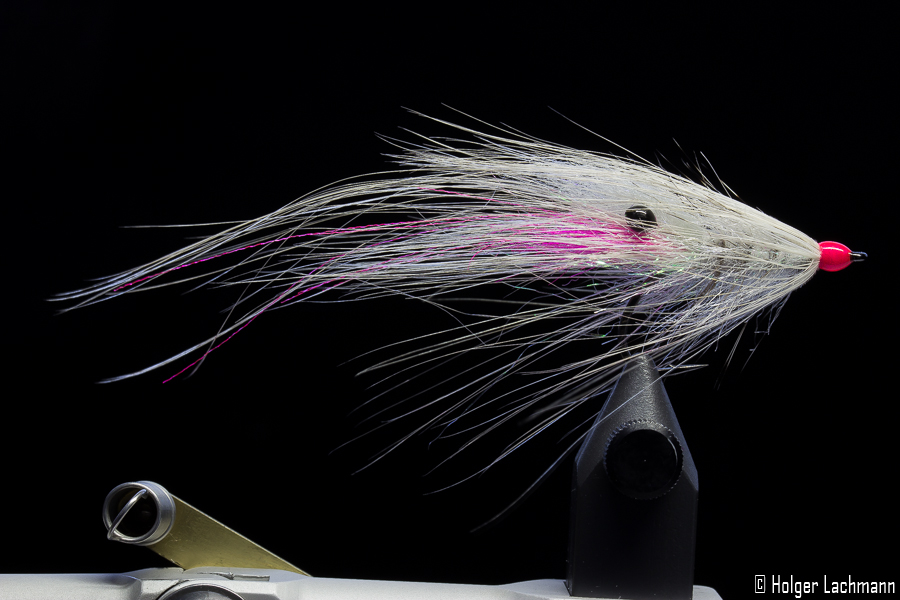
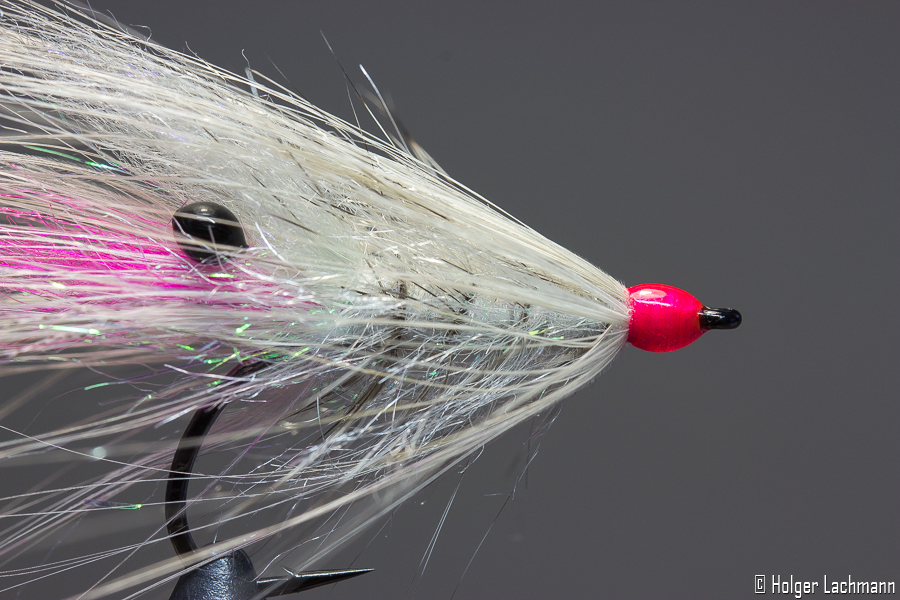
You can fish for sea trout even in the winter time. It’s a very hard kind of fishing with temperatures sometimes under 0°C, but there is a chance to catch an awesome „Silberbarren“. It’s common knowledge, that sea trouts like the color pink, especially in the cold season. It’s also common knowledge, that sometimes, the sea trouts like a very slow retrieve. For that situations, the DETLEF is a really good choise. The soft materials move very nice in the water, even if you strip the fly in very slowly. On the other hand, it’s not very complicated to tie and when you use other colors like beige, tan and brown, you got a very nice shrimp pattern for the rest of the year.
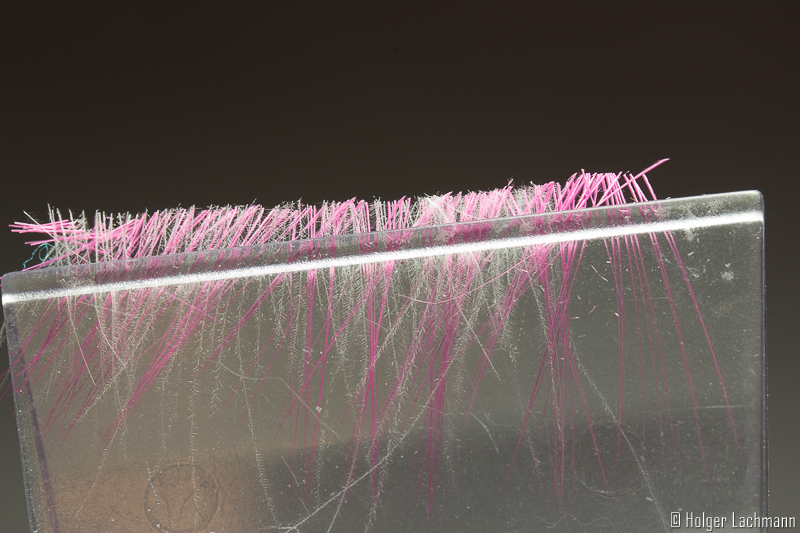
One very important point: Don’t use too much material! Less is more!
Materials used for this fly:
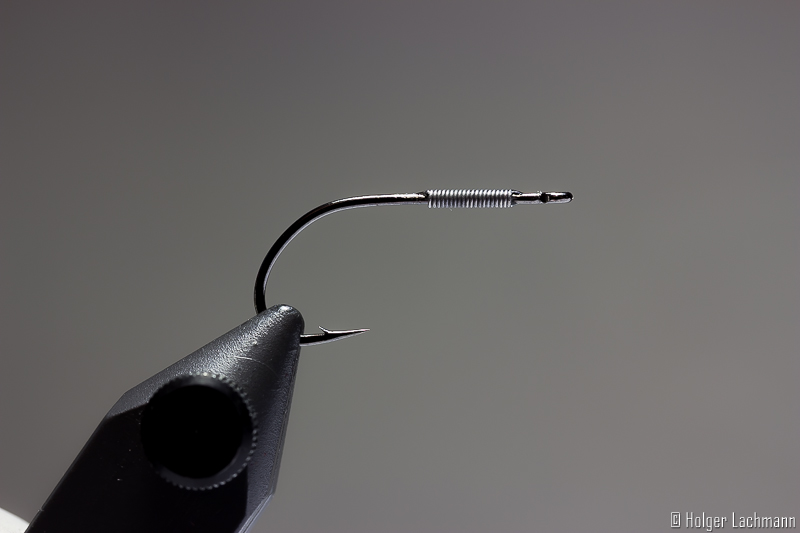
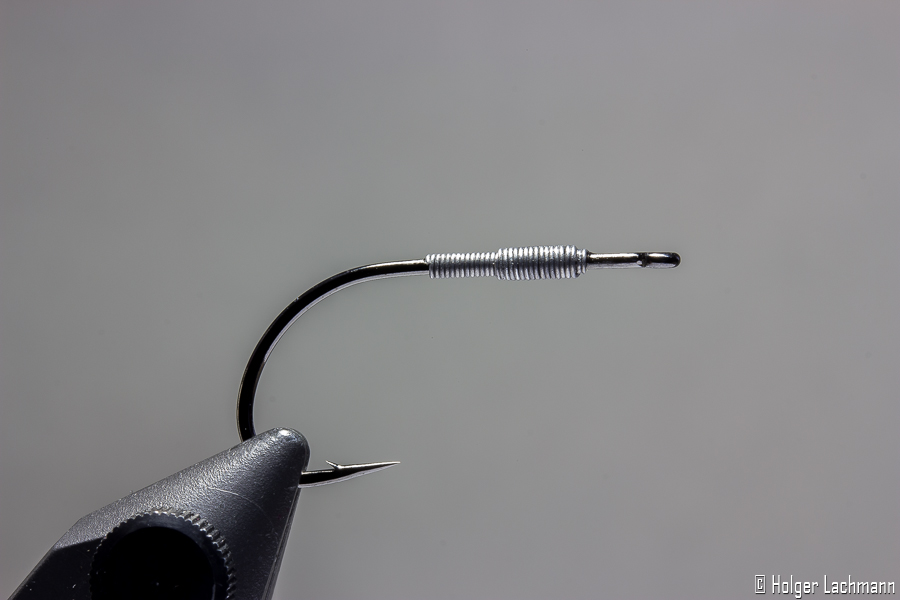
Do a little drop of superglue on the shank and wind on some fine lead wire.
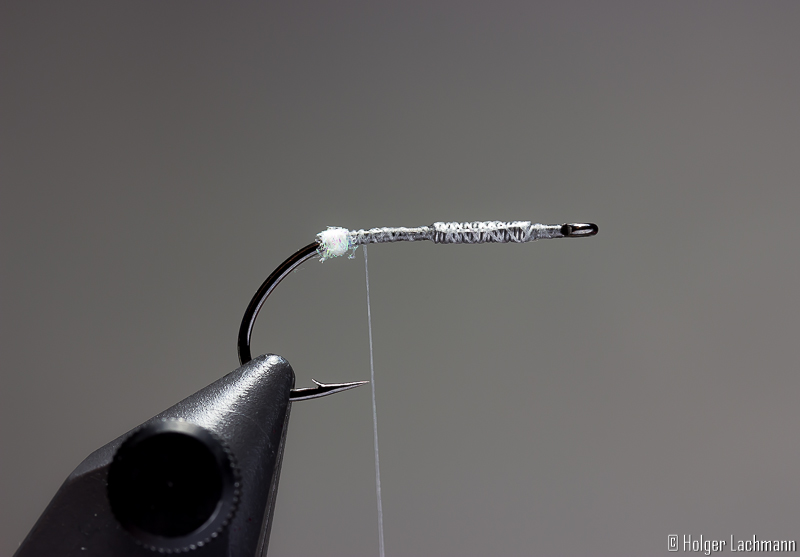
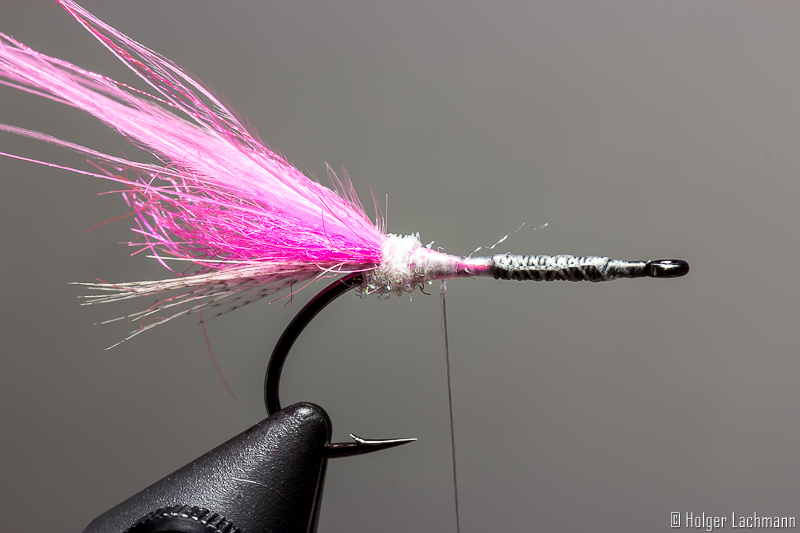
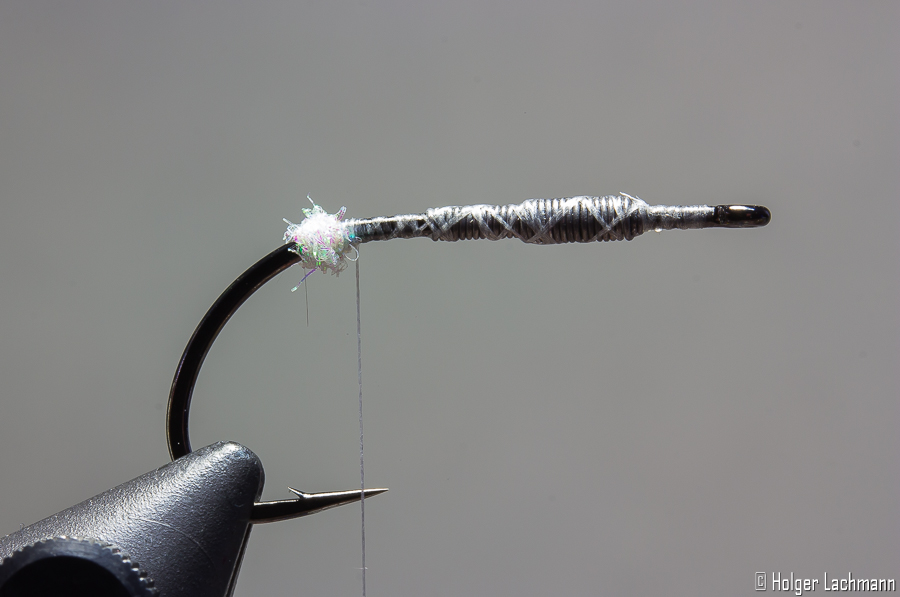
Form a little dubbing ball with the ice dub at the end and tie in some fibres of Mallard.
Take a bit of pink SLF and tie it in.
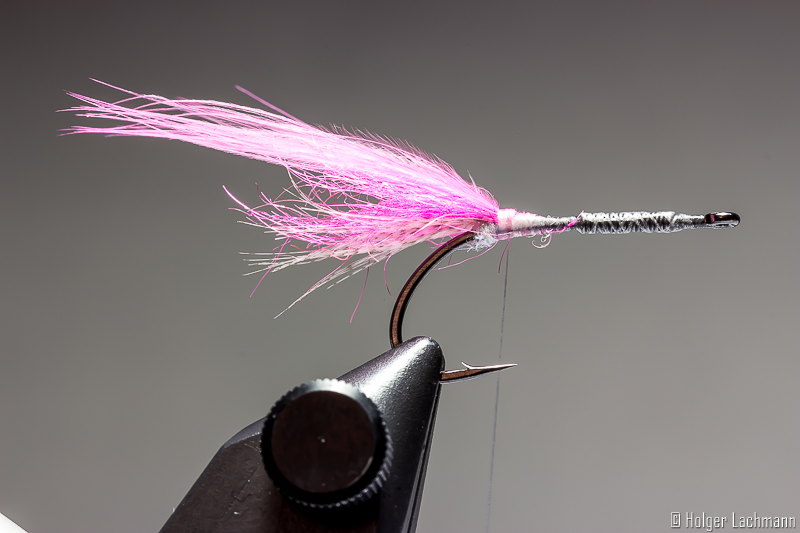
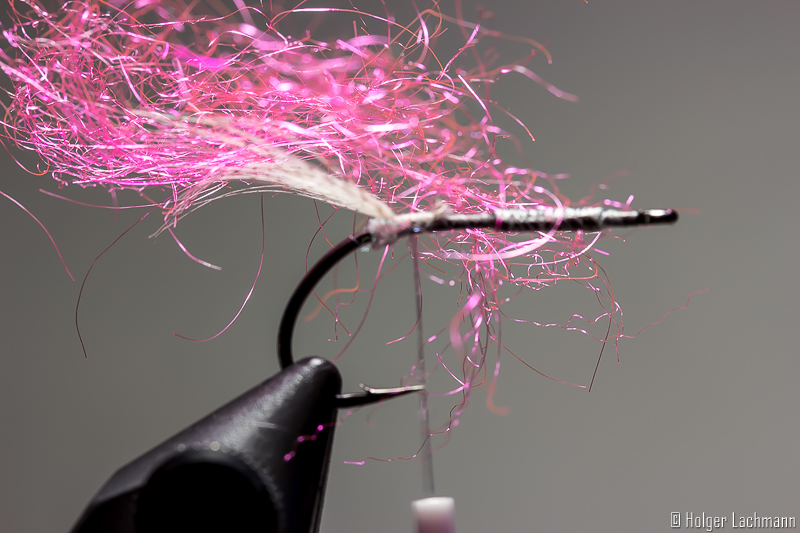
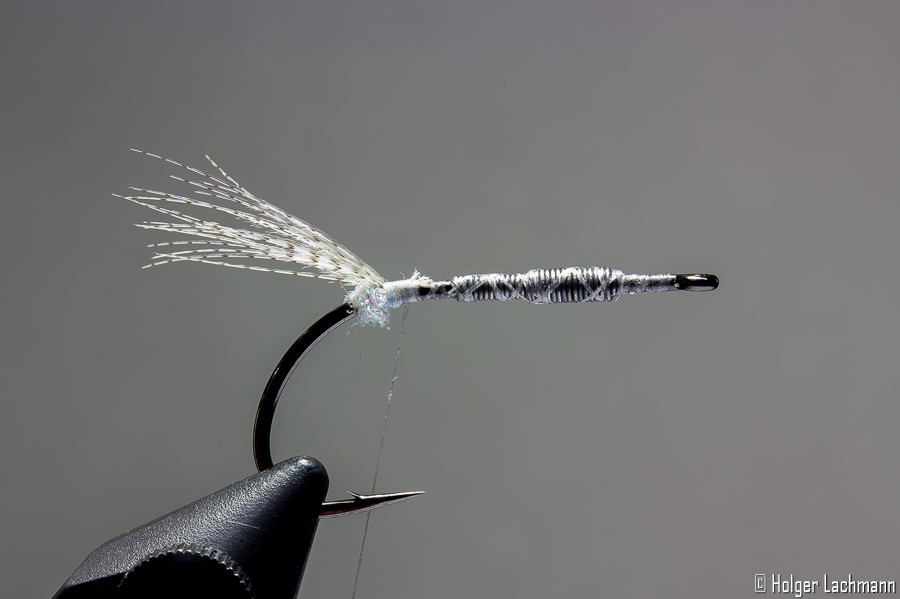
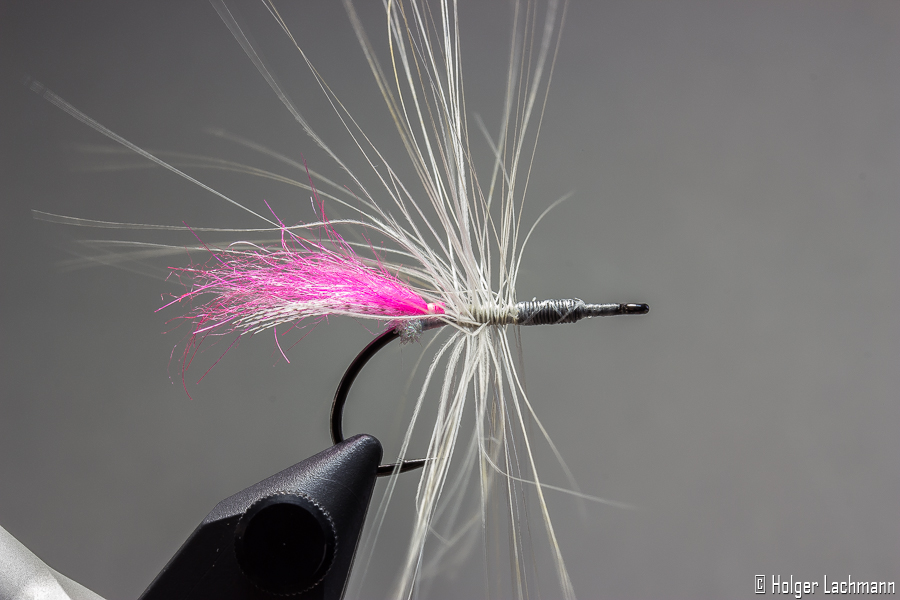
Take some long soft fibres from a pink hackle and tie them in as shown. Add some strands of pink Fluoro Fibre antennas.
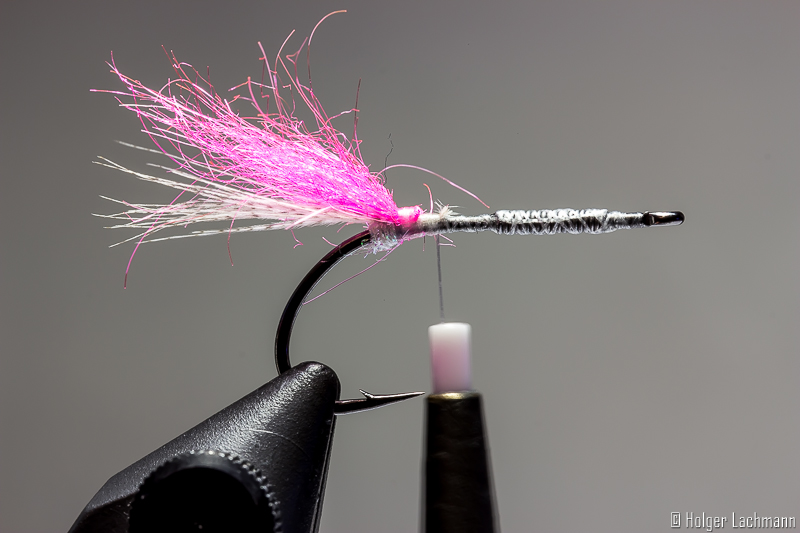
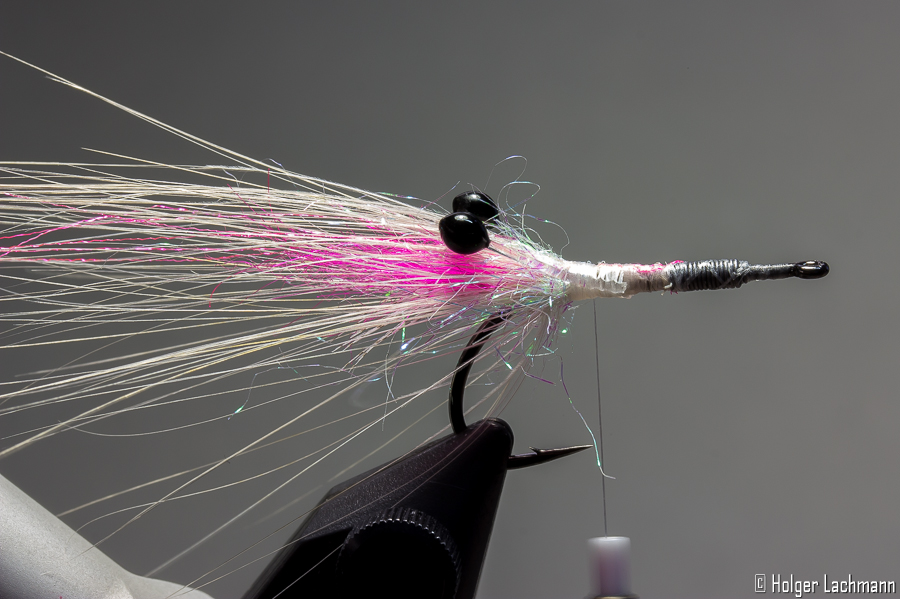
Dub a little ball with Ice Dub and tie in the shrimp eyes. The dubbing ball will seperate the eyes in a nice way.
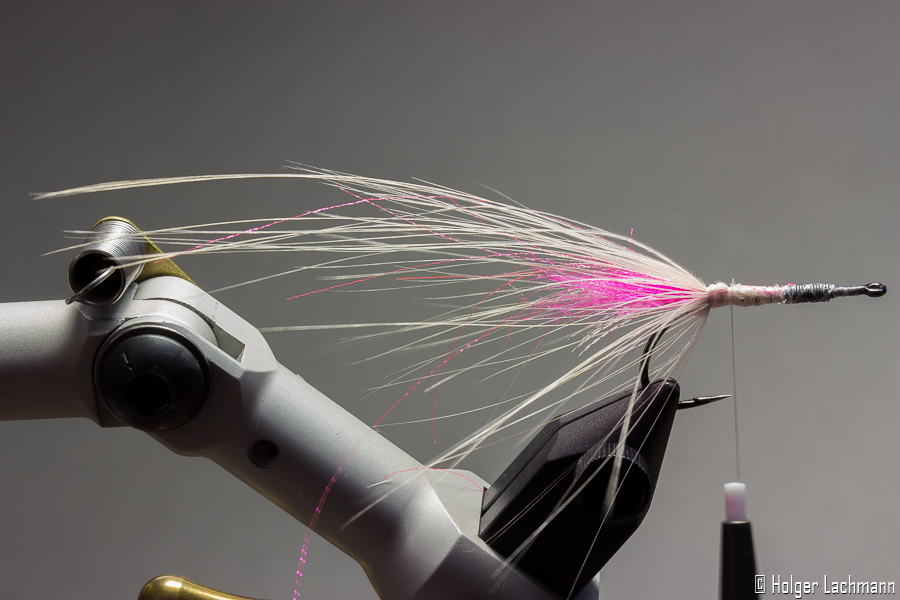
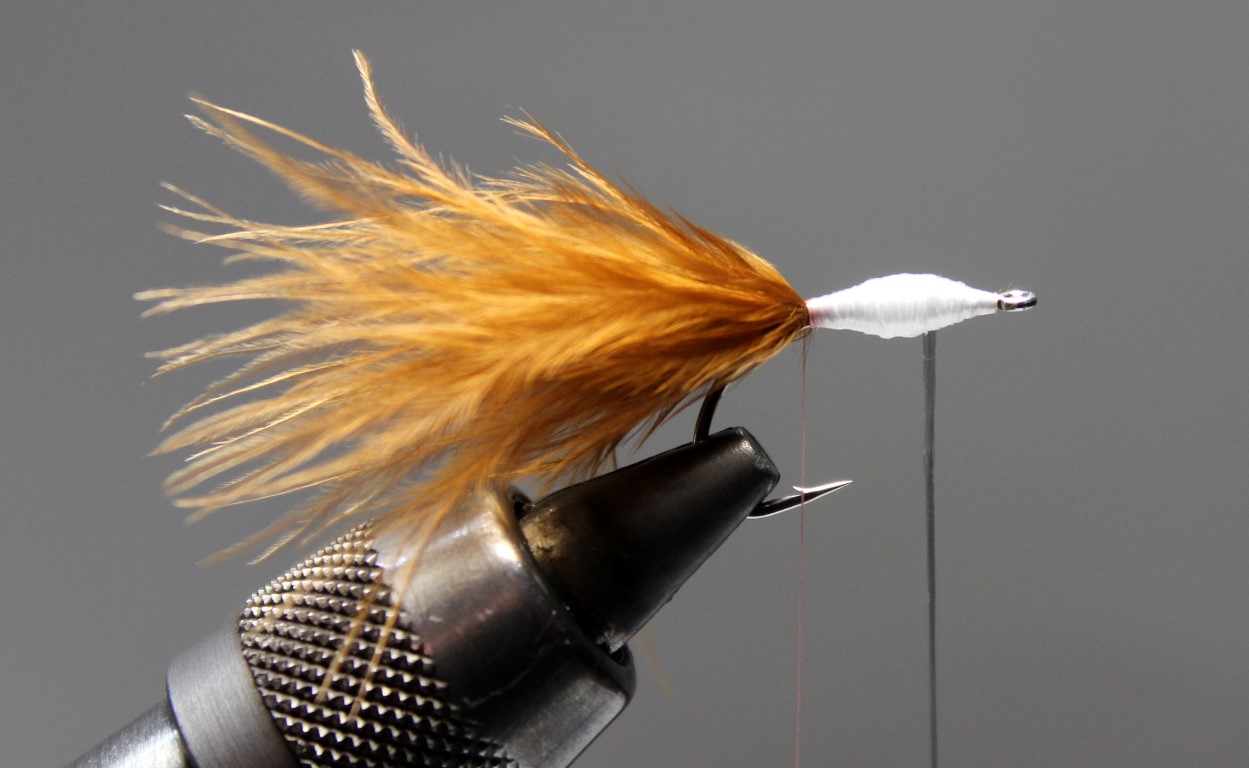
Take some Polar Dub in white and tie it in as a horn.
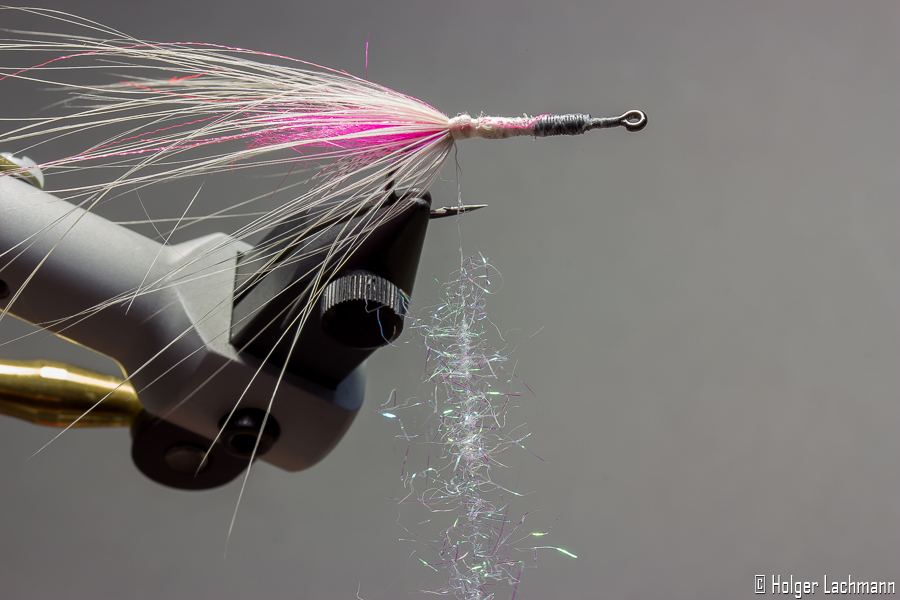
Form a thread loop and then dub the body with the SLF.
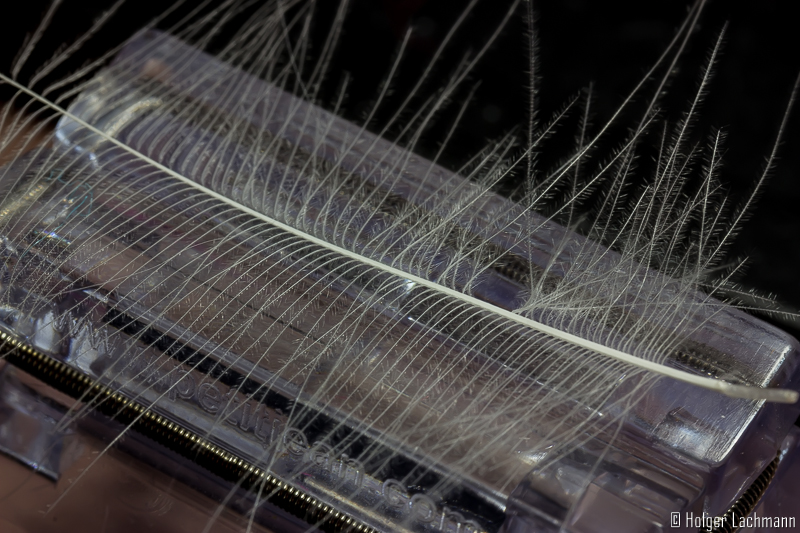
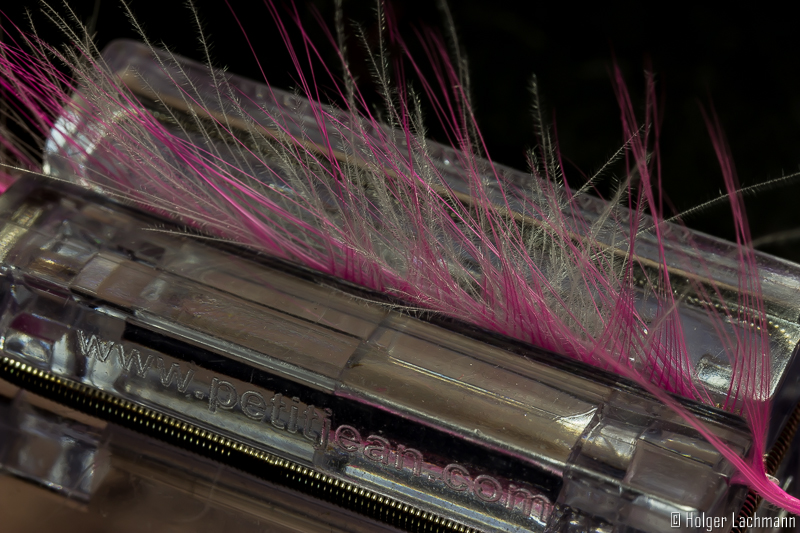
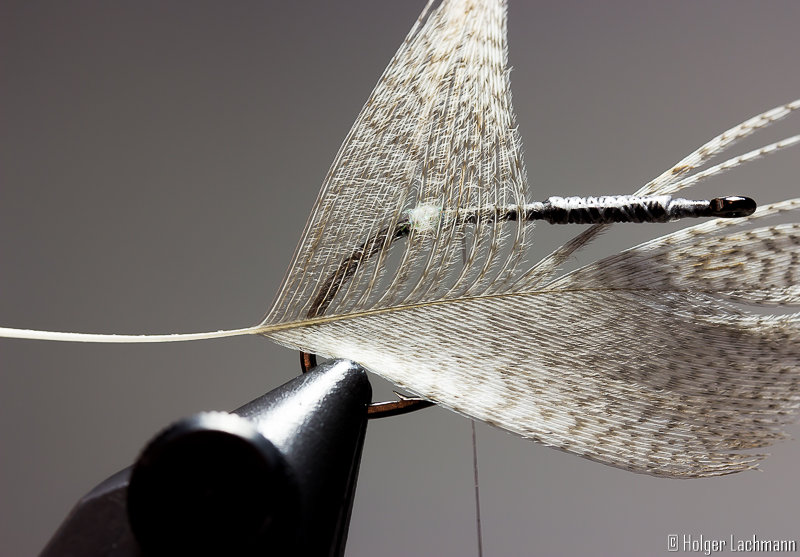
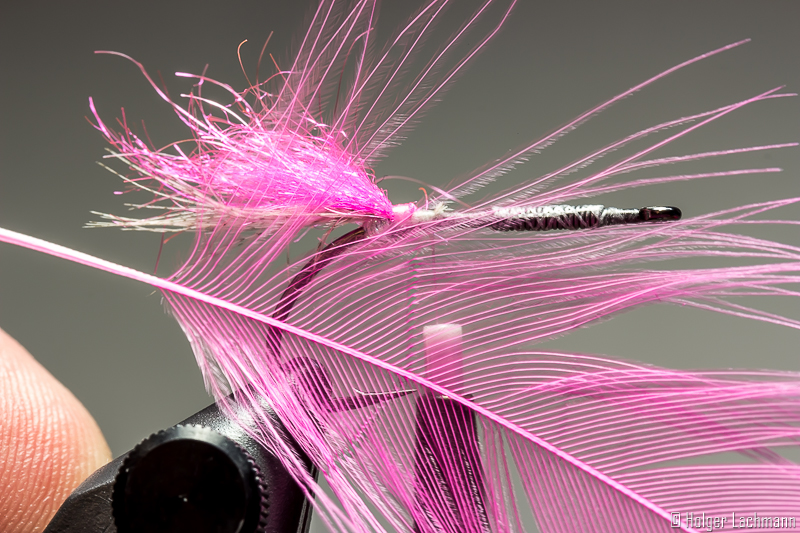
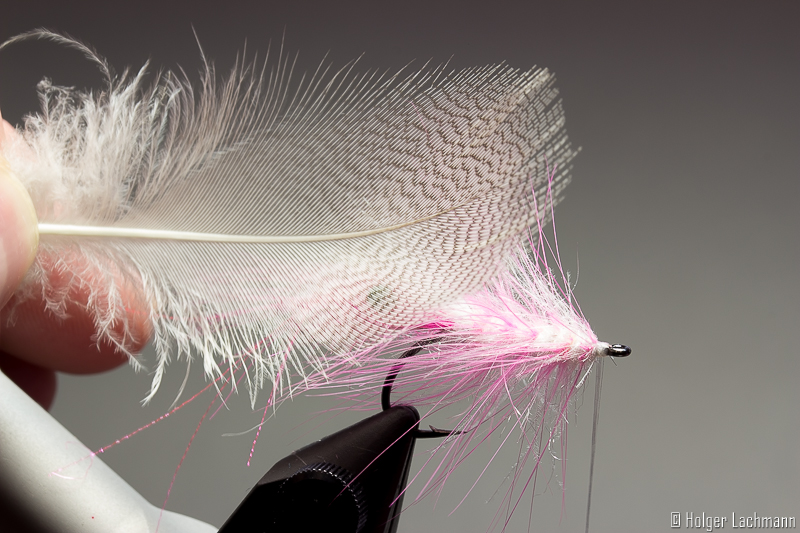
Put a big white CDC feather on the Petitjean Magic Tool and push it in by using a pink hackle.
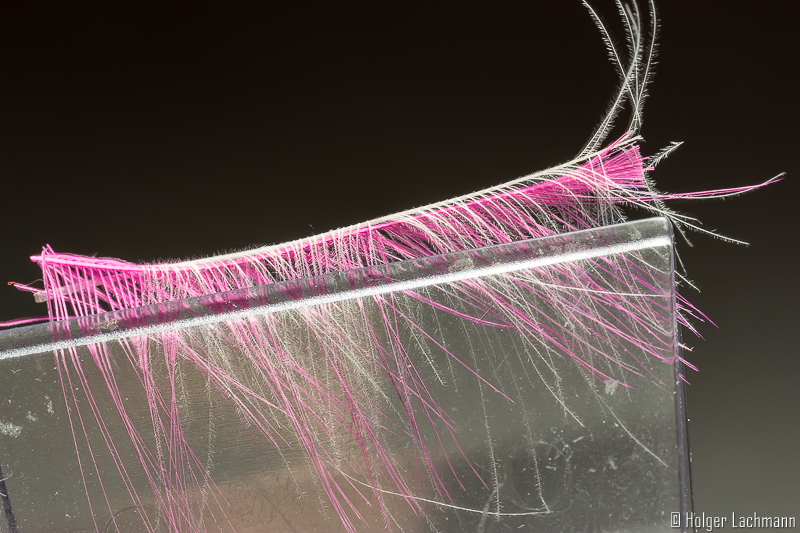


Grab the fibres with the clamp of the Magic Tool and and cut off the stems. Then put the fibres in the waxed thread loop and twist the loop.
Wind the hackle fibres-CDC-Mix around the body and catch it with your thread.
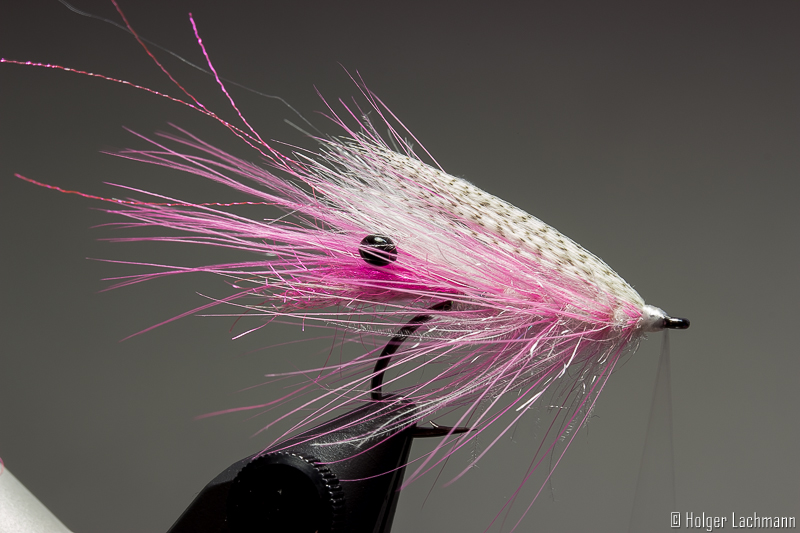
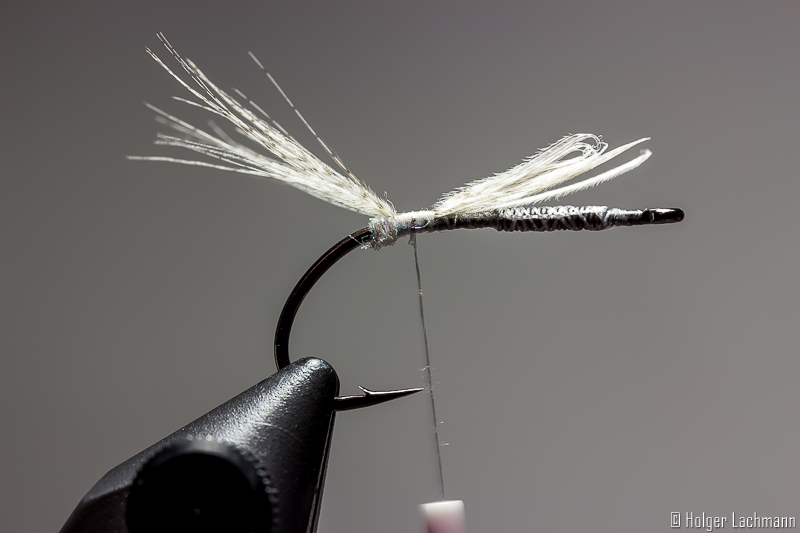
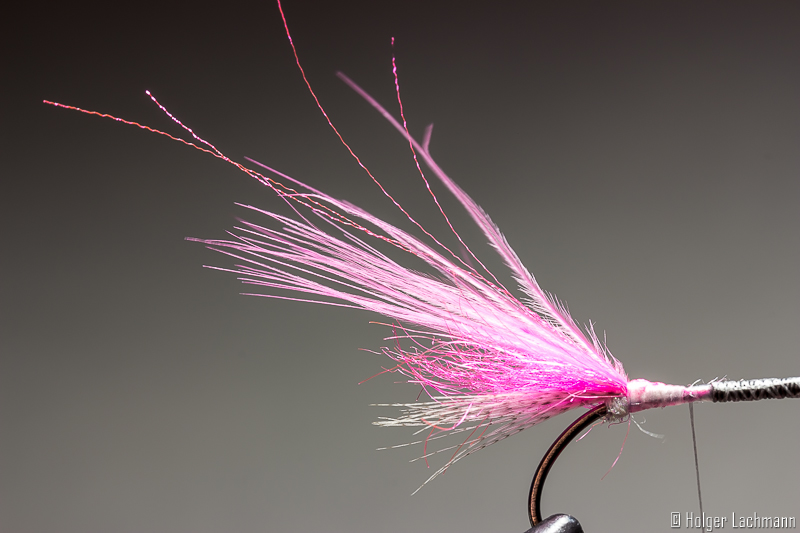
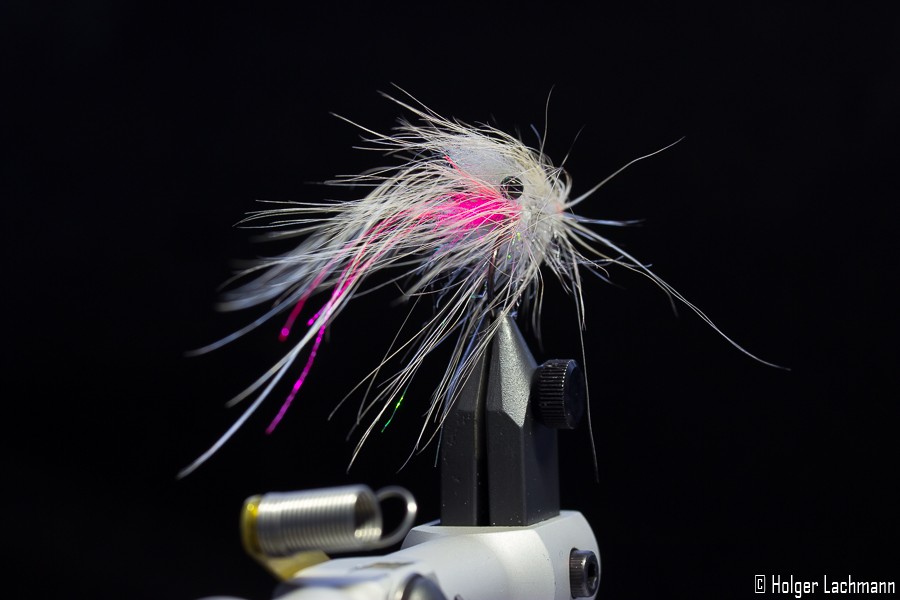
Some fibres from a Mallard feather will be used for the back of the fly. So, the fly swims in the right position and the black/white gives a great extra contrast. Do one or two whip finish and use some varnish to secure the knot. That’s it! Detlef is ready!
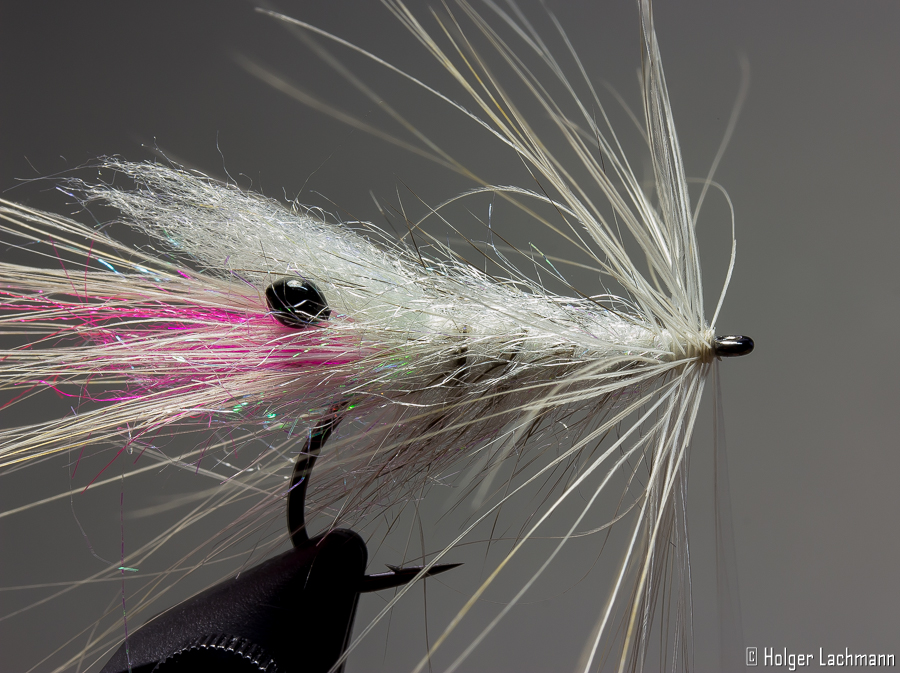
I was asked so often in the last time for a step by step tutorial for the Sea Trout fly „Der Loppo“, that I finally made one.
This fly isn’t something „brand new“, „the next revolution“, „the game changer“ or anything like this. It’s just a mix of some ingredients of good flies mixed together to a fly, which I personally like and in which I put my faith when fishing. I made flies for my fishing in the past, which looked quite similar, but this is the final outcome.
Its got a nice semi translucency, it’s not too bright and not too unimpressive. You can tie it in different colors. I also like tan/white and orange as a color combination very much.
This example fly is tied on a hook size 4, but you can also tie it in size 6 with shorter fibres, when you want to fish it slower and the Sea Trouts just nibble on the longer fibres.

I even got a variation with black hackles and hot orange trigger points for murky water… looks very cool, too!
Ok, let’s start the step by step with a list of the materials:
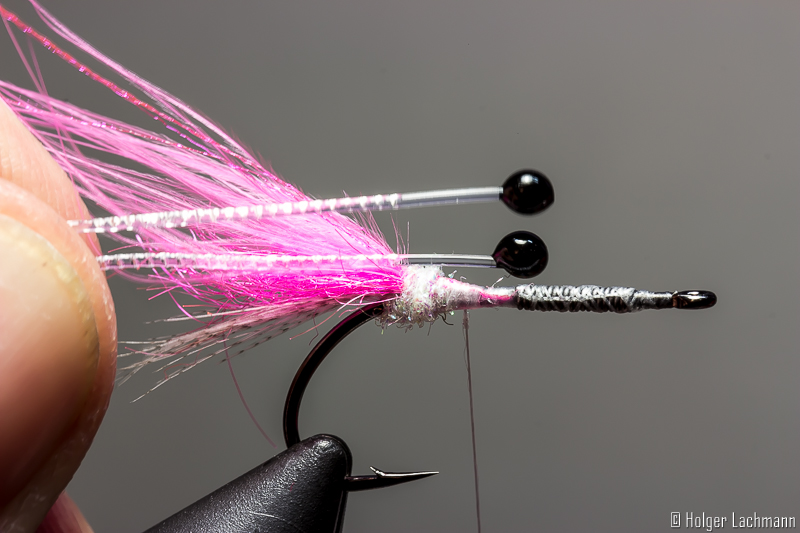
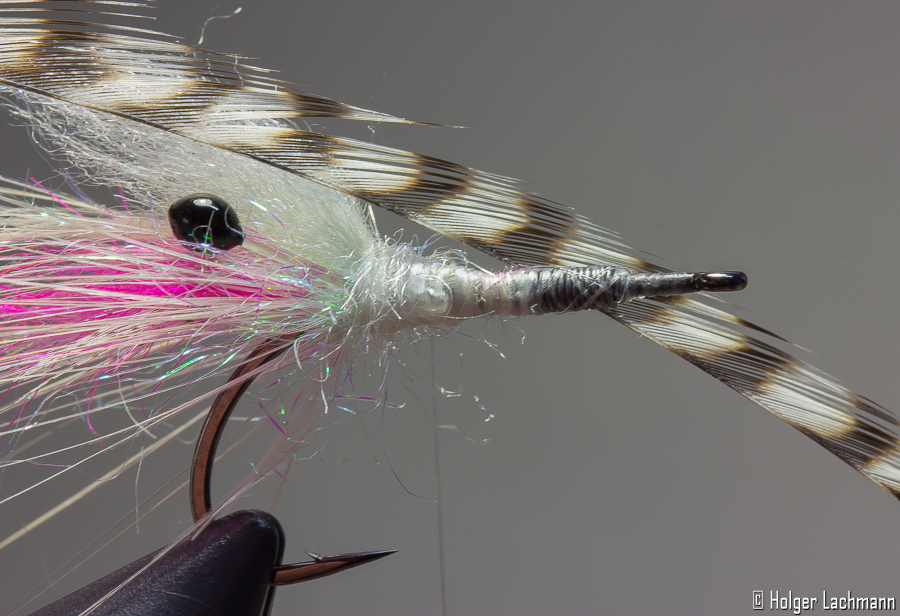
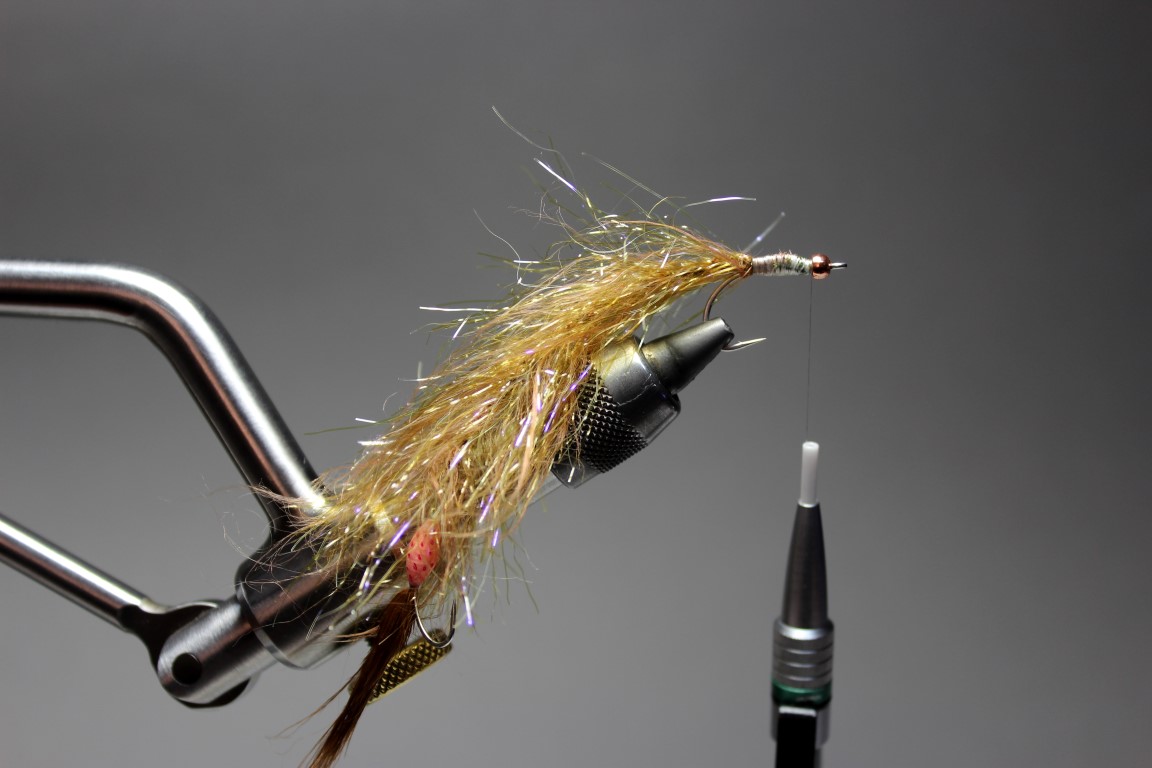
Put the hook into the vise and wind the lead wire arounf the shank. To secure the lead, you could use a little drop of super glue. Attach the thread and form with the Ice Dub a little tight dubbing ball at the end of the shank.

Tie in the Mallard and the pink SLF as „mouth parts“.


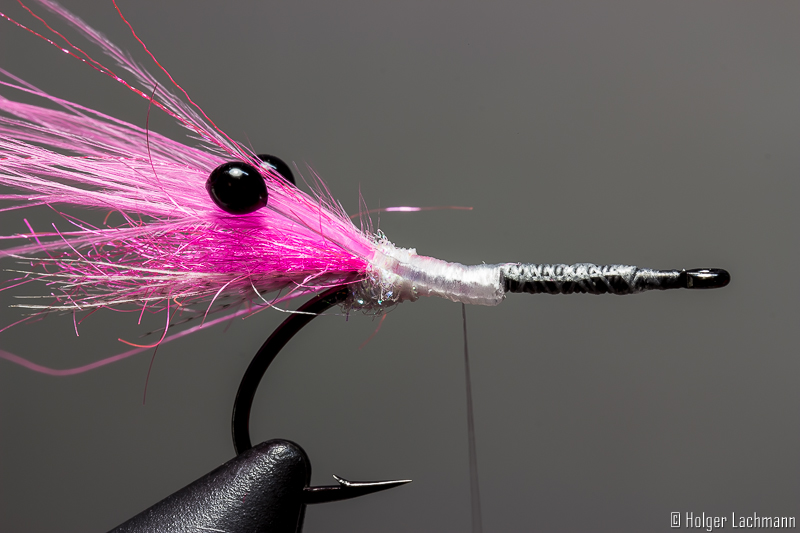
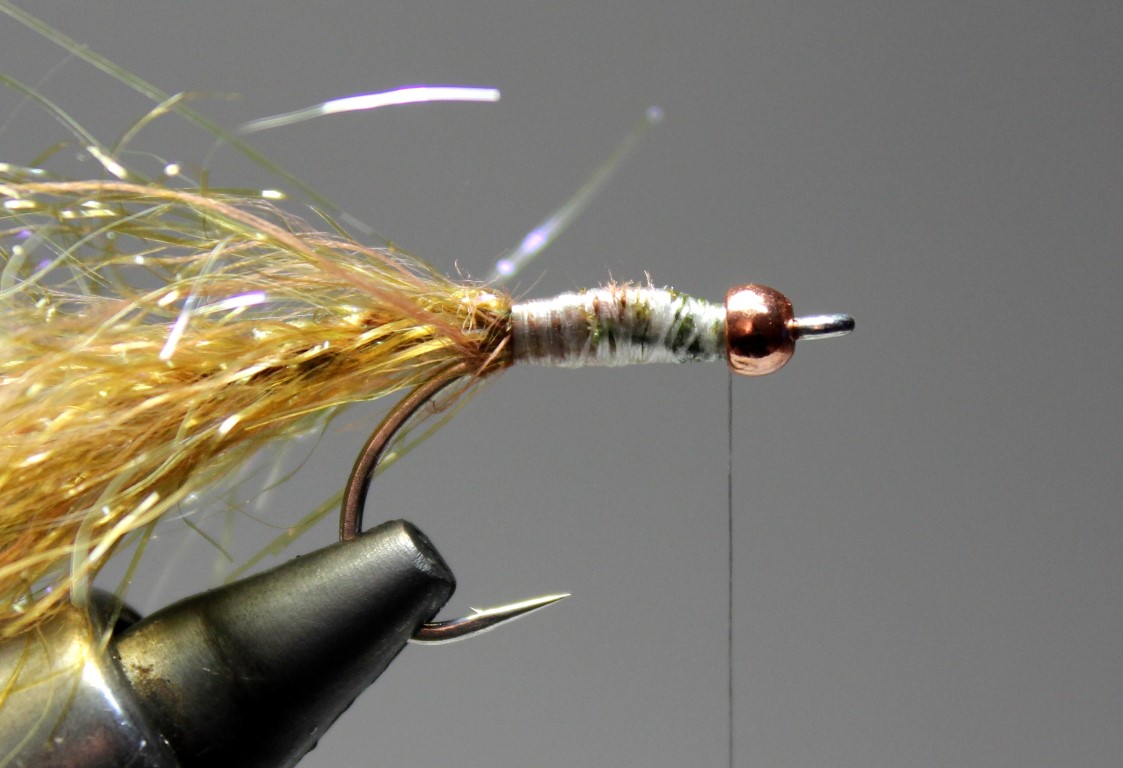
The first spey hackle should be tied in like shown. It’s easier to wind it around this way. Go back with your tying thread to the little bump and secure so the thin fragile stem of the spey hackle. For a little extra color, tie in some Fluoro Fibres in pink.
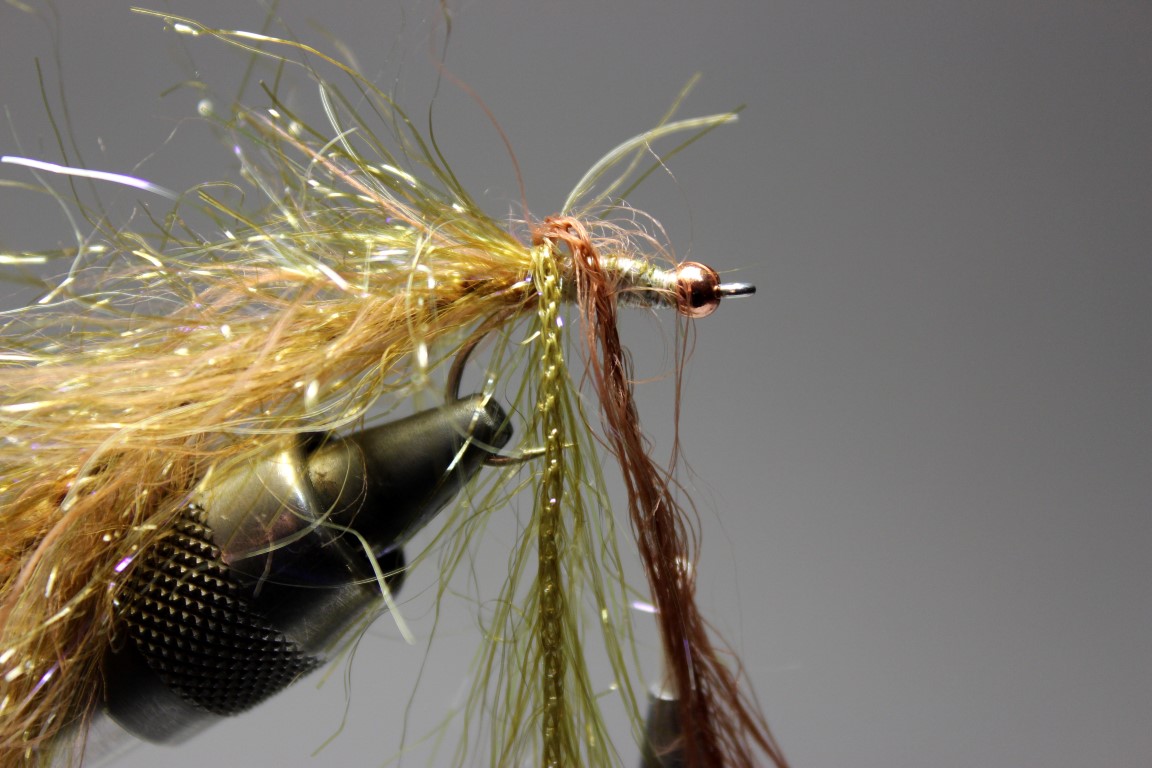
I like to tie in some extra long hackle fibres for the extra movement. If you think they are too long, just skip this tying step.


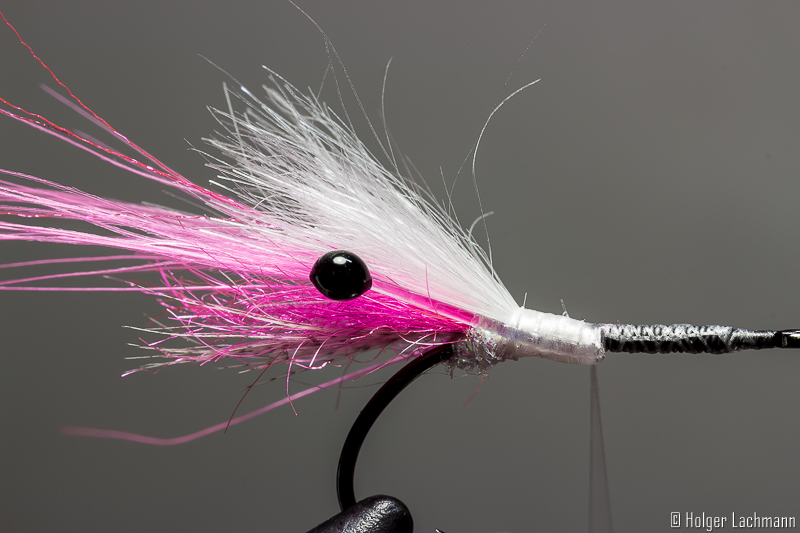
Split the thread and put some Ice Dub in the gap, then twist the bobbin and wind the dubbing around. After that, give the dubbing a brush with your velcro.
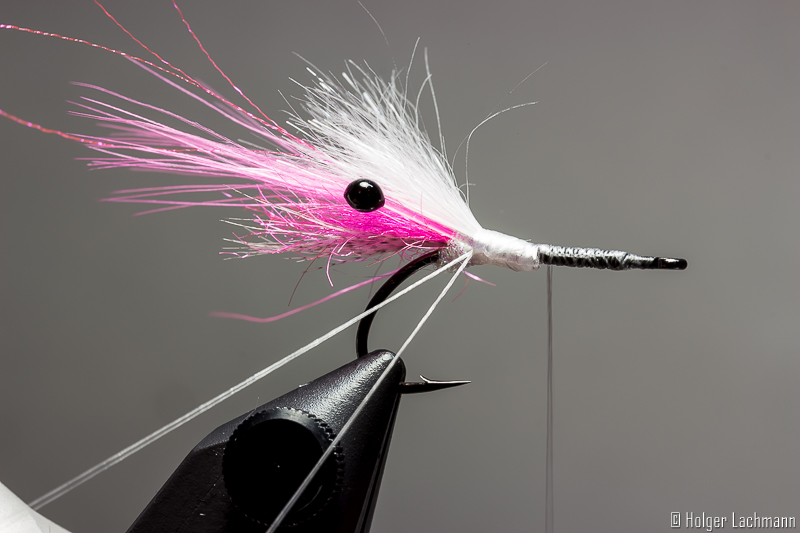
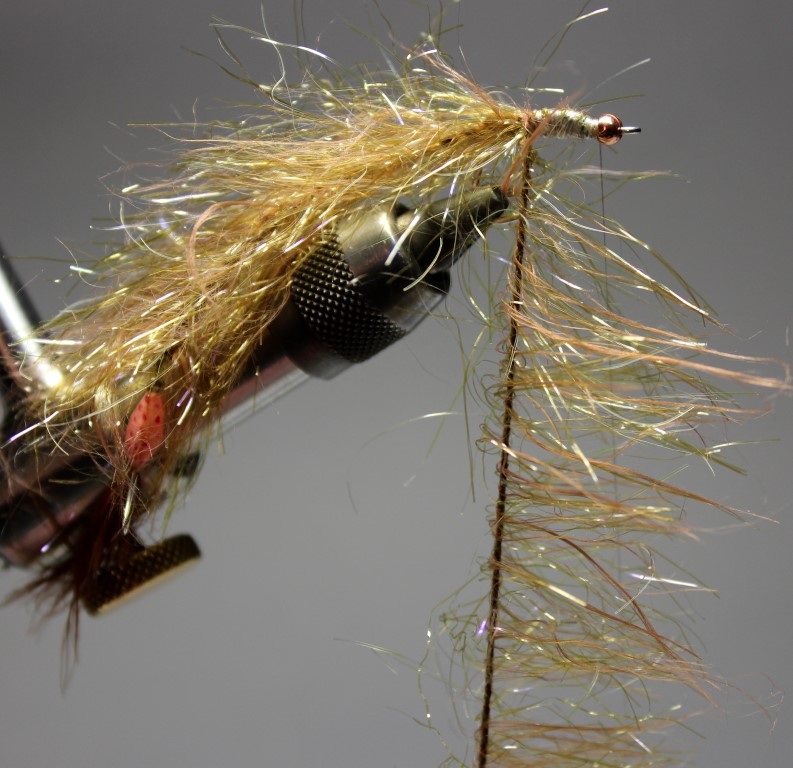
Now the eyes and the mono for ribbing should be tied in.

For the horn section, tie in the Laser dub and do a first turn with the white/pearl SLF Saltwater Dub.
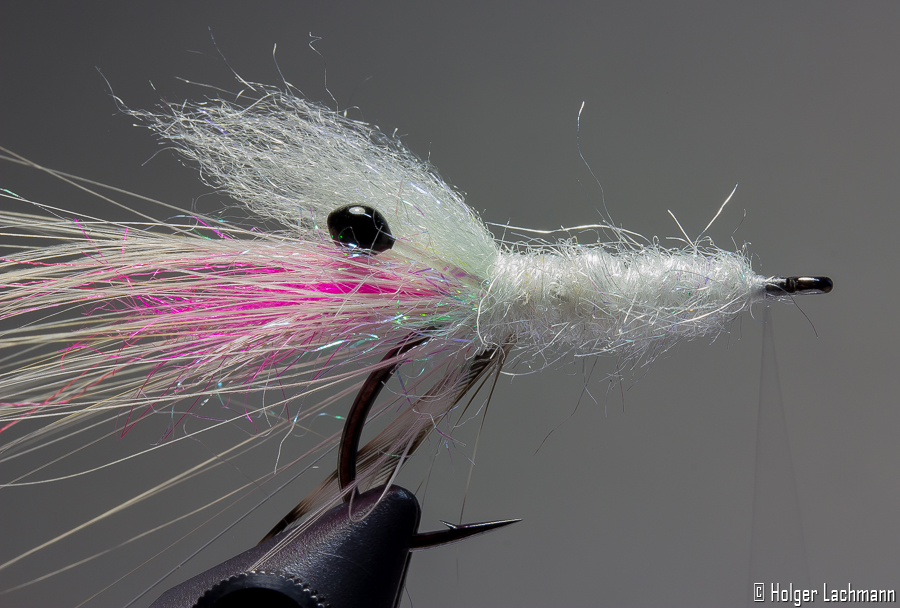
Tie in the grizzly hackle which was stripped on one side and dub the body using the SLF Saltwater Dub. Wind the grizzly hackle to the eye and leave enough space for the final hackle. Secure the hackle by ribbing the body incl. the hackle with the mono and catch it with the tying thread. Don’t forget the ribbing! ;) At the end, give the body and the hackle a strong brush with your velcro. The mix of hackle and SLF looks really cool in the water.
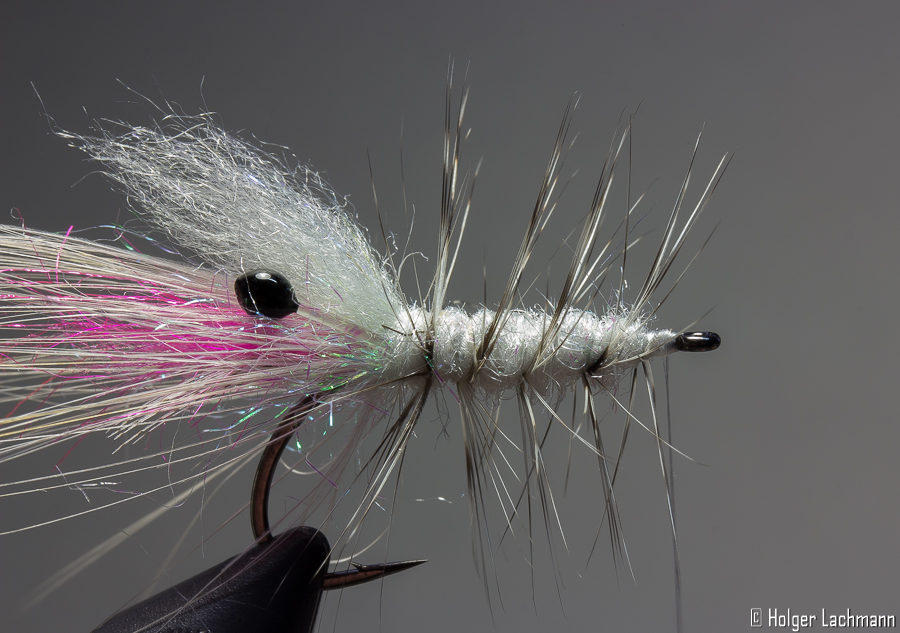
Wind around the second spey hackle and again secure the stem with your thread. It doesn’t matter, when in looks a bit bulky.
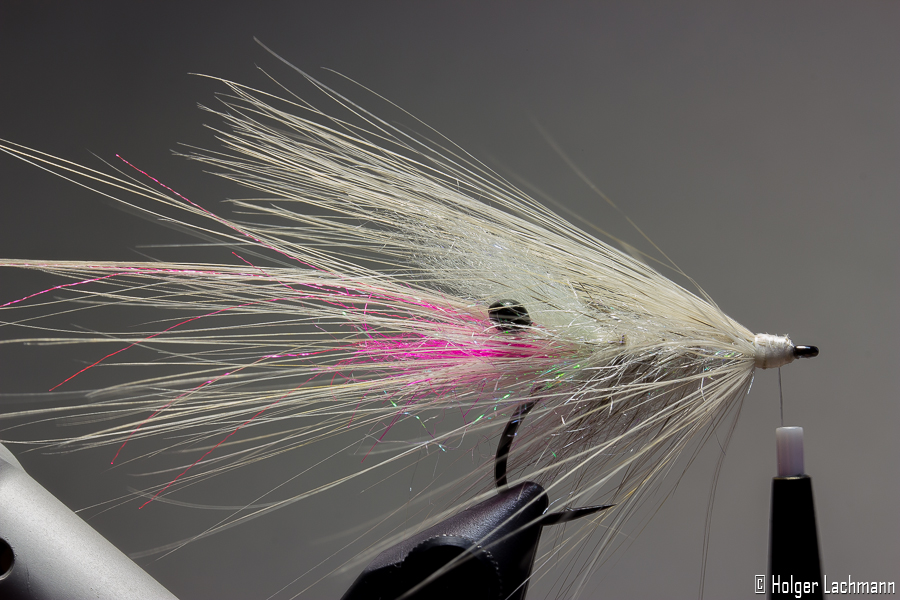
Take some extra spey fibres and tie them on top as a back. Looks in the water like the shrimp shell and makes sure the fly will always swim straight.
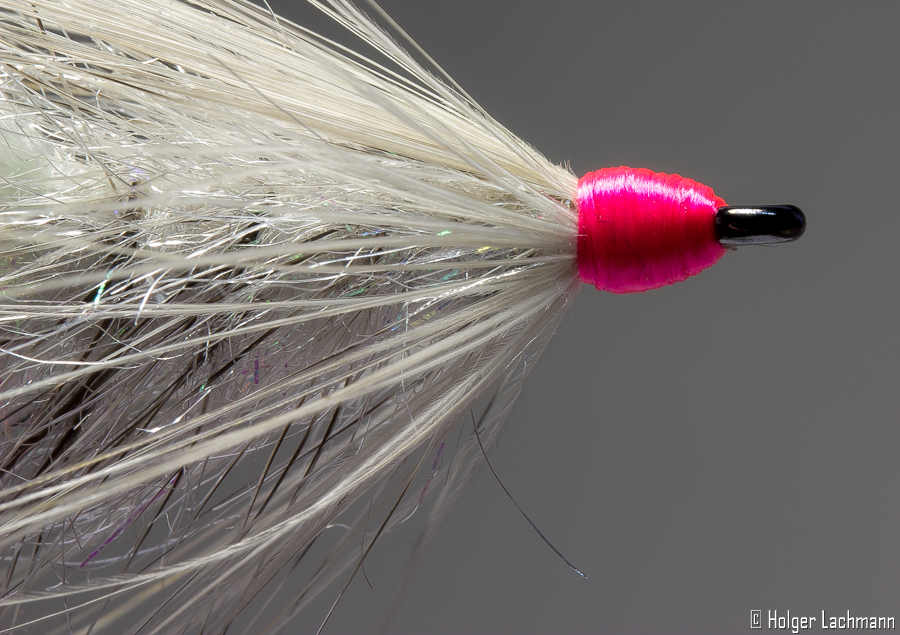
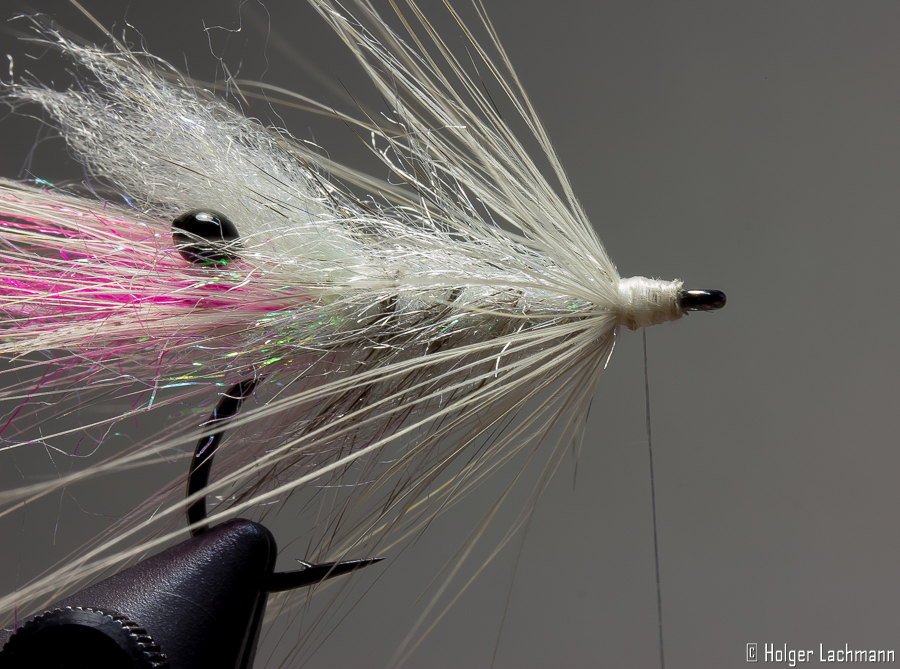
Do a whip finish with the GSP thread and cut it of. Then do a nice head using the fluo pink thread as a trigger point. Varnish the head or use Bug Bond uv resin to get a nice, shiny head.
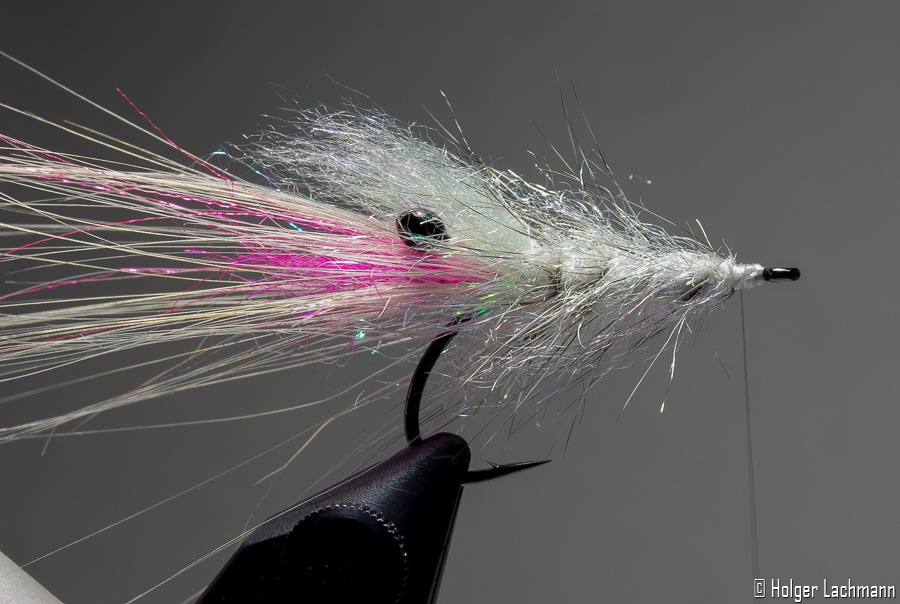
That’s it!
Der Loppo ist fertig! :) I wish you a lot of fun tying and fishing this fly!
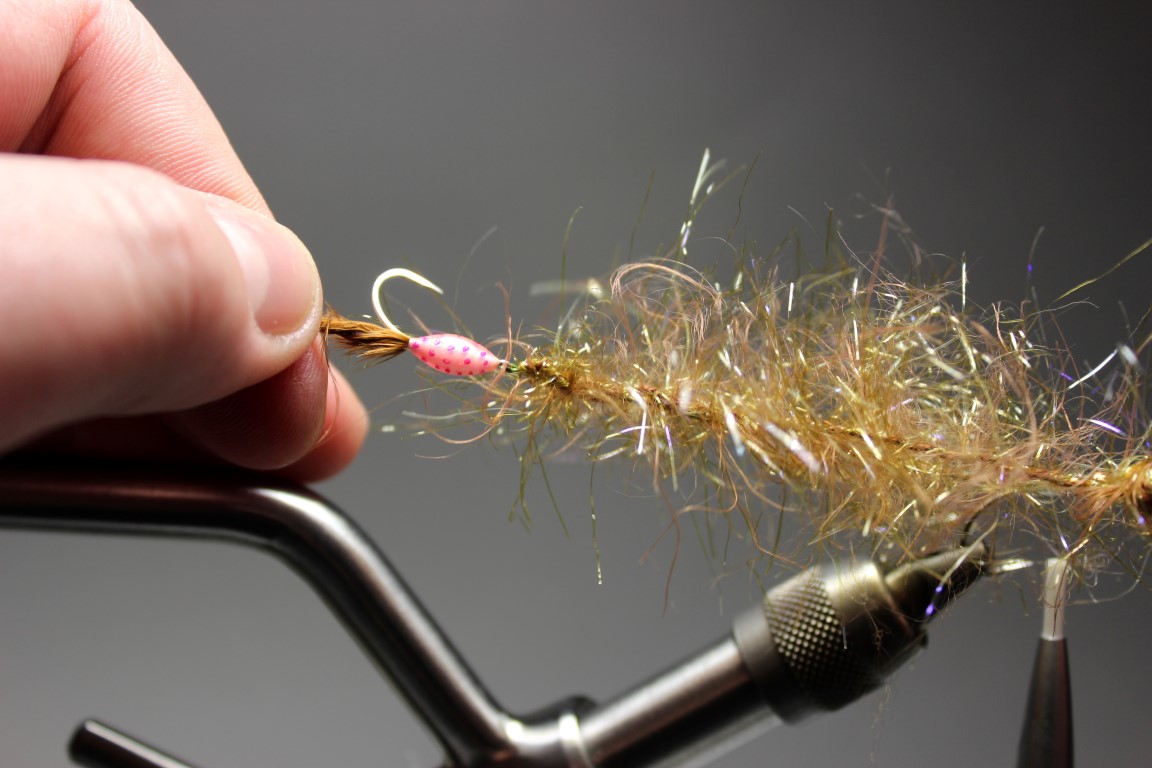
Every spring, the bristle worms (kind of a annelid) swarming in the Baltic Sea and the sea trouts are feeding like crazy on these worms and you really should have a worm pattern in your fly box, because you’ll never now, when the swarming will start. This worm pattern moves fantastic in the water and it’s worth the effort, even if a normal wooly bugger will catch fish. If you have tied one or two, you’ll see, that it’s really easy and fast to tie once you know how.
The first one who showed me this awesome technique to tie these worms was the master fly tyer Andy Weiß, one of the most creative fly tiers in the world and I’m glad to call him my good friend! He showed me a lot of tips and tricks over the years and I had some really cool and funny moments together with him in the last years. Andy, if you read this…what can I say…. cheers my friend!
Ok, back to business!
Here are the materials I’ve used:
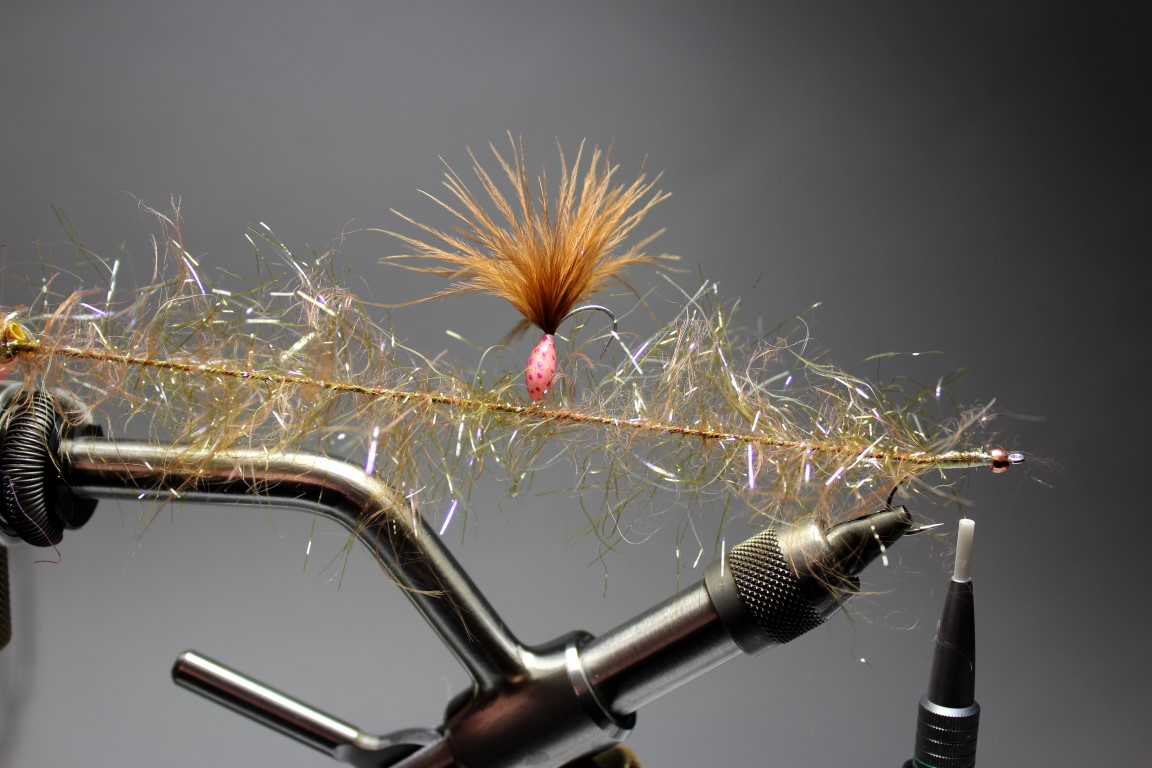
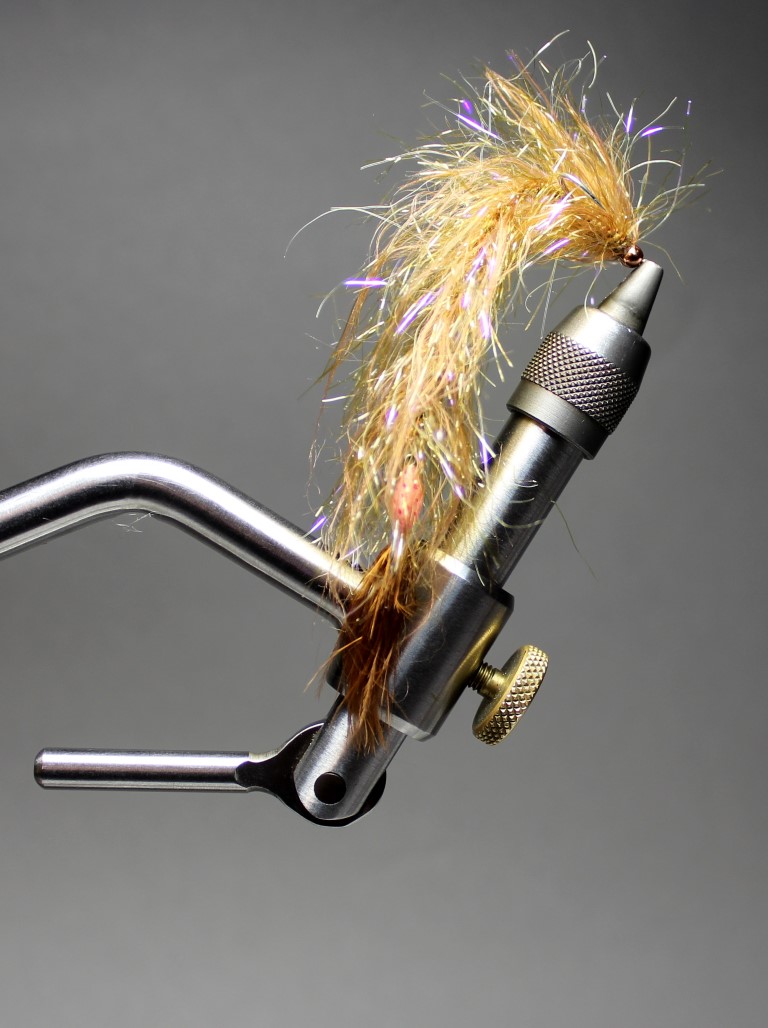
Put the hook into the vise and tie in a bunch of marabou. Build a kind of bubble on the hook shank. It’s easier to do it with a thicker thread instead of your normal tying thread.
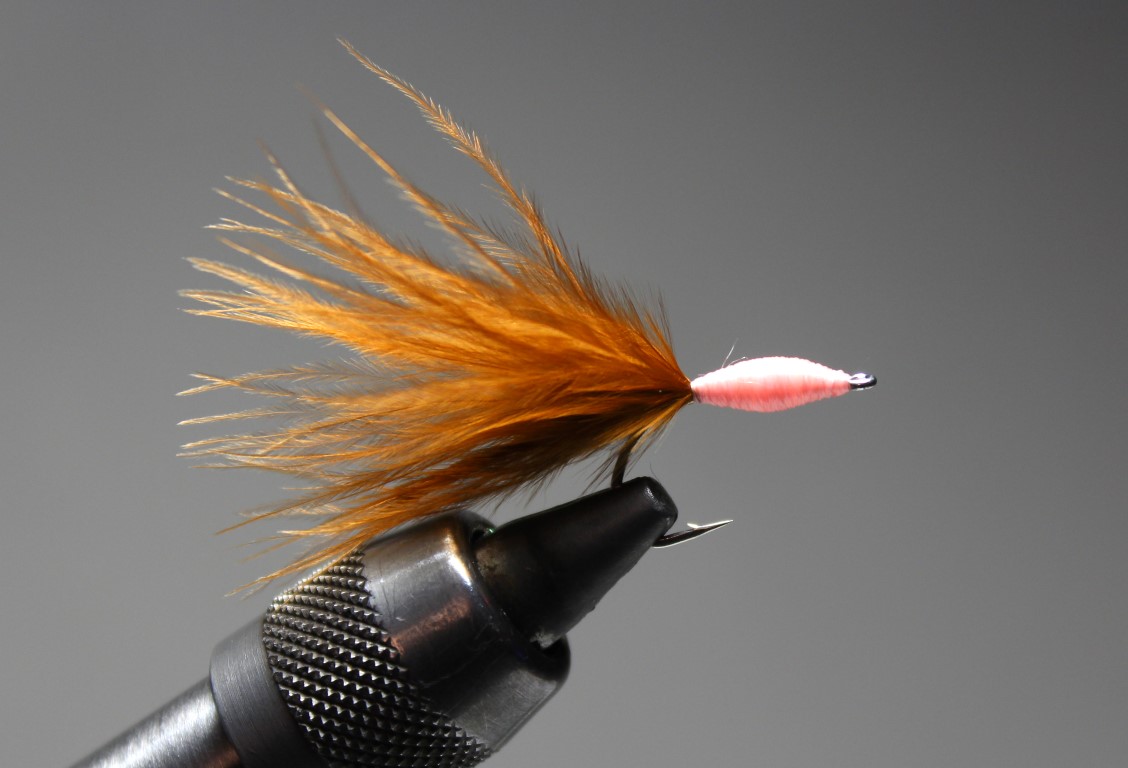
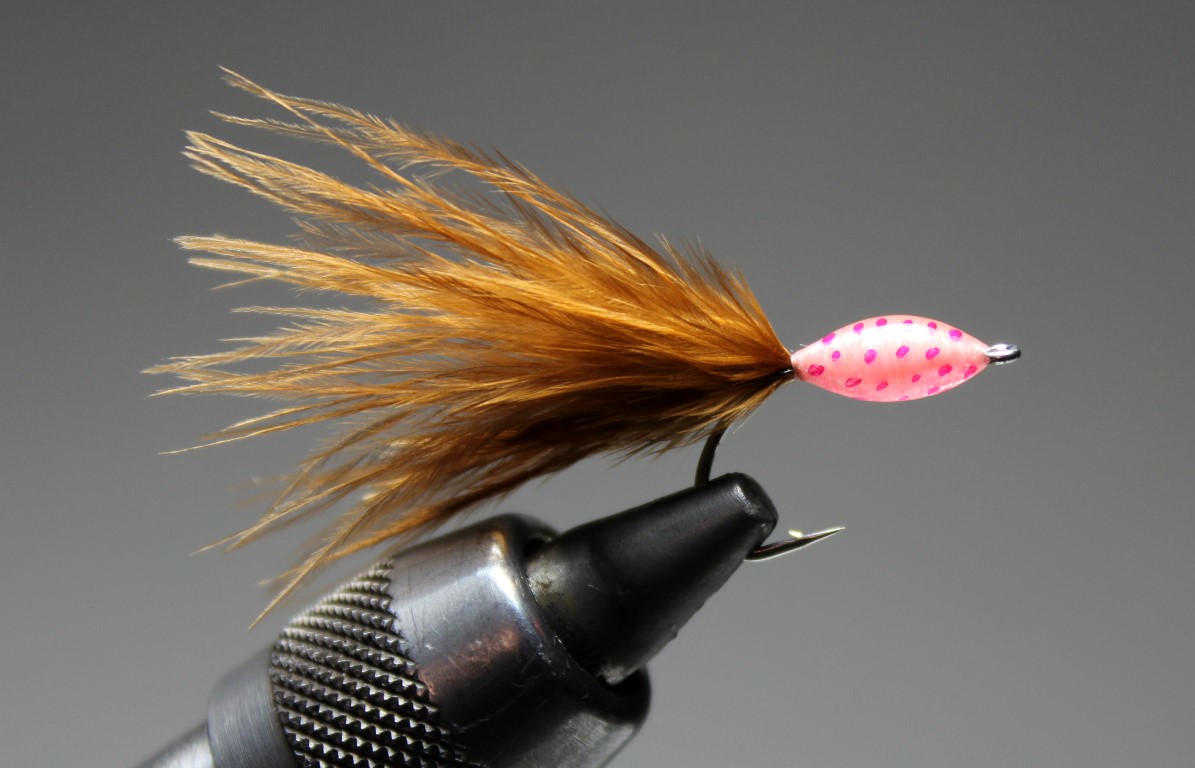
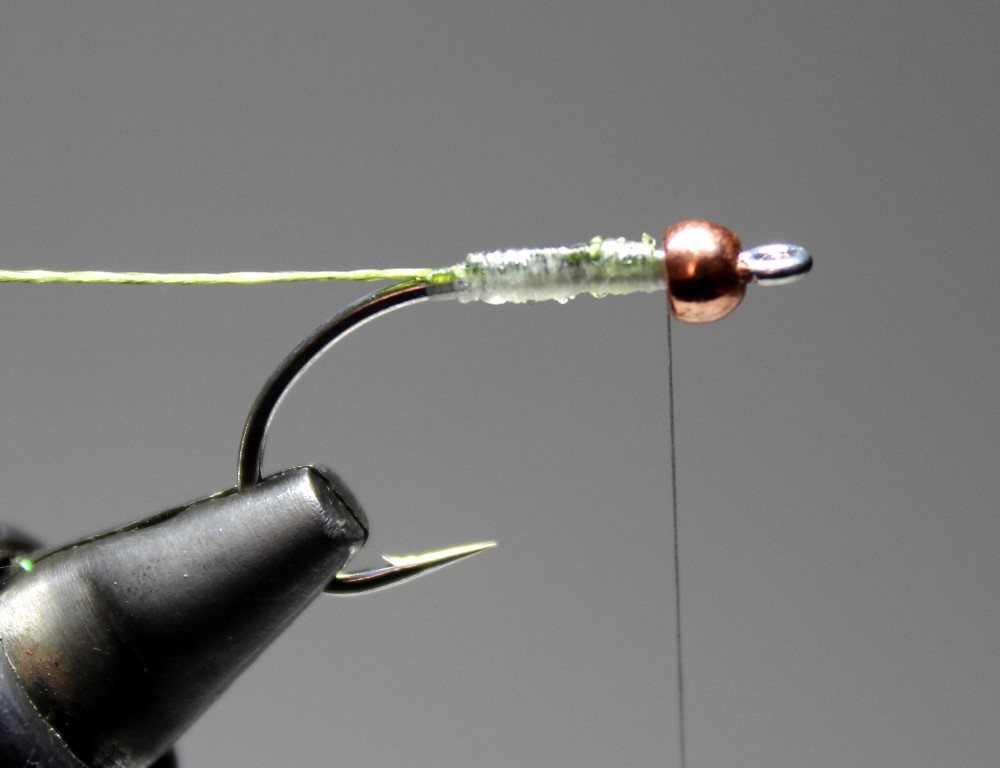
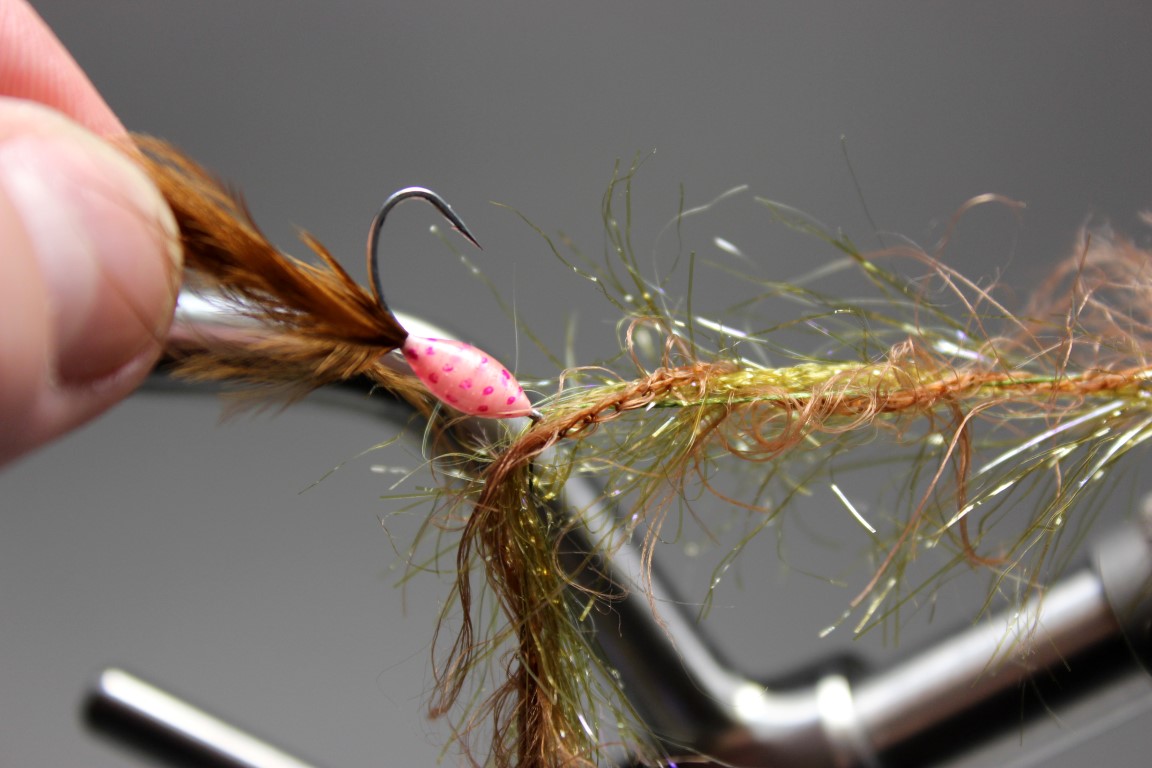
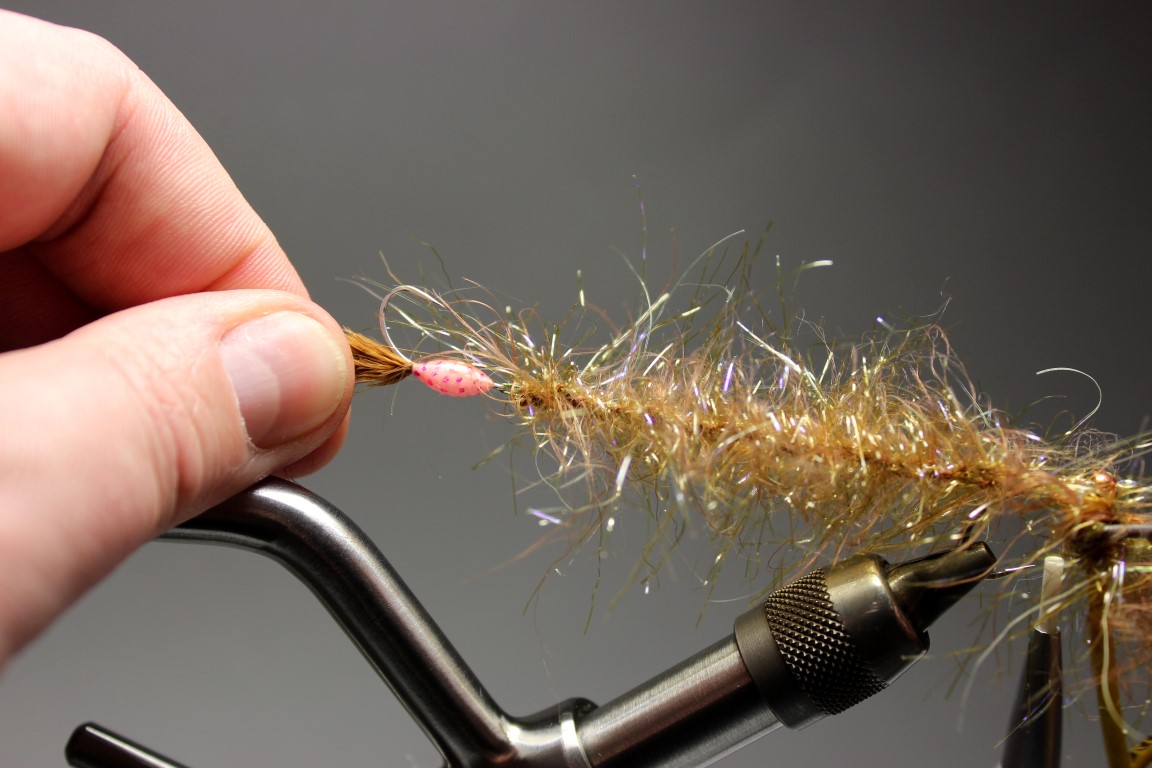
Tie over the white bubble with your tying thread in the color of your choise. Coat it with Bug Bond uv-resin. If you like it a bit fancy, do some small dots with your marker pen on the bubble and secure it with a second thin coating of Bug Bond to get the 3D effect. The bubble should imitate an egg ball and gives the worm a nice bite point.
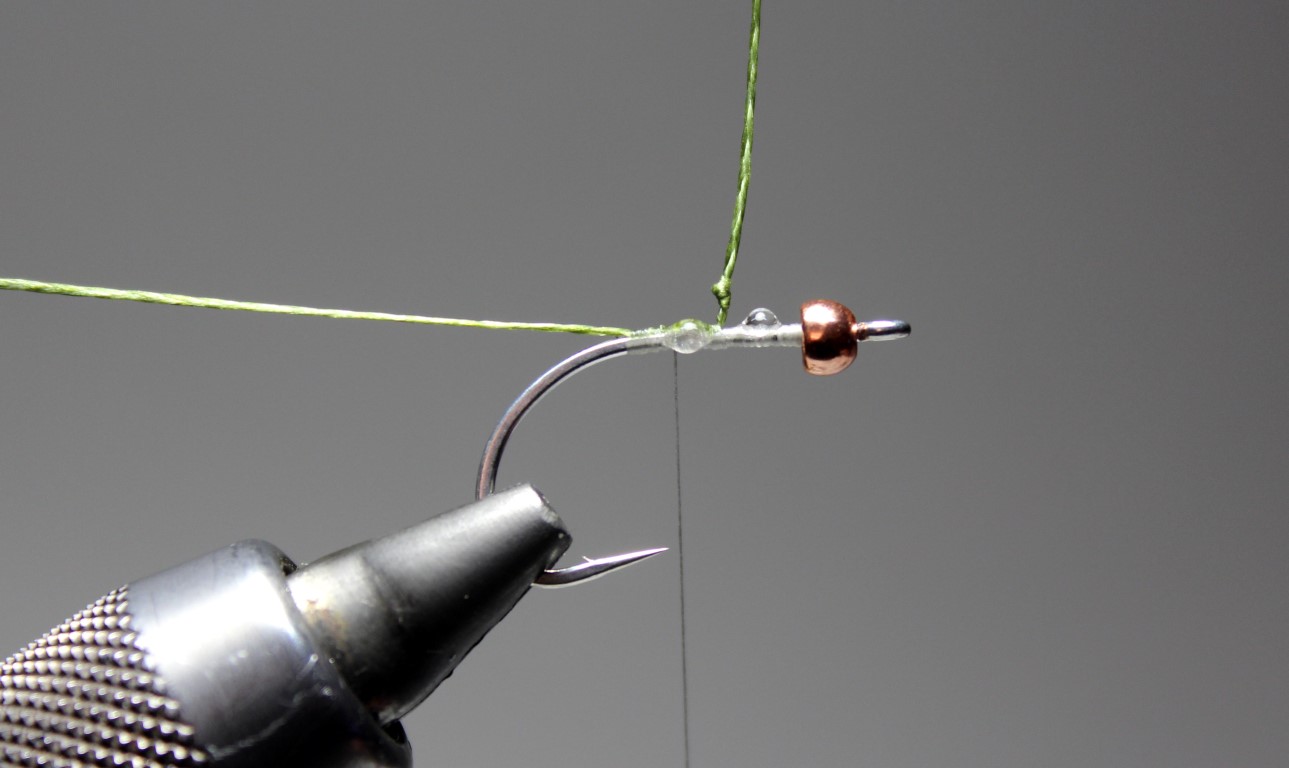
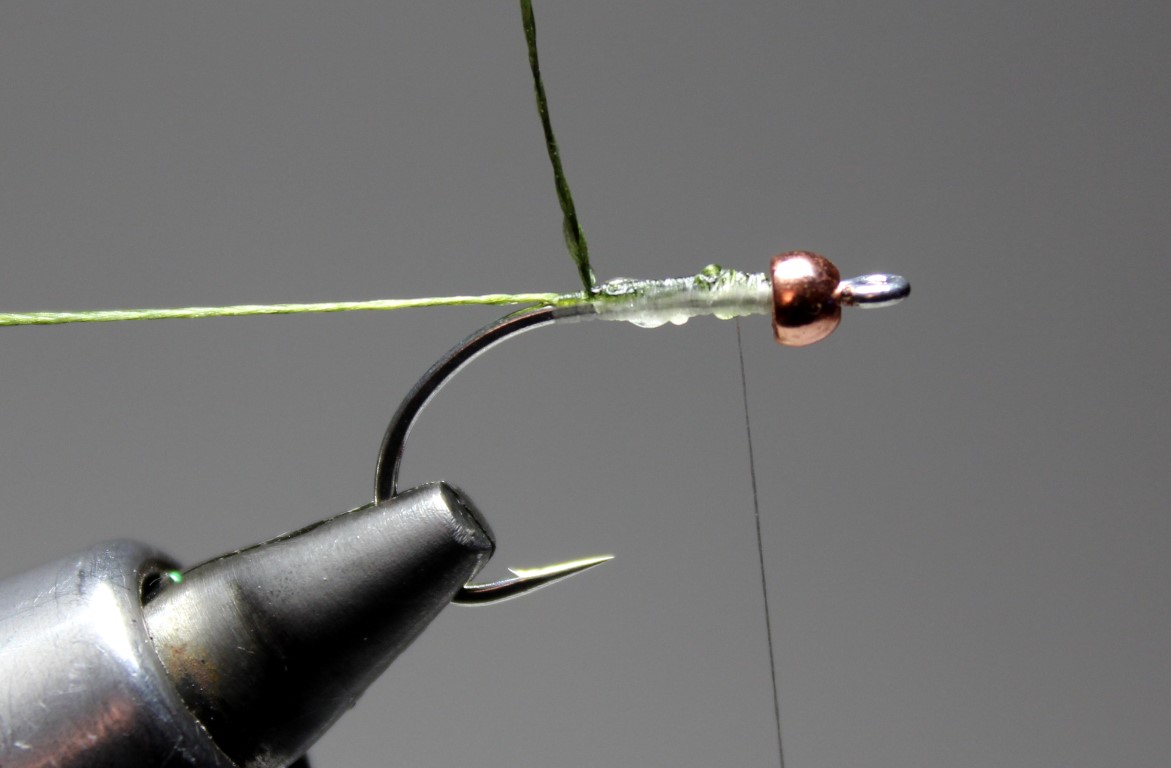
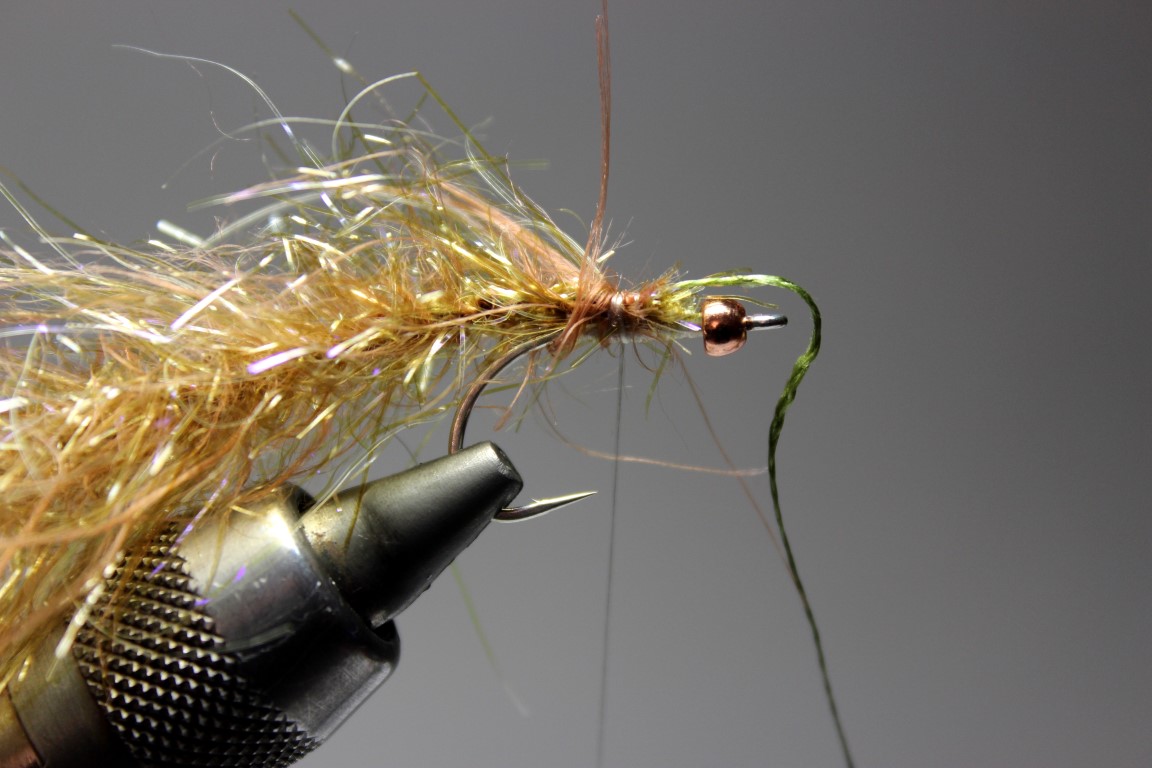
Put the tungsten bead onto the front hook. Do a simple over hand knot in the dyneema fishing line and tie it onto the shank. Secure it with two drops of super glue and keep on tying and fold the dyneema back and forth like shown. No fish will ever destroy this connection!
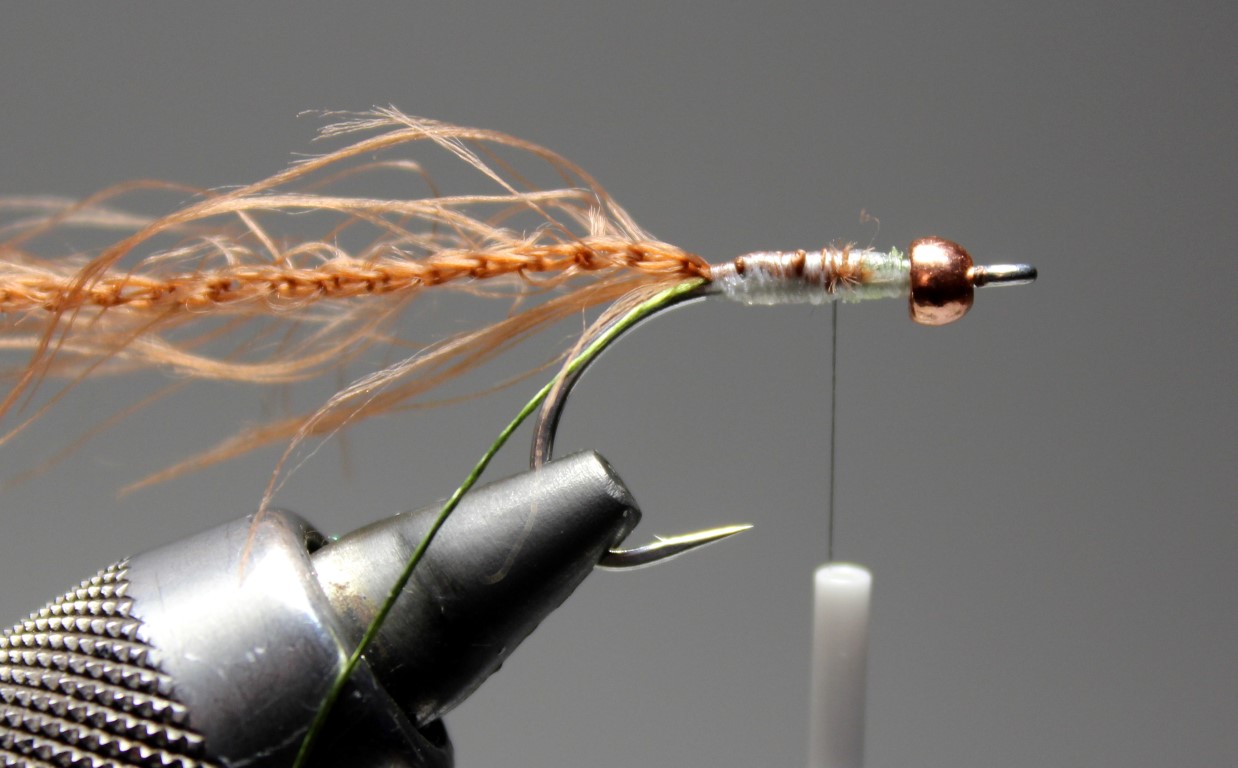
Tie in the polar chenille and the worm wool.
Put the egg hook on the dyneema. That’s how you define the length of the fly. Grab the dyneema, polar chenille and the worm wool and twist it hard.
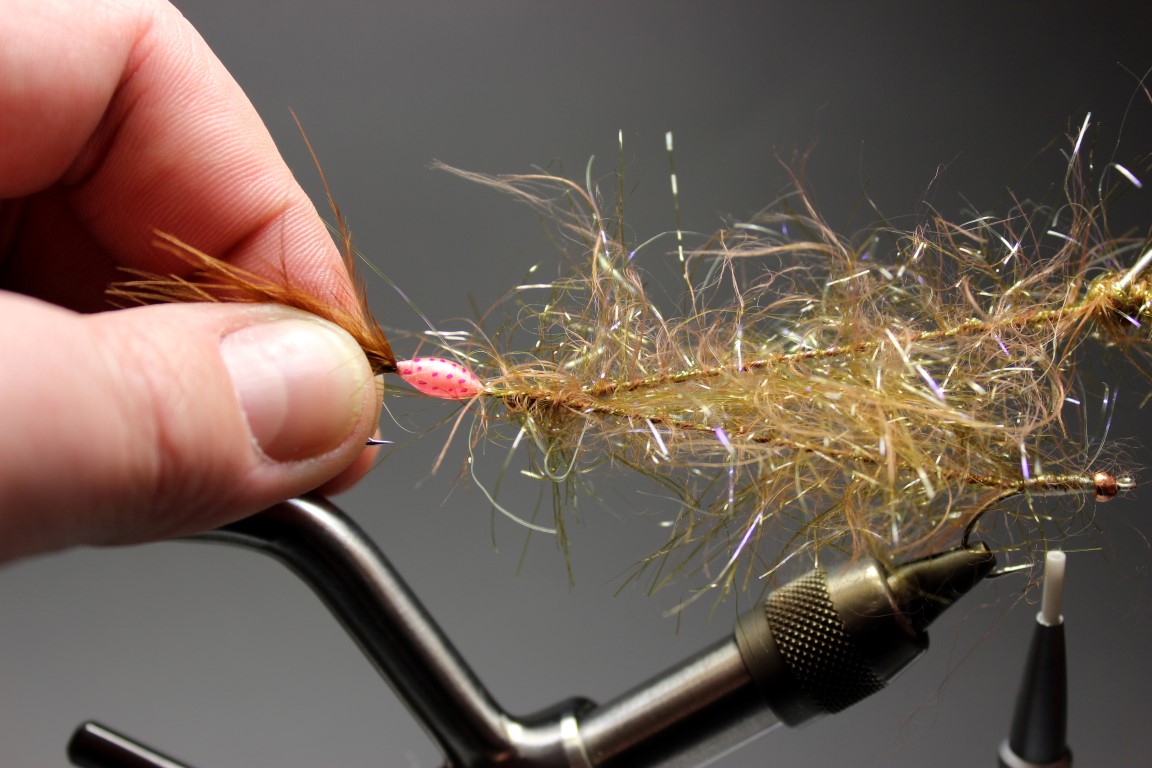
Grab the egg hook and bring the string to the hook eye and let the strings twist into each other.
Catch the strings with your thread and cut the polar chenille and the worm wool, but NOT the dyneema fishing line!
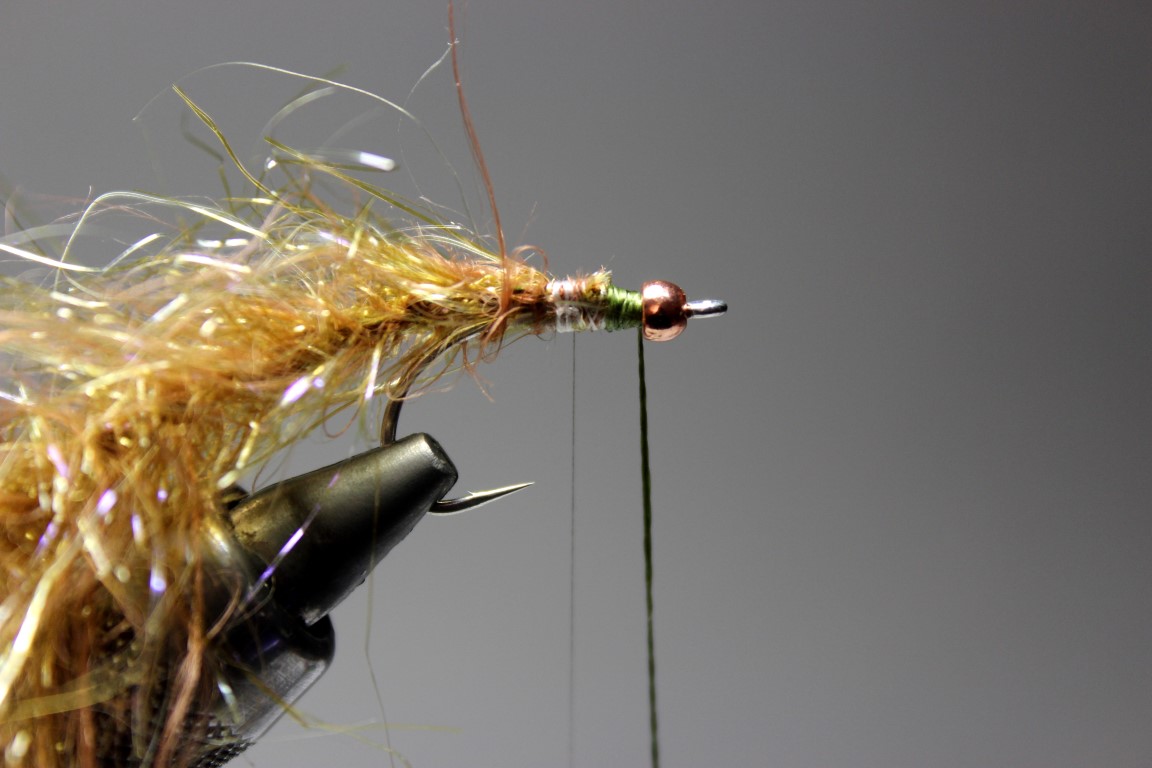
Wind the dyneema fishing line around the hook shank , put a drop of super glue on it and secure it with your tying thread very tight!
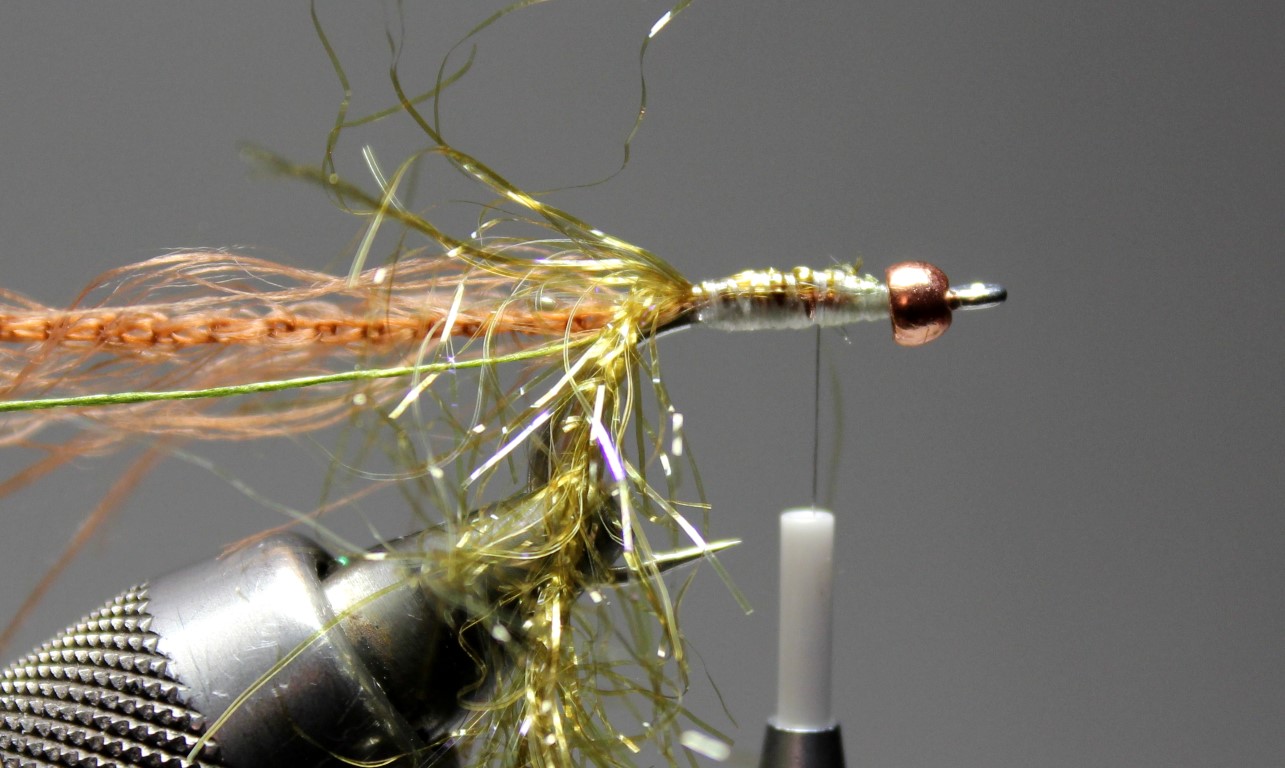
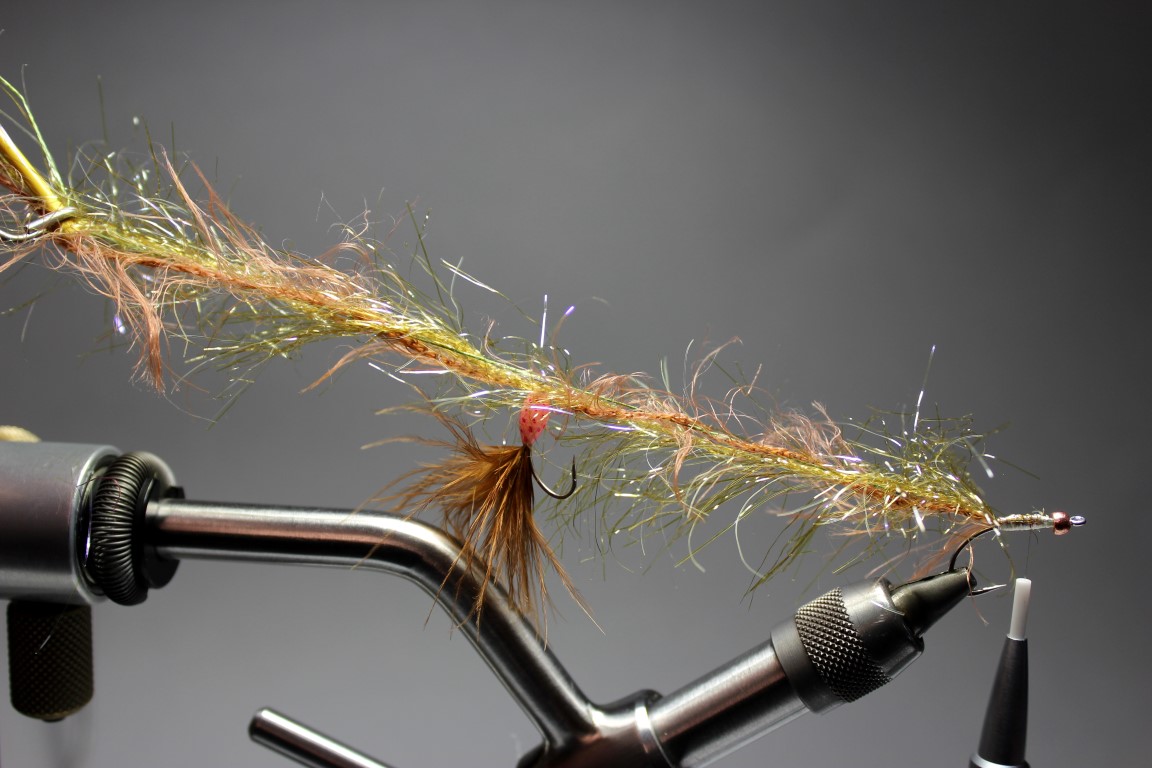
Tie in two another strings of polar chenille and worm wool and twist both strings. Give it a good brush with your velcro. Stroke all fibres to one side.
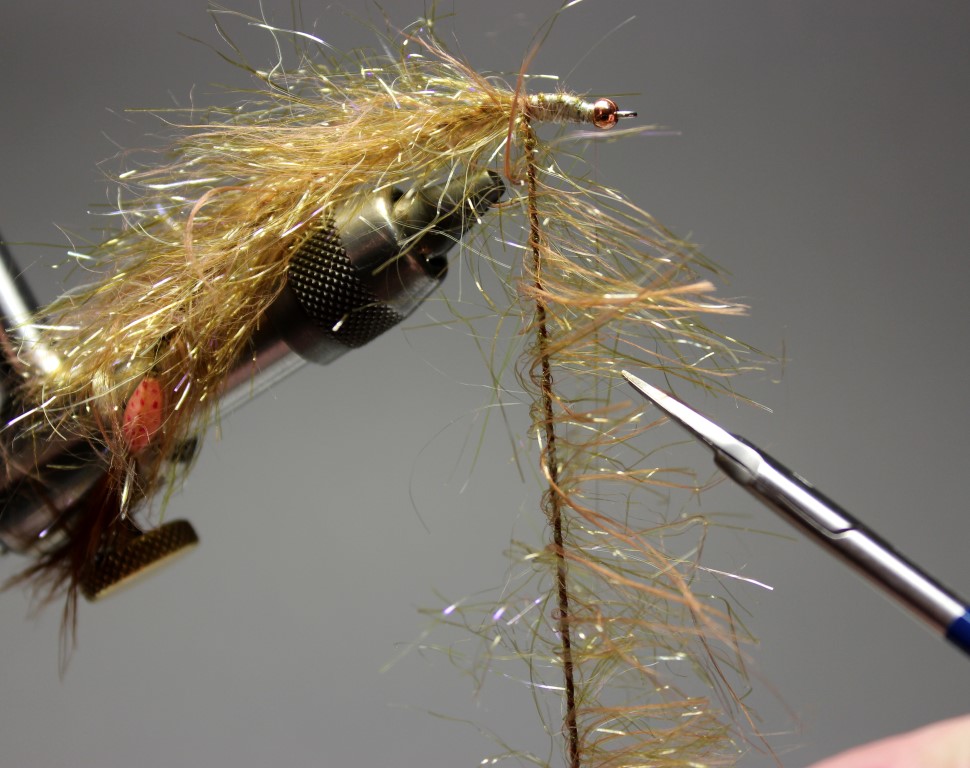

Cut in an angle with your scissors, so the fibres don’t got all the same length. Wind the twisted strands around the shank to the front and catch it with your thread. Cut the strands closely to the bead, do a whip finish and let some thin varnish soak into the front to secure everything.
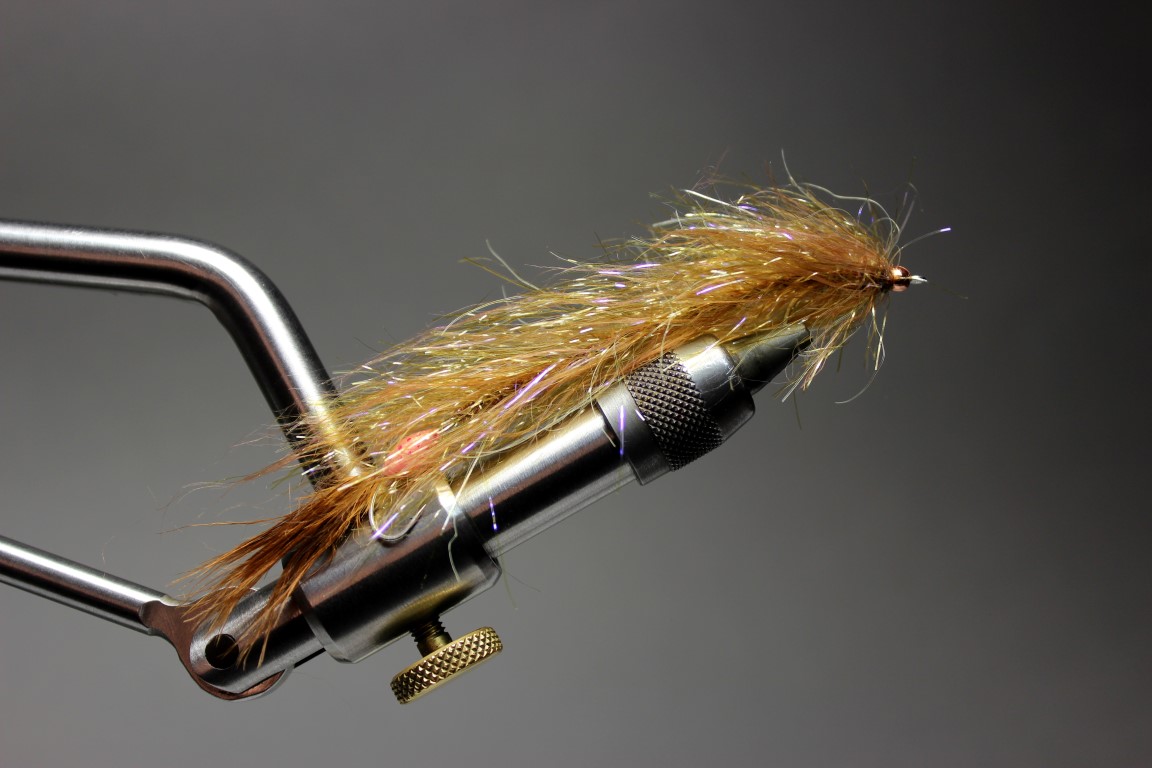
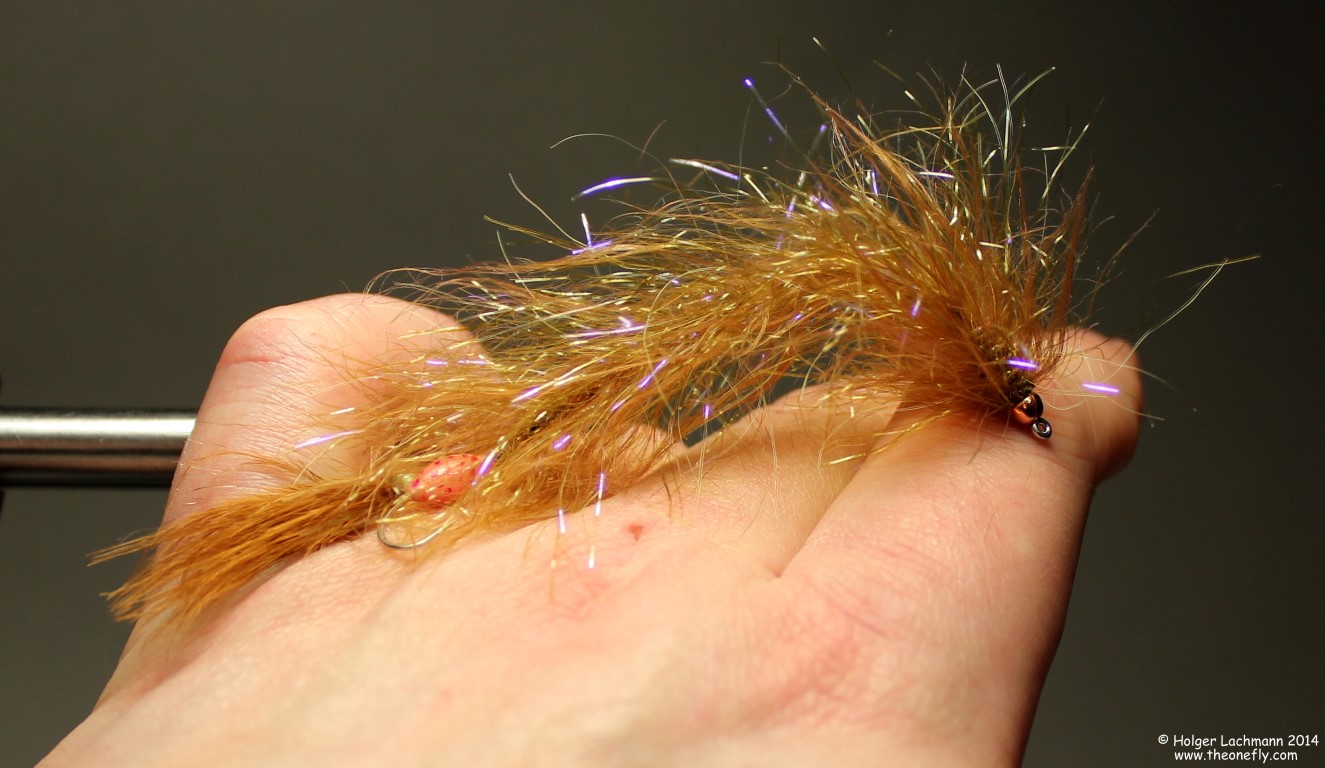
Give the worm a complete brush with your velcro and you’re done! A superb worm fly with a great action in the water and some nice translucency, because of the polar chenille. It’s also a very durable pattern and you can tie it in all colors and sizes you like. If you don’t like flies with two hooks, just cut the hook bend of the front or the back hook close to the body.
I made a new little video about an easy to tie pattern of a Stickleback.
[vimeo width=“600″ height=“500″]https://vimeo.com/108999238[/vimeo]
I made last night a video tutorial of a seatrout pattern for the Baltic Sea. I just called it „Food“, because maybe the seatrouts think it’s a little fish or a shrimp….just food.
Unfortunately Vineo reduced the quality of the video. I’ll have to work on this.
Anyway, I hope you’ll like it. I think I will do some more videos in the future. Maybe you tell me, what you think about it.
[vimeo width=“600″ height=“500″]https://vimeo.com/108696581[/vimeo]
This is the first time I made a video of the single steps to tie the fly. I hope you like it. The fly is a very good and looks even better in the water. Great pattern for Seatrout.
[vimeo width=“600″ height=“400″]http://vimeo.com/108574605[/vimeo]

This is a very durable and effective streamer pattern to imitate a small fish. It’s absolute versatile. Seatrout, trout, perch, asp, zander, … every fish which hunts for smaller fish is a good target for THE BURNER.
It looks good when dry, but it looks amazing when wet.
This is really a pattern which you should try.

Materials:


Wind on the lead wire and attach the mono for the ribbing


Split the thread and put the Ice Dub between it. Spin the thread and brush the dubbing with your velcro, than wind the dubbing from the back to the front. Brush the body again with your velcro.


Tie in a piece of a zonker stripe and rib it with the mono. Catch the mono at the front with your thread.


Tie in some bunches of Senyo’s Laser Dub in the colors of your liking. The belly should always be brighter than the back. Finish with a whio finish behind the hook eye and comb the fibres back.


Take your super glue and put two 3D eyes on each side. Then take Bug Bond Lite UV Resin and put a drop between the eyes on the top and on the underside. The thin resin soaks into the head. Use your Bug Bond torch to harden the resin. If you like, you can do some gills behind the eyes with a thin marker pen.
That’s it! A sweet baitfish pattern with the great movement of the zonker stripe and the cool translucent look of the laser dub.
Tight lines and some good time at the water!
 I love to fish and tie sandeel patterns for sea trout in the Baltic Sea (a friend also caught Stripers and False Albacore with it very well btw).
My „Baltic Candy„, a variation of Bob Popovics famous Surf Candy, is after some years in use quite well known among the coastal fishermen, which makes me pretty happy and proud, to be honest.

This Laser Eel is another variation, which is quite easy to tie, maybe easier than the original Baltic Candy. The only difficulty is the use of uv resin on/in the Laser Dubbing, but there is no extra weight used, so the body becomes easily slick.
Just give this fly a try, it looks even better in the water. ;-)
Materials:


Place the hook in the vise, tie in a piece of polar fibre in white, then a couple of strands of angelhair and another piece of polar fibre, this time in olive. It’s very important to comb the material carefully.

Wind some strands of the laser Flash rainbow around the hook shank and catch it with your thread.


Tie in a bunch of Senyo’s Laser Dub on top and underneath the hook shank and comb it backwards. Bring the thread to the hook eye and do a whip finish. Put the eyes on right place on both sides.

Put some Bug Bond on the head and let it soak into the Laser Dubbing. Cure it with your Bug Bond uv torch.

Apply another coating of Bug Bond to make the head nice and slick.
That’s it! The finished fly, very durable and fishy! Hopefully it brings a nice bend in your rod!
")
Here’s a Surf Candy style pattern tied with the new Fleye Foils by Bob Popovics. The tail made out of arctic fox wiggles nice in the water. Much better than most synthetics. It’s not just a battern for the saltwater fisherman, you can also fish it in freshwater. Small sizes for trout and char for example, bigger ones for asp. Just give it a try.
Materials:
")
")
Tie in the arctic fox as tail and 3 strands of krinkle mirror flash, one on each side and one on top.
")
3mm in front of the fox, tie in a bunch of white senyo’s laser dub on the top of the hook shank and one underneath.
") Do the same with a bunch of laser dub holographic minnow belly 3 mm infront of the white dub.
Do the same with a bunch of laser dub holographic minnow belly 3 mm infront of the white dub.
")
Now, pick two colors of laser dub of your liking, here it’s light olive and shrimp pink, and tie it in like you see above.
") Pull the laser dub backwards, that’s how you put a bit of volume to the head, otherwise it won’t fit to the shape of the foil.
Pull the laser dub backwards, that’s how you put a bit of volume to the head, otherwise it won’t fit to the shape of the foil.
")
Put a foil on each side. Just tie in the little „nose“ of the foil with a couple of turns and whip finish the fly.
")
")
")
Pull the laser dub and the foils backwards and start to apply the uv resin on the body. The resin should soak into the dubbing, that gives the fly later some translucency. Mostly it’s easier to applicate two layers of uv resin. You got much more control of everything.
If you don’t use a tackfree uv resin, put a thin coating of nail varnish on the uv resin to get a tackfree glossy finish.
That’s it! Ready for fishing!
tl
Holger Lachmann
")
Everybody knows Bob Popovics‘ famous Surf Candy. A really great pattern to imitate bait fish and sandeels. I always loved this pattern. The only thing I didn’t like was the stiff material, which is used for it. For my seatrout fishing in the Baltic sea, I wanted the pattern to move more like the real sandeel.
I was always a fan of soft materials, so I tried polar fibre which looks fantastic underwater and moves really nice. The big problem: It was wrapping around the hook bend while casting, which was annoying. The solution was to expand the epoxy body behind the hook bend. This prevents the tangling extremely well.
Another important feature is the weight in the front of the fly which causes a strong jigging effect. The natural behavior of a sandeel when chased by a predator is that it swims as fast as it can to the bottom to hide in the sand. The jigging effect imitate this behavior.
I think I tied now over 1000 Baltic Candies and they changed a lot over the last years. The first years I used 5minute epoxy for the body and I developed some tricks to build a perfect smooth body without a lot of efforts. I showed these tricks at a lot of fairs in the last years and there was always an „Aaah!“-effect for the audience and even for some of the other tiers, but I wouldn’t tell you the tricks! ;-)
Why? The answer is quite simple. I don’t use epoxy anymore. I was annoyed by the yellowing of the epoxy after some months. It doesn’t matter which epoxy brand you are using, everything turns yellow! You don’t tie a BC in 5 minutes, that’s for sure, so it’s hard to see your with love tied flies turning yellow. The other important point is, that epoxy is very unhealthy. So I changed to uv-resin, which means all my nice epoxy tricks were useless….but that was not to bad, because working with uv-resin is quite easy, especially when you are working with „tackfree“-resin.

A Baltic Candy wet and dry
My Baltic Candies becomes smaller and thinner over the years, because of a lot of improvement. It’s harder for the fish to find out if it’s real food or not, when the fly looks a bit blurry in the water. Another advantage is, that a slim sandeel pattern with weight in the front flies through the air like a dart. Even with your hand you can throw a Baltic Candy several meters! Try this little experiment with a normal fly….you’ll see whats happened. ;-)

Bernd Ziesche with perfect baltic silver. You can see my Baltic Candy on the cork handle. ;-)
This sbs is for a „fully dressed“ Baltic Candy. You can use less flash if you prefer it. Personally I got Baltic Candies with different amounts of flash material.
Two important tips: First, strip the Baltic Candy really fast through the water with some stops. You could never, really never(!), strip the BC too fast. We could never reach the speed of a spin fishermen, so there is no „too fast“.
Secondly, it could happen that the polar fibre is a bit disarranged after you caught a fish. Just use a velcro on your jacket or vest as a comb to brush the BC.
At last, I have to thank my buddy Bernd Ziesche (great guide, superb casting instructor and owner of the fly fishing school www.first-cast.de) for his tests and comments over the years!
Materials:
 (Mittel)") Wind the lead wire around the hook shank and secure it with super glue.
Wind the lead wire around the hook shank and secure it with super glue.
 (Mittel)") Tie in the twisted flash.
Tie in the twisted flash.
 (Mittel)") Twist the flash and wind it to the front and catch it with your thread.
Twist the flash and wind it to the front and catch it with your thread.
 (Mittel)") Tie in a little hot bite point at the end of the shank.
Tie in a little hot bite point at the end of the shank.
 (Mittel)")
 (Mittel)") Tie in a bunch of white polar fibre on the underside of the fly.
Tie in a bunch of white polar fibre on the underside of the fly.
 (Mittel)") Tie in the angel-hair.
Tie in the angel-hair.
 (Mittel)")
 (Mittel)") Tie in bunches of blue and olive polar fibre.
Tie in bunches of blue and olive polar fibre.
 (Mittel)") Tie in two strands of krinkle mirror flash on each side and do a whip finish.
Tie in two strands of krinkle mirror flash on each side and do a whip finish.
 (Mittel)")
 (Mittel)") Pull the fibres with your left hand and apply the Bug Bond and cure it with your uv-torch.
Pull the fibres with your left hand and apply the Bug Bond and cure it with your uv-torch.
 (Mittel)")
 (Mittel)")
 (Mittel)") Put the stick-on eyes on each side and apply the second thin coating of Bug Bond. The Baltic Candy is tackfree and now ready for fishing. If you are a crazy fly tyer like myself, you apply a third quick coating of Bug Bond, which gives really a smooth high end finish („black“ photo)! ;)
Put the stick-on eyes on each side and apply the second thin coating of Bug Bond. The Baltic Candy is tackfree and now ready for fishing. If you are a crazy fly tyer like myself, you apply a third quick coating of Bug Bond, which gives really a smooth high end finish („black“ photo)! ;)
That’s it, the Baltic Candy, my modified version of Bob Popovics‘ famous Surf Candy.
tight lines
Holger Lachmann
 (Klein)")
This pattern is so famous….no more words about it, let’s start tying! ;-)
Materials:
 (Klein)")
 (Klein)")
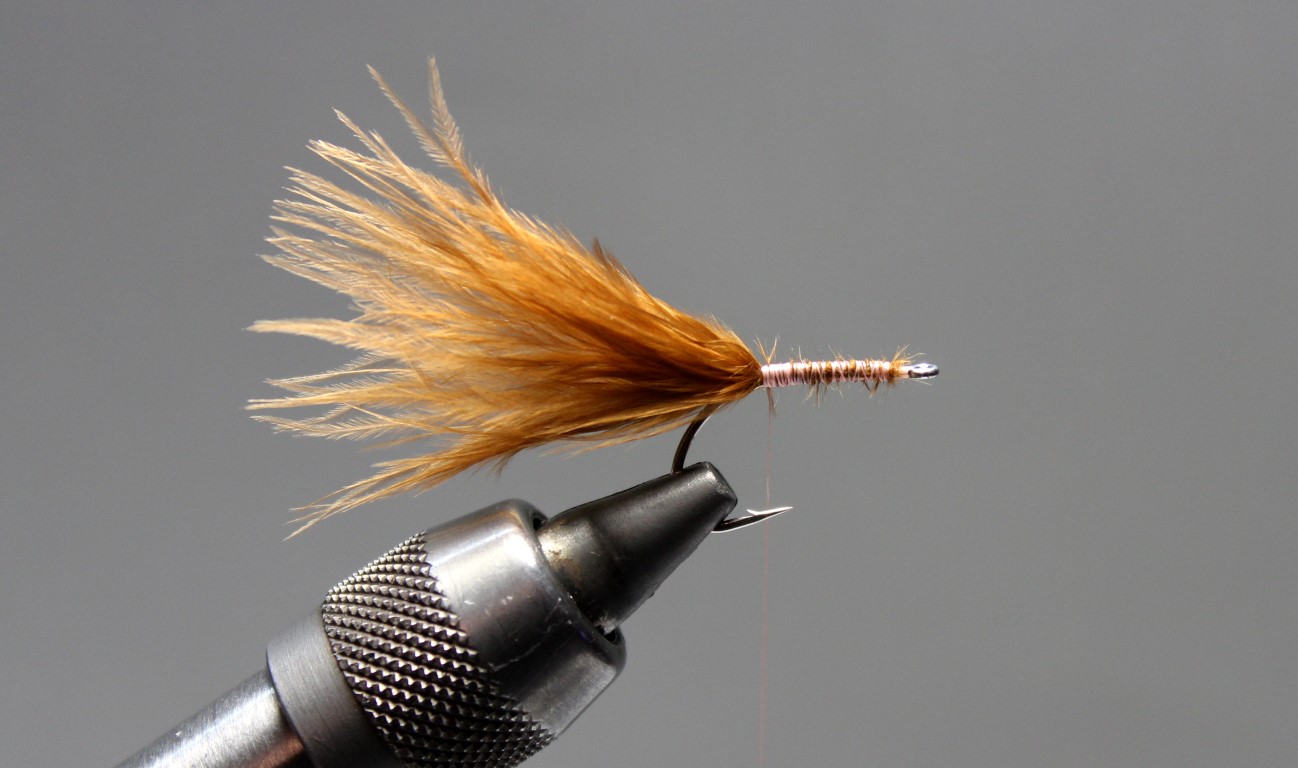
Do a layer of thread on the hook shank and tie in the grizzly marabou as a tail.
 (Klein)")
 (Klein)")
Tie in two strands of pearl crystal flash on each side of the marabou and fix the mono for the ribbing.
 (Klein)")
 (Klein)")
 (Klein)")
Spin some dubbing around the thread and dub the body. Don’t dub the body to tight, because we want to brush it later.
 (Klein)")
 (Klein)")
 (Klein)")
Tie in a smaler grizzly hackle and wind the hackle from the front to the back around the dubbing body. Rib the dubbing body and the hackle turns with the mono from the back to the front and catch the mono with your tying thread. Give the body a nice brush with your velcro-brush.
 (Klein)")
 (Klein)")
 (Klein)")
Take a dun grizzly saltwater hackle and prepare it like shown on the picture. Tie it in and wind it around the hook to create the front hackle.
 (Klein)")
 (Klein)") Take some bead chain eyes and tie them in. After some turns around the eyes, put a drop of super glue between the eyes to secure them, then keep winding the thread around the eyes. That’s how you create a strong bead chain head. If you fix the eyes with loose turns of thread, they will slip around the hook shank. That’s it, the Grey Magnus.
Take some bead chain eyes and tie them in. After some turns around the eyes, put a drop of super glue between the eyes to secure them, then keep winding the thread around the eyes. That’s how you create a strong bead chain head. If you fix the eyes with loose turns of thread, they will slip around the hook shank. That’s it, the Grey Magnus.
tight lines
Holger Lachmann
")
Zonker stripes are one of my favorite materials for tying streamers. The Zonker-Fish is a really simple pattern made out of a zonker stripe, which is very durable and, most important, it catches fish.
You can find a lot of color examples in my photo album Streamers.
Materials:

Wind on some lead wire and secure it with super glue.
")
Tie in a piece of mono for ribbing.
")
")
Mix two colors of flash dubbing.
")
")
Split the thread and put the dubbing in the gap. Then spin the bobbin to twist the dubbing.
")
Wind the dubbing around the hook shank and brush it with your velcro brush.
")
")
Tie in a zonker stripe at the front and rib it with the mono from the back to the front.
")
")
Tie in a strand of krinkle mirror flash on each side and form a little head with flash dubbing.
")
")
")
Use some super glue for fixing the Clear Cure Eyes on each side and fill the space between the eyes on top and bottom with Clear Cure Goo to create a durable head.
tight lines
Holger Lachmann