Reel + Flies GIVEAWAY on INSTAGRAM

Spring GIVEAWAY! Make sure to follow me @holgerlachmann on Instagram!

I teamed up with Vosseler fly fishing reels @reelmaker to realize this giveaway.
You can win a brand new Vosseler AIR-One 5/6! 100 % made in Germany!

YOU can CHOOSE the COLOR of the reel plus you get a FREE LASER ENGRAVING!
You will also get 25 flies I’ve tied. Nymphs, dried, streamers… all kinds of flies you’ve seen in my Instagram account.

A closer look at FLY FUR

I was asked by the Bavarian fly shop Rudi Heger, if I’m interested in testing the new FLY FUR by Fair Flies. Well, I’m always interested in testing new materials, but I was sceptical, because it looked like normal Craft Fur. Nothing really new.

I did a little research on the homepage of the manufacturer. They wrote about Fly Fur:

  • Half the underfur and twice the overfur of other select craft furs
  • Longest, most supple fibers will not leave you wanting for your pike and streamer patterns
  • Super fine fibers are coated so that they do not clump, but flow freely when wet
  • Uniquely designed colors for fish – not left over colors from other industries 
  • Great marabou replacement
  • Perfect for tying your flies and jigs
  • Outlasts the natural fibers it replaces
  • Fibers made from 45% post-consumer products
  • 25 square inches

Just marketing was my first thought. But I tried to be open minded and did my own tests.

First, I checked the maximal length of the fibres. That’s an important point. Some brands just offer quite short fur. The benchmark is imho the Craft Fur by Hareline.

On the package is written „over 4 inch length fibres“. That was true with one exception: the fibres of the black barred fur are a little bit shorter. All other colors I’ve tested got the correct length.

On the left side Craft Fur, on the right side Fly Fur.

Testing the main point: Fly Fur should have half the underfur and twice the overfur of Craft Fur. Normally we all need the longest fibres of Craft Fur for our streamers. The underfur is crumpled and it doesn’t play so well in the water.

I cut two bunches of fur close to the fabric. The Fly Fur bunch is a little bit smaller.

Craft Fur left, Fly Fur right

I took a comb to seperate the longest fibres from the underfur. The result was very clear. Even if the Fly Fur bunch was a little smaller it got about twice the amount of long fibres.

Craft Fur on top, Fly Fur underneath

It’s true, Fly Fur got much more longer fibres than Craft Fur.

Final Result:

Fly Fur got a nice length, it got more long fibres than Craft Fur and way less underfur. I tied some flies with it in the last two weeks and I used way less material than normally with Craft Fur. Especially when I’m tying sandeels for example, because I really just need the longest fibres. For me, it’s a really great addition to the existing fur on the fly tying market. Fly Fur will definitely get a constant place in my fly tying drawers.

Sandeel tied with Flu Fur
More Sandeels
Baitfish

Waterworks Lamson Litespeed 3 Micra 5

Got the opportunity to buy this Waterworks Lamson Litespeed 3 Micra 5 reel for a reasonable price. So I couldn’t resist. ;-)

Like in the past, I took some pictures of the reel just for fun and as a source of pictures, which are not taken by the manufacturer. Couldn’t say how it will perform, but the first impression is very good. Good brake, nice sound, well machined and with 140,25 gram super light.

I want to use it for sea trout fishing and for my streamer fishing at home with 6 and 7 weights. Hopefully, I will hear the brake „scream“ this season.


150 m of 58lbs J-Braid as backing should be more than enough.

Little Sculpin #6

This is a little guy, which I really like. It’s just 5-6 cm long, tied on a hook size 6. In the front is a tungsten bead. The head made of deer hair is soaked with Uv resin. It’s almost indestructible. 💣 The body is ice dub and a nice Zonker strip. Brought me some really nice fish in the past years. Good for browntrout and seatrout as well. The fly you see on the photo is fished and almost three years old.

PolarBrush-Baitfish Step By Step

polarfibre-brush-baitfish-13

My buddy Alex from adh-fishing knows, that I like or maybe I should say love Polar Fibre for some of my flies (especially the Baltic Candy). When he called recently, he told me „…we got some new cool stuff, for example the Polar Fibre Streamer Brush, I’m pretty sure you will like it!“

Some days later I got it at my home. ADH did already a video how to use it for pike and big saltwater flies (click here to see the video).

When I saw it, I just thought „BAITFISH“!

I love baitfish patterns. That’s just what predatory fish love to eat. So I did a fast and easy to tie baitfish pattern using Polar Fibre Streamer Brush.

I made a little step by step of my first attempt. Yes, that what you see on the pictures was really the very first time I’ve tied with the Streamer Brush. It’s very easy and you don’t need much of it. You can get it in different colors and also in two tone combinations. A little bit of UV-Flash is also already in the brush, so you don’t need extra flash.

I will do a closer look at it soon, but for now, let’s start with the step by step!

Materials:

  • Hook: Gamakatsu F 314 #2
  • Body: Ice Dub UV White
  • RIbbing: Mono
  • Body: H2O Polar Fibre Streamer Brush grizzly chartreuse/green
  • Head: Senyos Laser Dub (different colors)
  • Eyes: 6mm 3D-Eyes fluo red
  • UV Resin: Bug Bond Lite
  • Thread: Veevus 50D white

polarfibre-brush-baitfish-1

Do a thread base and tie in the mono for the ribbing.

polarfibre-brush-baitfish-2

Dub a body 2/3 of the hook shank and rib it with the mono. Then give it a good brush with you velcro.

polarfibre-brush-baitfish-3 polarfibre-brush-baitfish-4 polarfibre-brush-baitfish-5

Take the Polar Fibre Streamer Brush and cut of a two colored segment like shown and tie it in.

polarfibre-brush-baitfish-6

Grab the wire with a hackle plier and wind the fibres back.

polarfibre-brush-baitfish-7

Wind the Streamer Brush around the shank and comb it backwards. Catch the end with your thread and secure it. Use a drop of super glue or varnish to make it super strong.

polarfibre-brush-baitfish-8

View from above. A nice baitfish like drop shape.

polarfibre-brush-baitfish-9 polarfibre-brush-baitfish-10 polarfibre-brush-baitfish-11

Add clumps of Laser Dub to build up the head. You don’t need much. You should also comb the Laser Dub to align the fibres.

polarfibre-brush-baitfish-12

Put the eyes on the head by using super glue gel and let some drops of Bug Bond Lite soak up into the front of the head to make it strong.

polarfibre-brush-baitfish-13

If you like, you can color the fly with permanent marker pens. That’s it! Easy as 1-2-3. ;-)

DPP – Deep Perch Popper

20160925-img_8063p

When it’s getting colder, I like to fish for perch with popper-sytyle flies. I don’t fish them the normal way on the surface as a topwater fly. I use a super fast sinking line and attach just a short piece of mono or fc with a length between 100-50 cm to the front loop as a leader/tippet. The popper will float above the sinking line. The height it floats depends on the length of the tippet and on the current. The current will push the popper down.

20160925-img_8073

You should cast the line out and give it time to sink to the bottom. When you strip the line in, the popper swims towards the bottom. If you do a pause, the popper will rise towards the surface again. How often you strip and pause depends on the water you fish and the situation.

20160925-img_8075

Below is a very simple scheme of retrieving the popper.zig-zag

A very good fly even in murky water, because it makes a lot of shock waves. It also works great, when you have an uneven bottom and the risk to loose a normal streamer is very high.

20160925-img_8074

„DETLEF“ Step By Step – aka TFFKAPF

The step by step tutorial about the PINK FLUFFY is destroyed. It don’t know why, but it was not shown right on the blog. So I did it again and I gave the fly a new name, because I didn’t like Pink Fluffy anymore.

So I called the fly „DETLEF“ – also known as the fly formerly known as PINK FLUFFY. Why? Don’t know , it just fits.

Pink Fluffy SBS (26)

[vimeo]https://vimeo.com/150781439[/vimeo]


You can fish for sea trout even in the winter time. It’s a very hard kind of fishing with temperatures sometimes under 0°C, but there is a chance to catch an awesome „Silberbarren“. It’s common knowledge, that sea trouts like the color pink, especially in the cold season. It’s also common knowledge, that sometimes, the sea trouts like a very slow retrieve. For that situations, the DETLEF is a really good choise. The soft materials move very nice in the water, even if you strip the fly in very slowly. On the other hand, it’s not very complicated to tie and when you use other colors like beige, tan and brown, you got a very nice shrimp pattern for the rest of the year.

One very important point: Don’t use too much material! Less is more!

Materials used for this fly:

  • Hook: Gamakatsu F314 # 6
  • Weight: Lead Wire fine
  • Dubbing: Ice Dub Pearl, SLF Saltwater Dubbing Pink and SLF Saltwater Dubbing White/ Pearl
  • Front: Mallard, Pink Hackle Fibres
  • Antennas: Fluoro Fibre Pink
  • Eyes: Selfmade Shrimp Eyes
  • Horn: Polar Dub White Transparent
  • Loop-Hackle: White CDC and Pink Hackle
  • Back: Mallard
  • Thread: Veevus GSP 50D White

Pink Fluffy SBS (1)

Do a little drop of superglue on the shank and wind on some fine lead wire.

Pink Fluffy SBS (2) Pink Fluffy SBS (3) Pink Fluffy SBS (4)

Form a little dubbing ball with the ice dub at the end and tie in some fibres of Mallard.

Pink Fluffy SBS (5) Pink Fluffy SBS (6)

Take a bit of pink SLF and tie it in.

Pink Fluffy SBS (8) Pink Fluffy SBS (9) Pink Fluffy SBS (10)

Take some long soft fibres from a pink hackle and tie them in as shown. Add some strands of pink Fluoro Fibre antennas.

Pink Fluffy SBS (11) Pink Fluffy SBS (12) Pink Fluffy SBS (13)

Dub a little ball with Ice Dub and tie in the shrimp eyes. The dubbing ball will seperate the eyes in a nice way.

Pink Fluffy SBS (14)

Take some Polar Dub in white and tie it in as a horn.

Pink Fluffy SBS (15) Pink Fluffy SBS (16)

Form a thread loop and then dub the body with the SLF.

Pink Fluffy SBS (17) Pink Fluffy SBS (18)

Put a big white CDC feather on the Petitjean Magic Tool and push it in by using a pink hackle.

Pink Fluffy SBS (19) Pink Fluffy SBS (20) Pink Fluffy SBS (21) Pink Fluffy SBS (22)

Grab the fibres with the clamp of the Magic Tool and and cut off the stems. Then put the fibres in the waxed thread loop and twist the loop.

Pink Fluffy SBS (23)

Wind the hackle fibres-CDC-Mix around the body and catch it with your thread.

Pink Fluffy SBS (24) Pink Fluffy SBS (25)

Some fibres from a Mallard feather will be used for the back of the fly. So, the fly swims in the right position and the black/white gives a great extra contrast. Do one or two whip finish and use some varnish to secure the knot. That’s it! Detlef is ready!

„Der Loppo“ Step By Step Tutorial

Der Loppo (1)

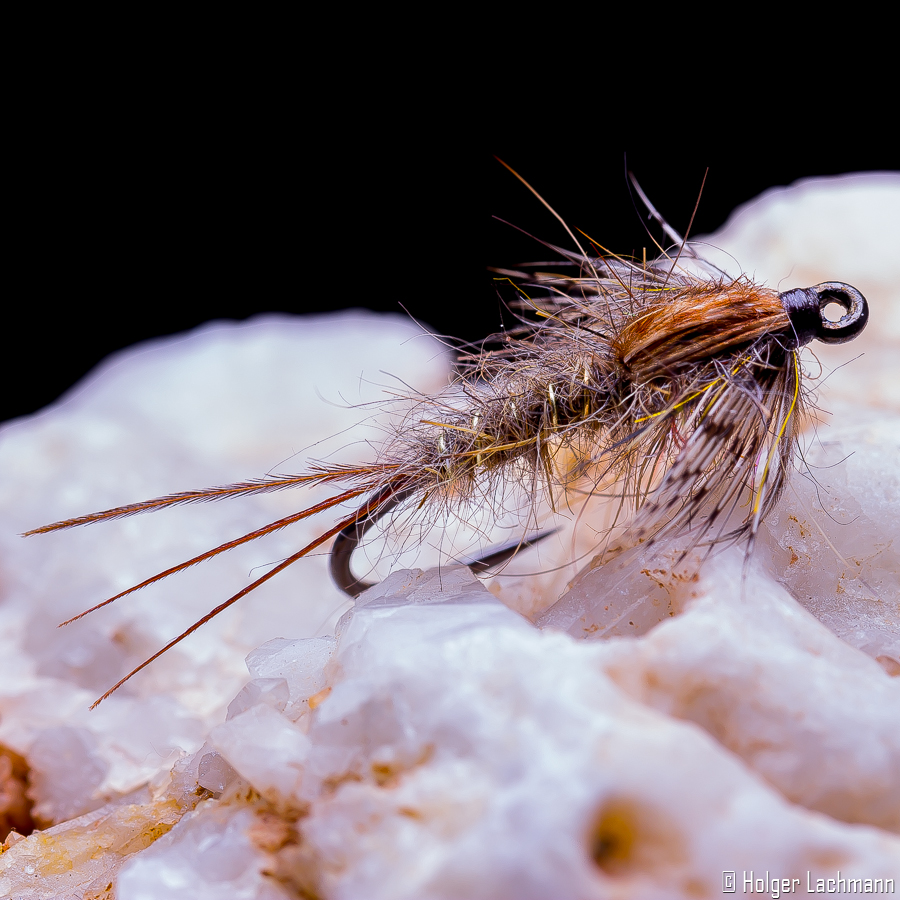
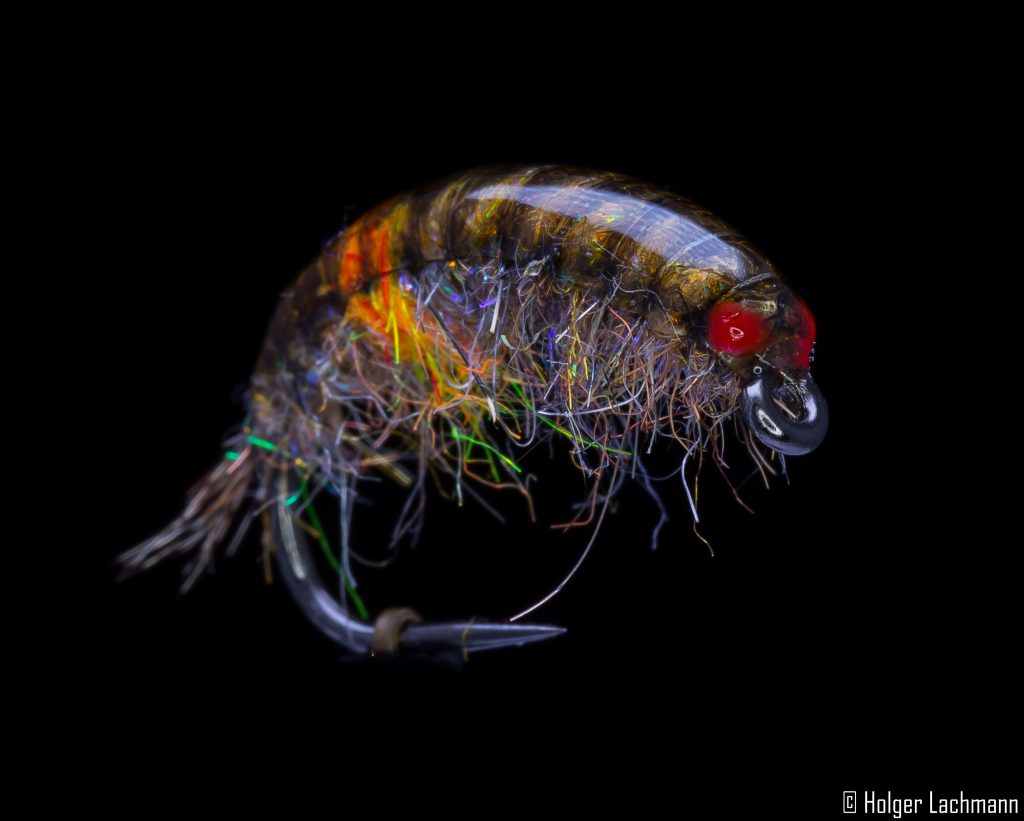
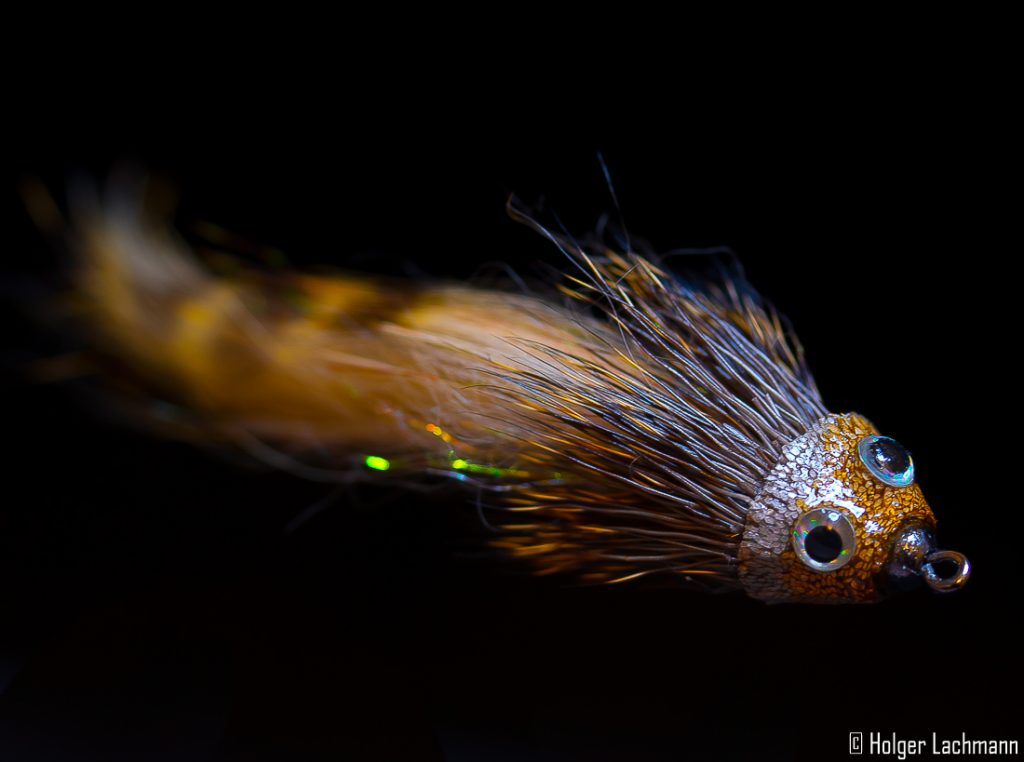
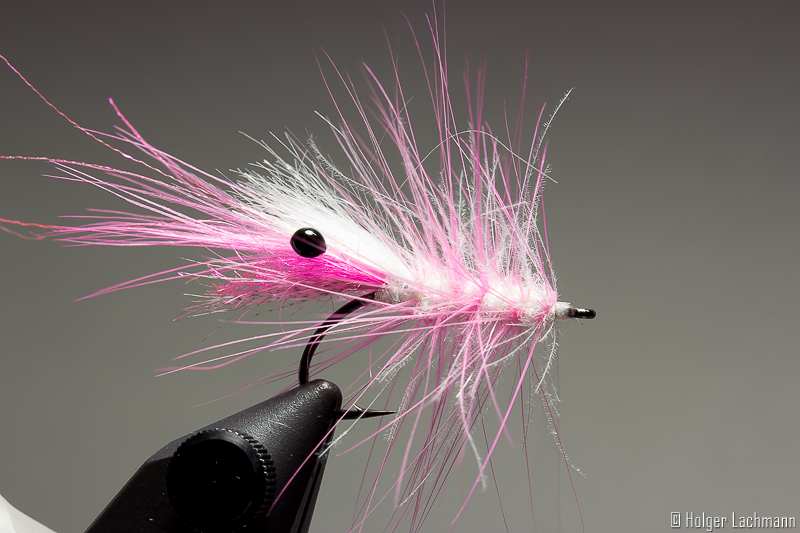
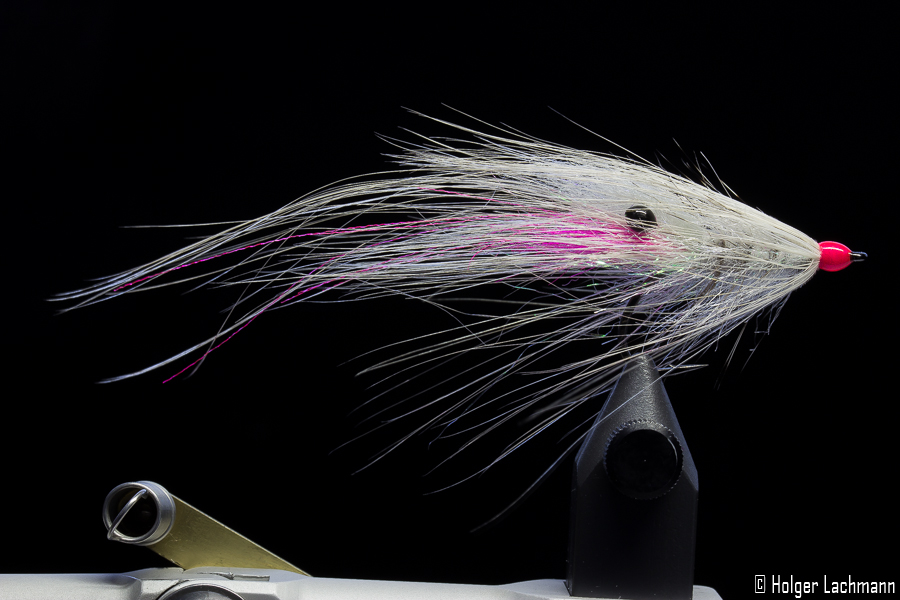
I was asked so often in the last time for a step by step tutorial for the Sea Trout fly „Der Loppo“, that I finally made one.

Der Loppo (2)

This fly isn’t something „brand new“, „the next revolution“, „the game changer“ or anything like this. It’s just a mix of some ingredients of good flies mixed together to a fly, which I personally like and in which I put my faith when fishing. I made flies for my fishing in the past, which looked quite similar, but this is the final outcome.

Der Loppo (2-1)

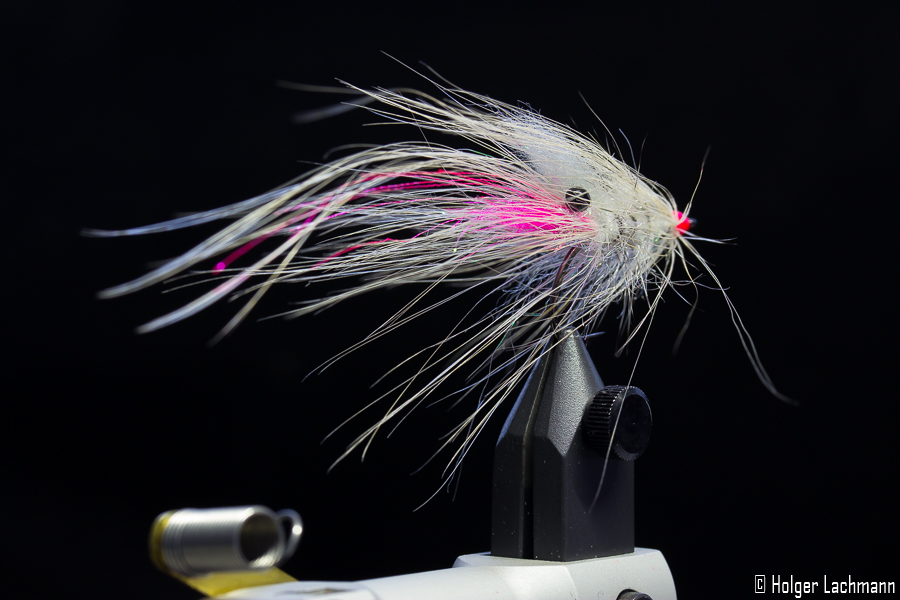
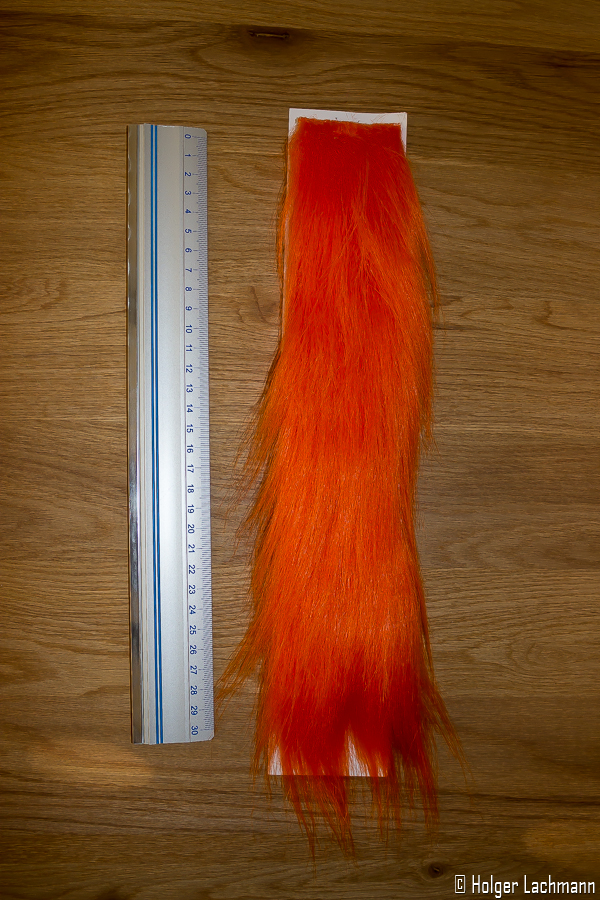
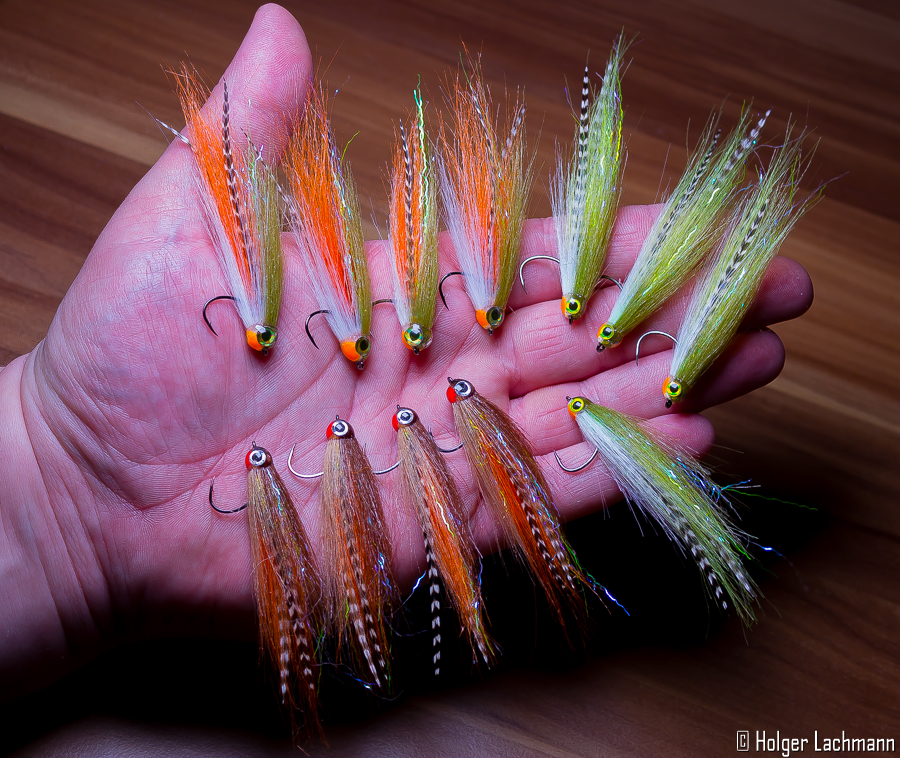
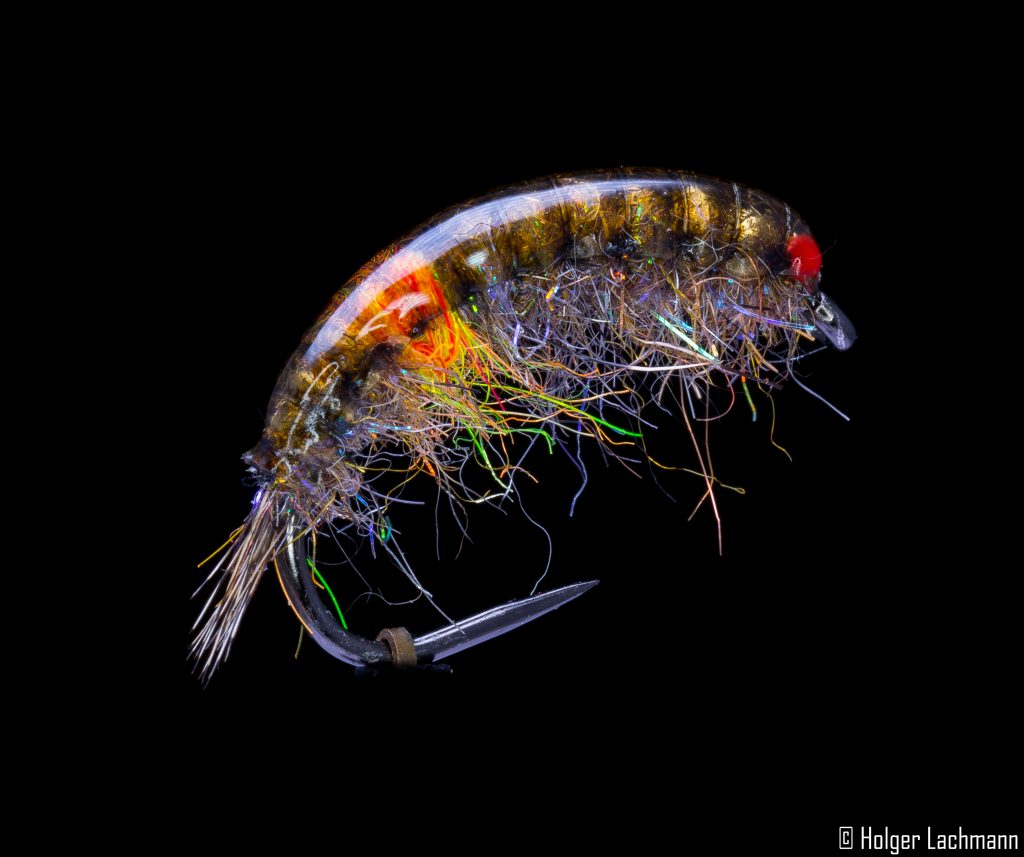
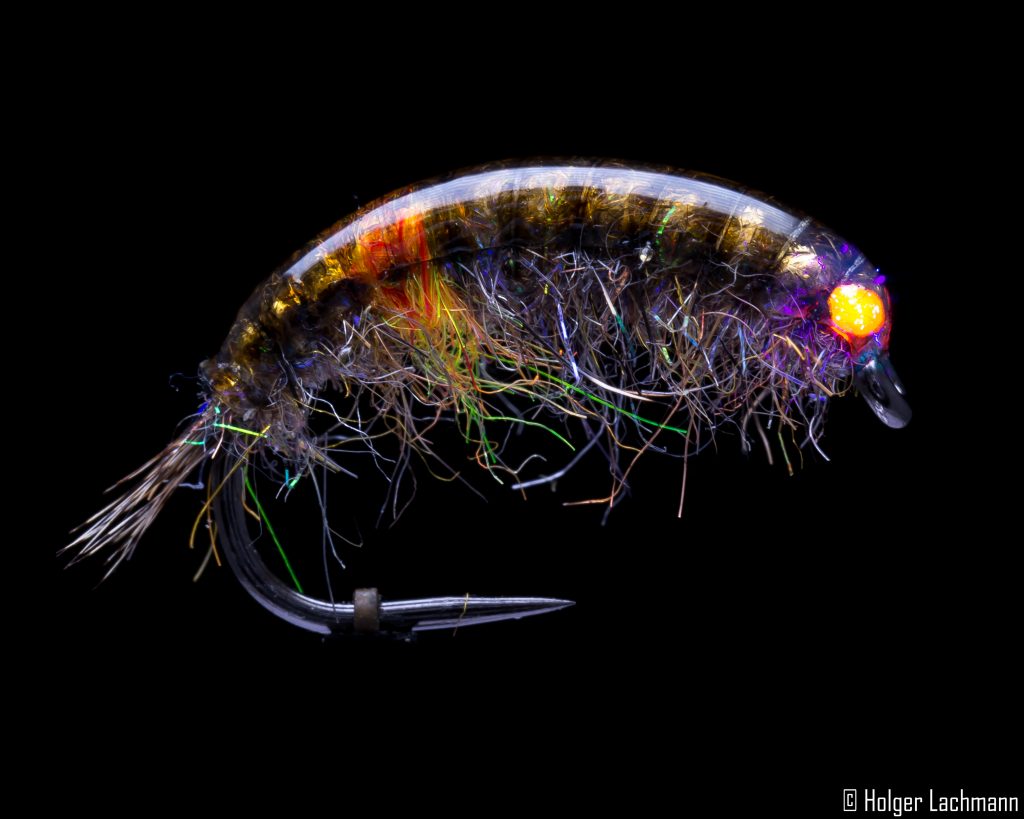
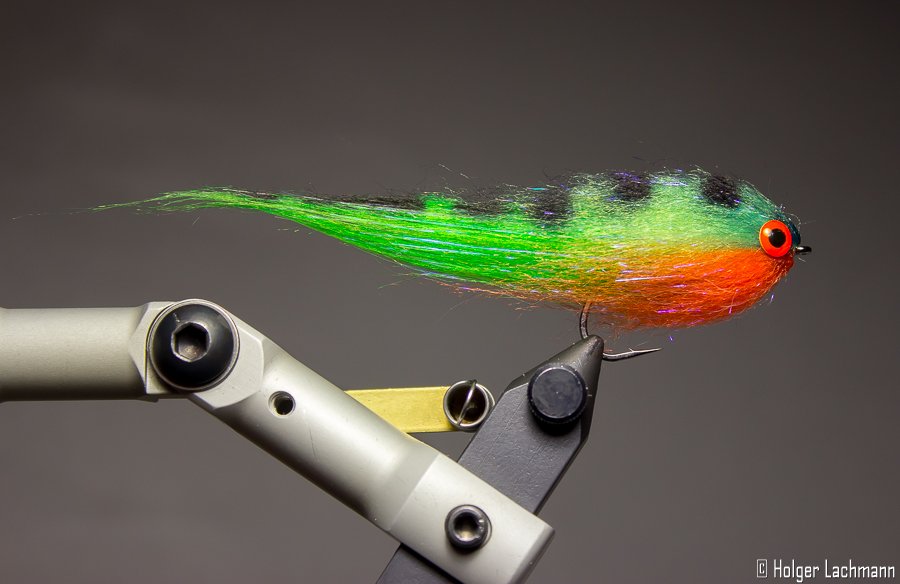
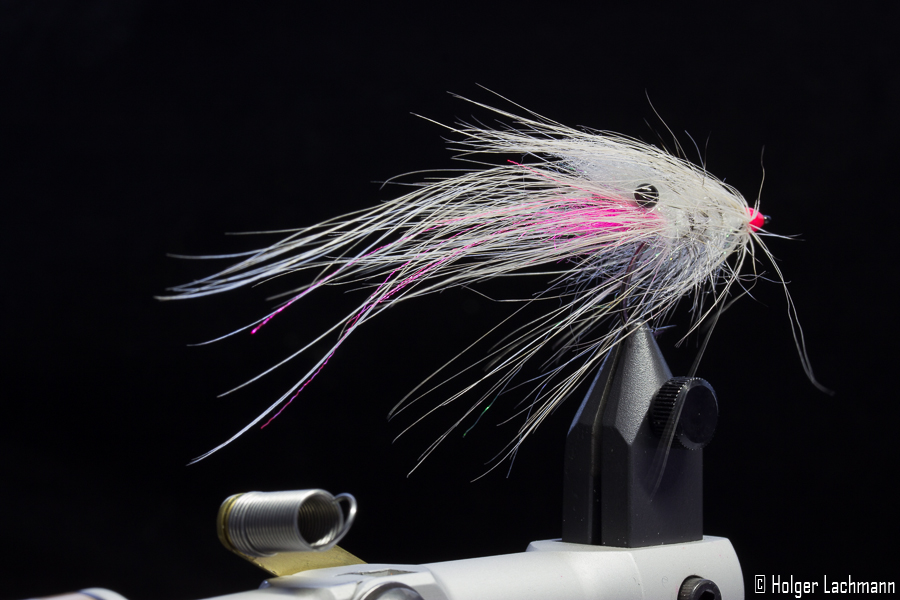
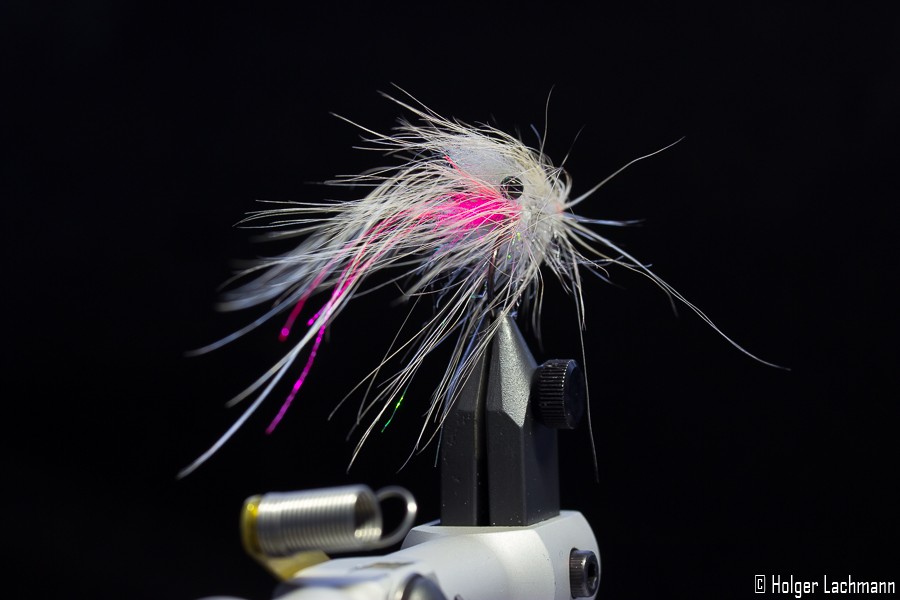
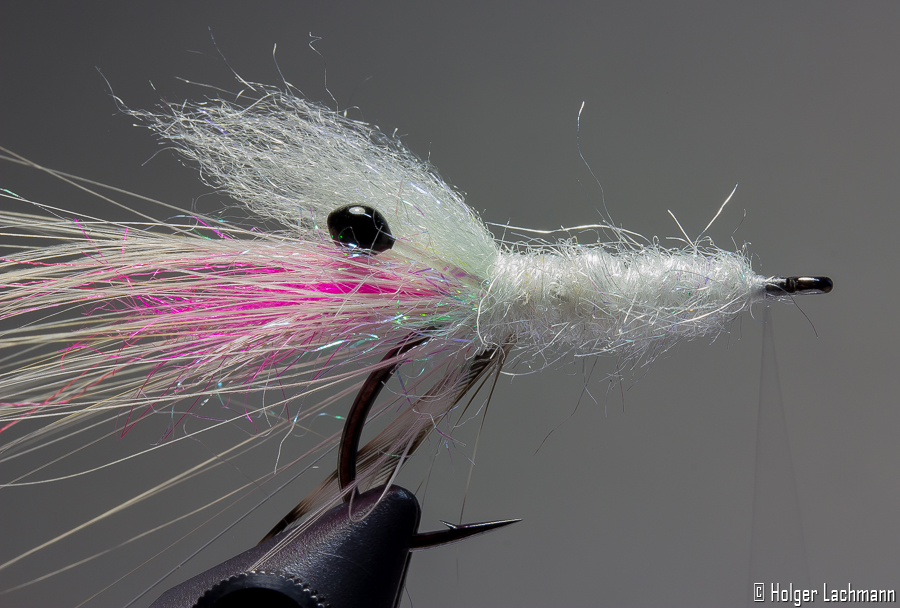
Its got a nice semi translucency, it’s not too bright and not too unimpressive.  You can tie it in different colors. I also like tan/white and orange as a color combination very much.

Der Loppo (3)

This example fly is tied on a hook size 4, but you can also tie it in size 6 with shorter fibres, when you want to fish it slower and the Sea Trouts just nibble on the longer fibres.

Der Loppo (4)

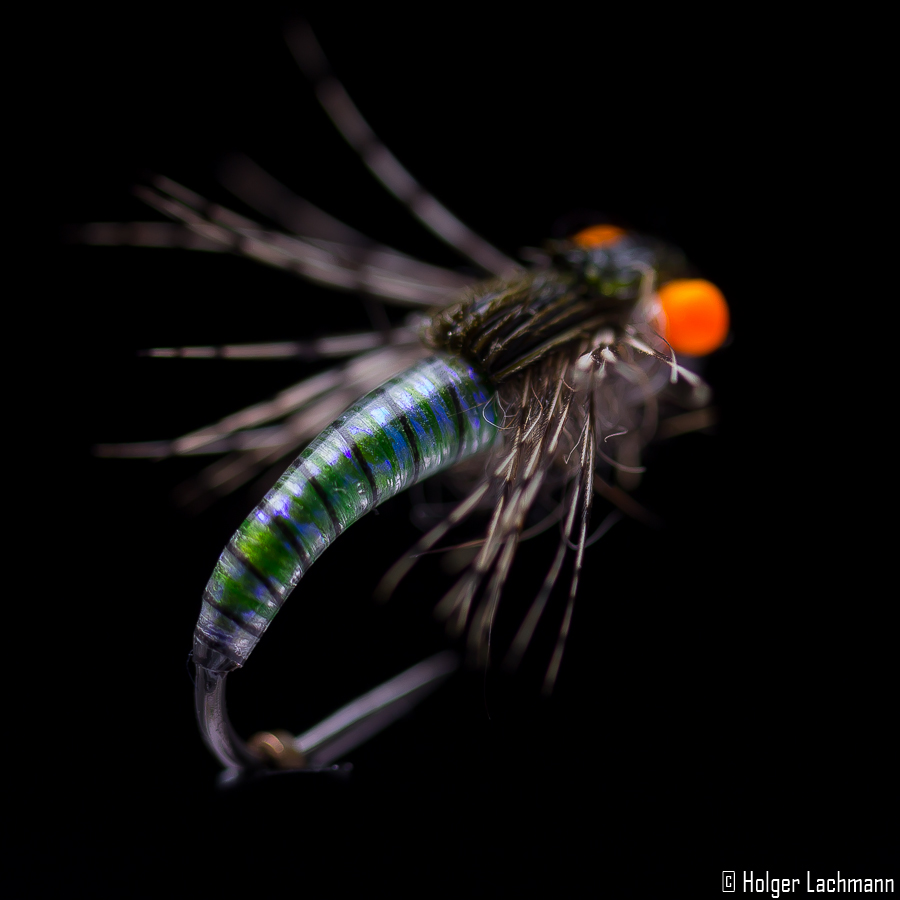
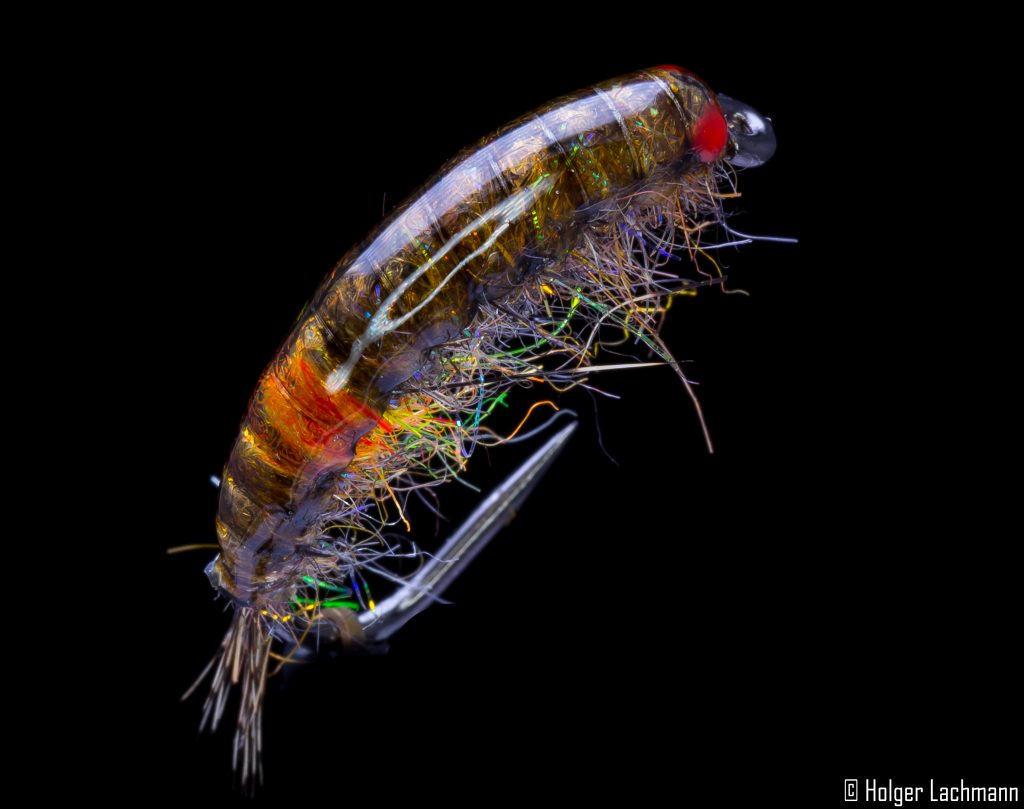
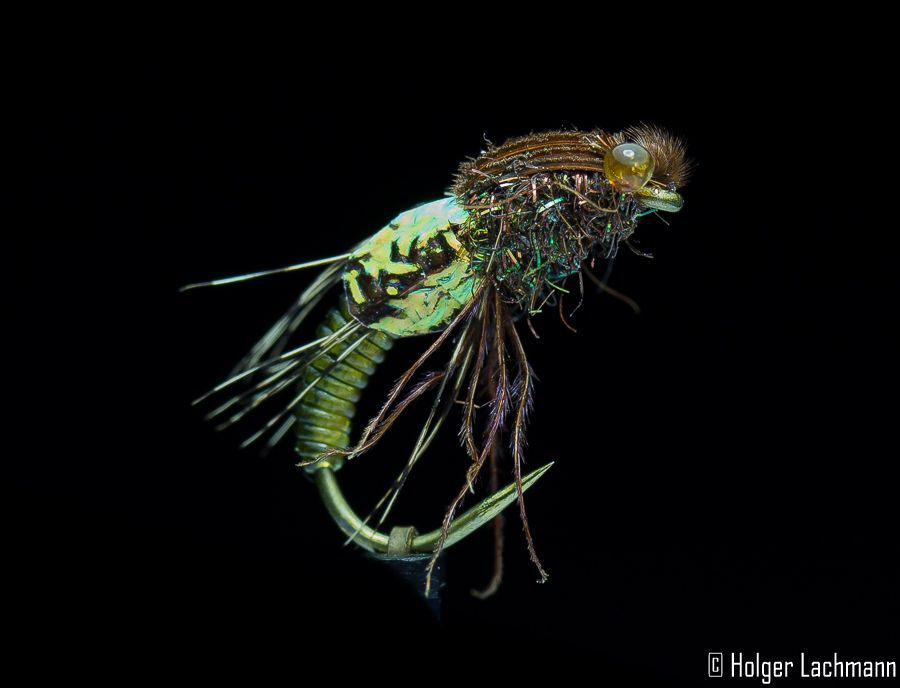
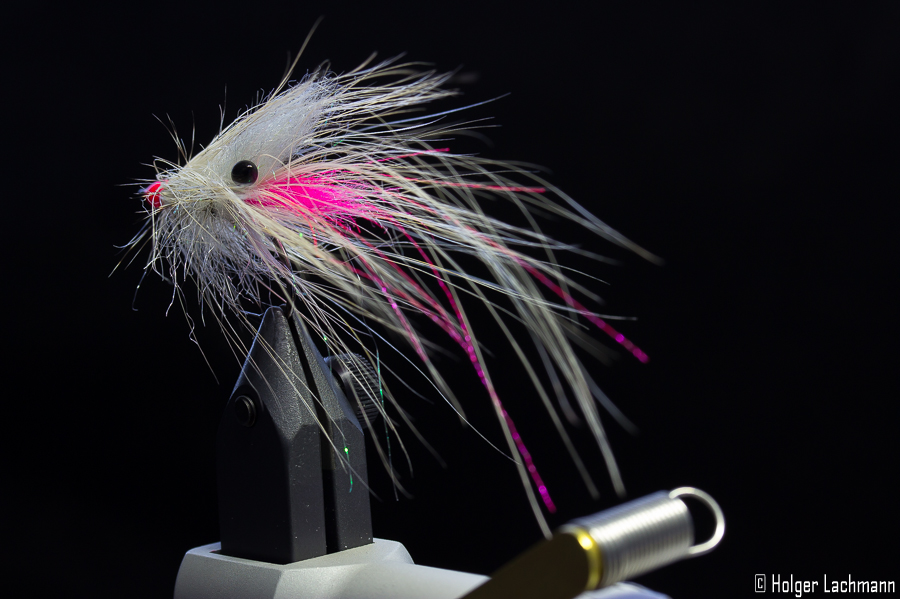
I even got a variation with black hackles and hot orange trigger points for murky water… looks very cool, too!

Der Loppo (5)


Ok, let’s start the step by step with a list of the materials:

  • Hook: Gamakatsu F314 #4
  • Weight: Lead Wire or substitute
  • Dubbing: Ice Dub Pearl, SLF Saltwater Dub White/Pearl
  • Mouth Part: Mallard and SLF Dub Pink
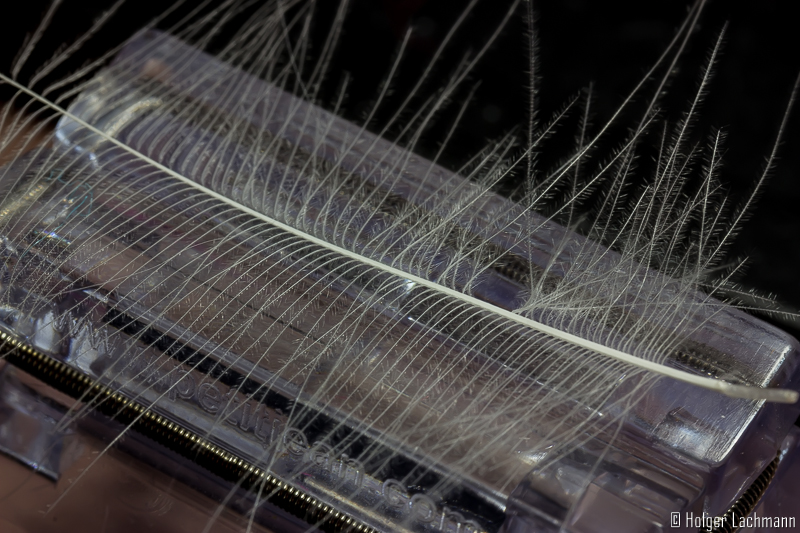
  • Hackles: Whiting Spey Hackle and a Grizzly Hackle stripped on one side
  • Horn: Senyos Laser Dub Gray
  • Antennas: Fluoro Fibre Pink
  • Eyes: Mono Eyes selfmade
  • Ribbing: Mono
  • Thread: 50D GSP white and 70D Uni Fluo Pink

Der Loppo SBS (1) Der Loppo SBS (2)

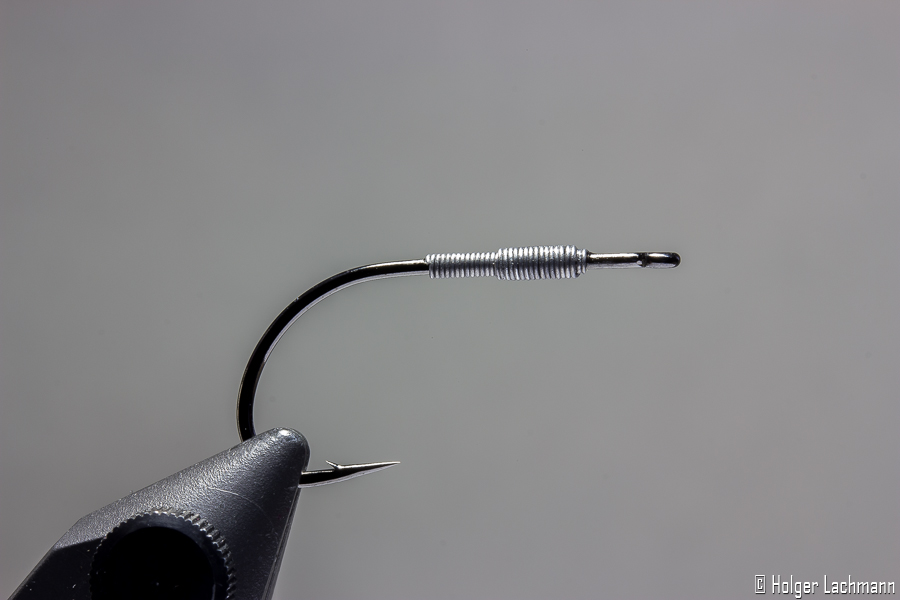
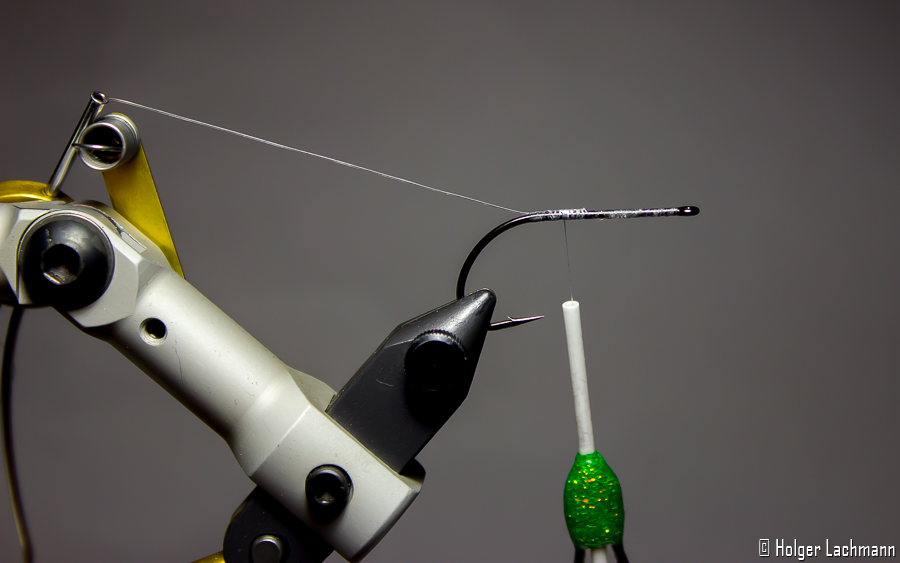
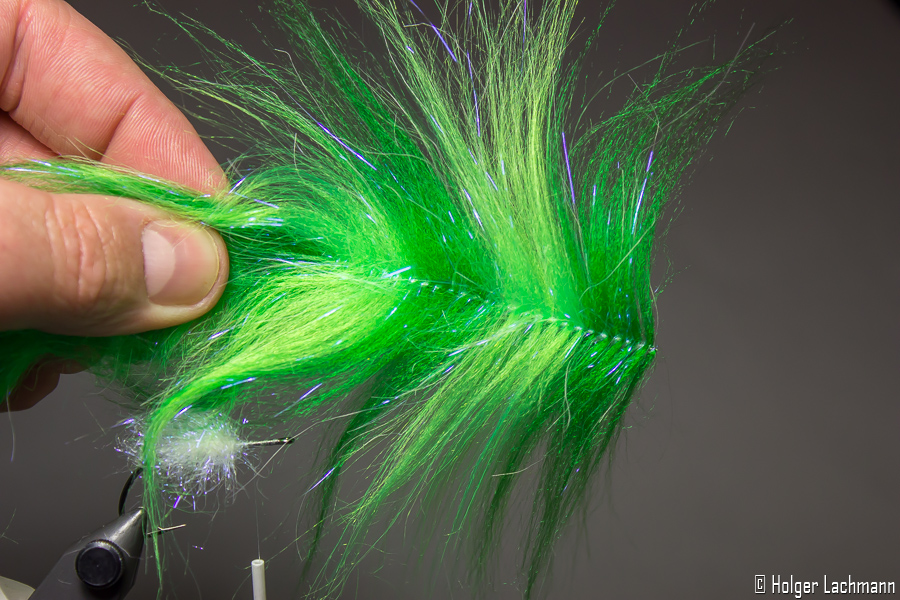
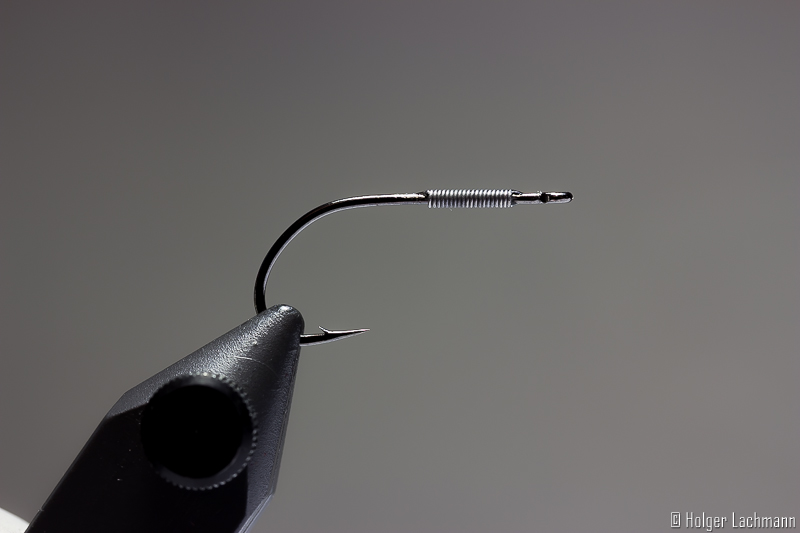
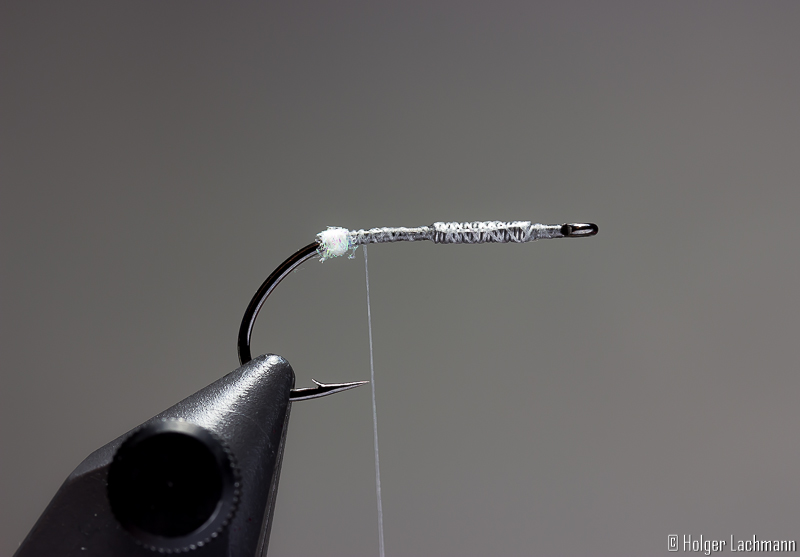
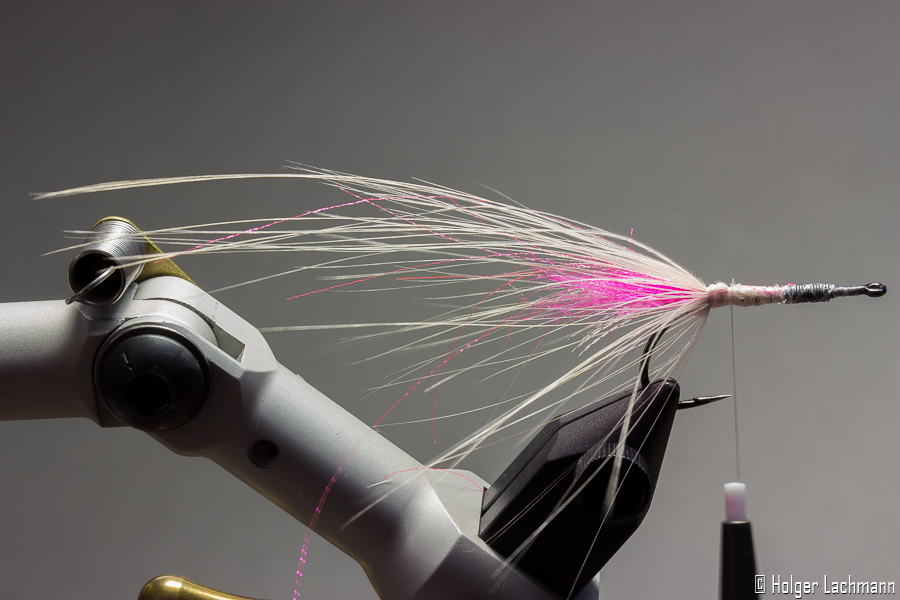
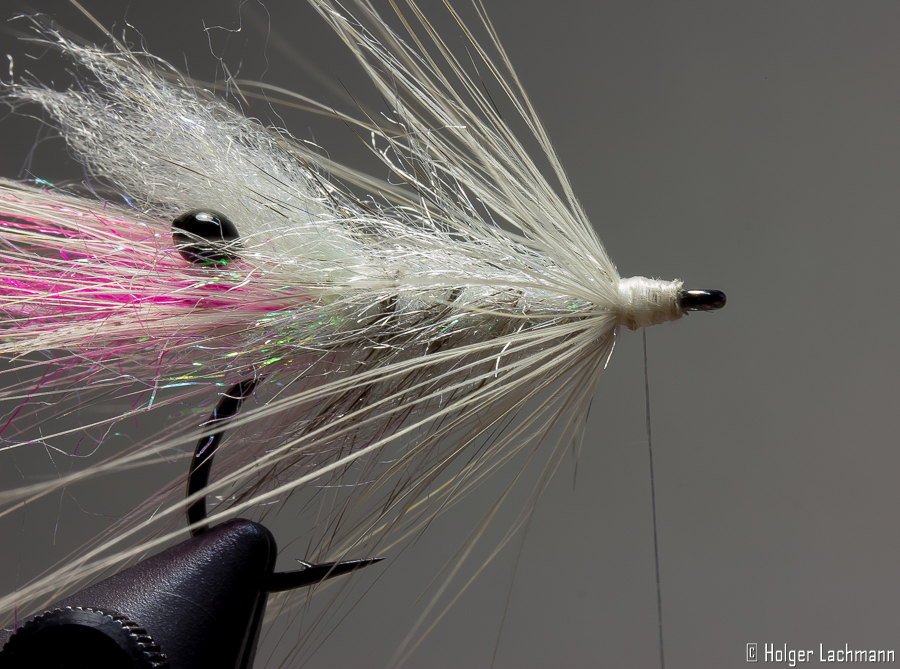
Put the hook into the vise and wind the lead wire arounf the shank. To secure the lead, you could use a little drop of super glue. Attach the thread and form with the Ice Dub a little tight dubbing ball at the end of the shank.

Der Loppo SBS (3)Der Loppo SBS (4)

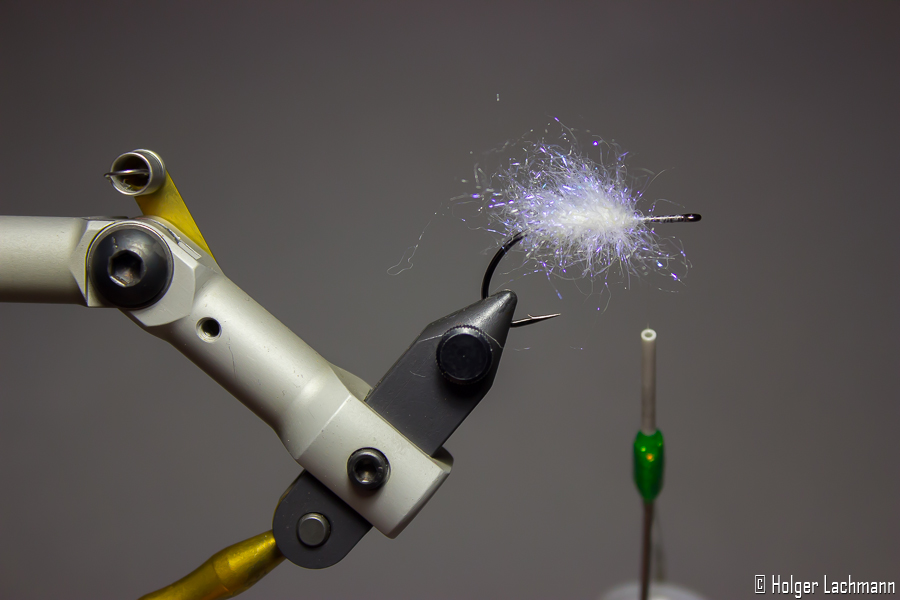
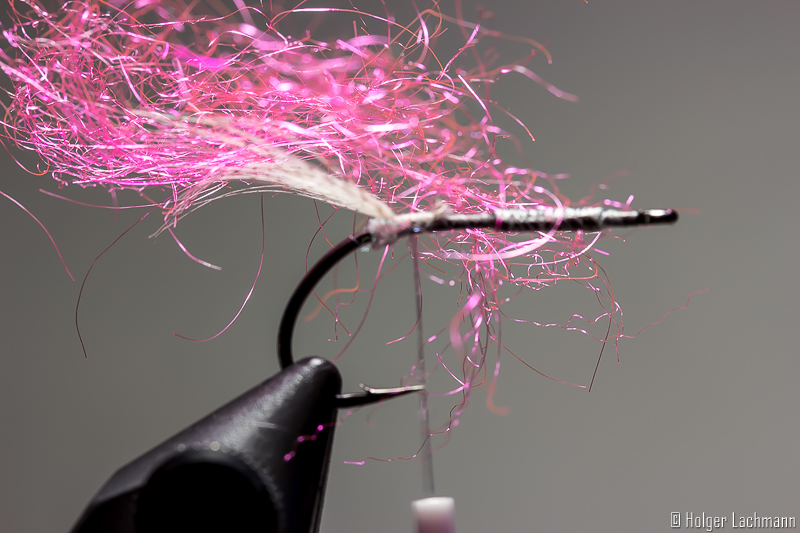
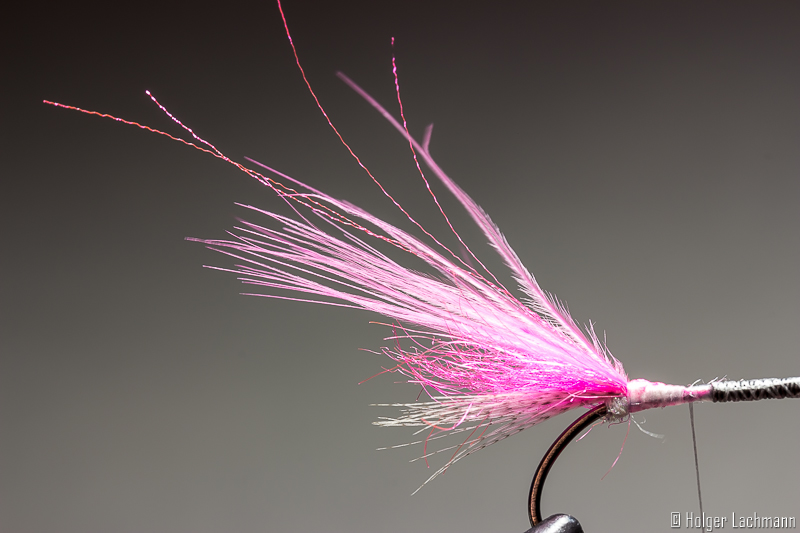
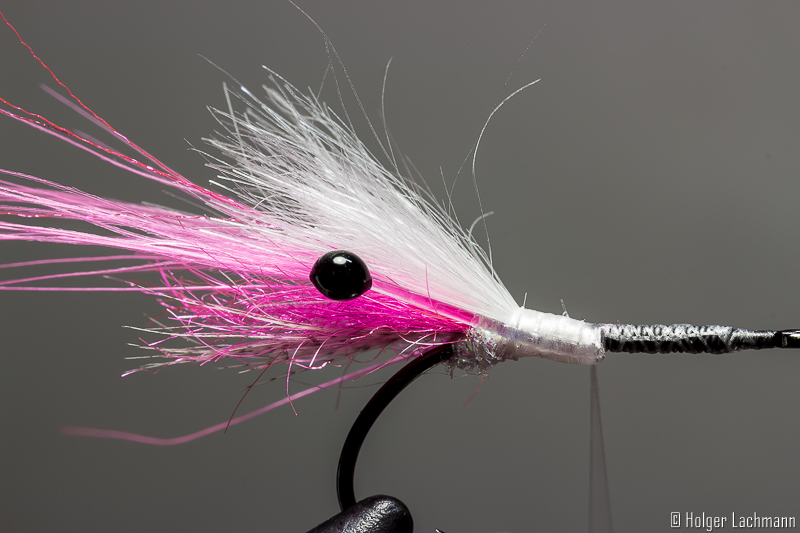
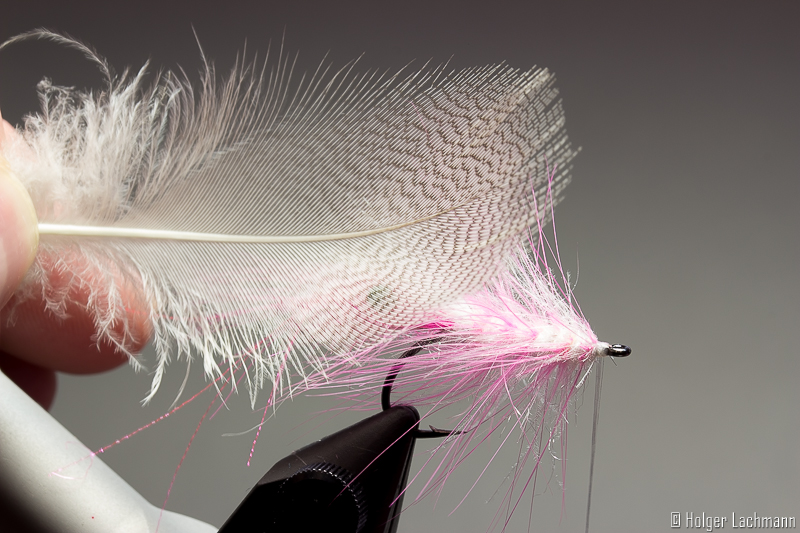
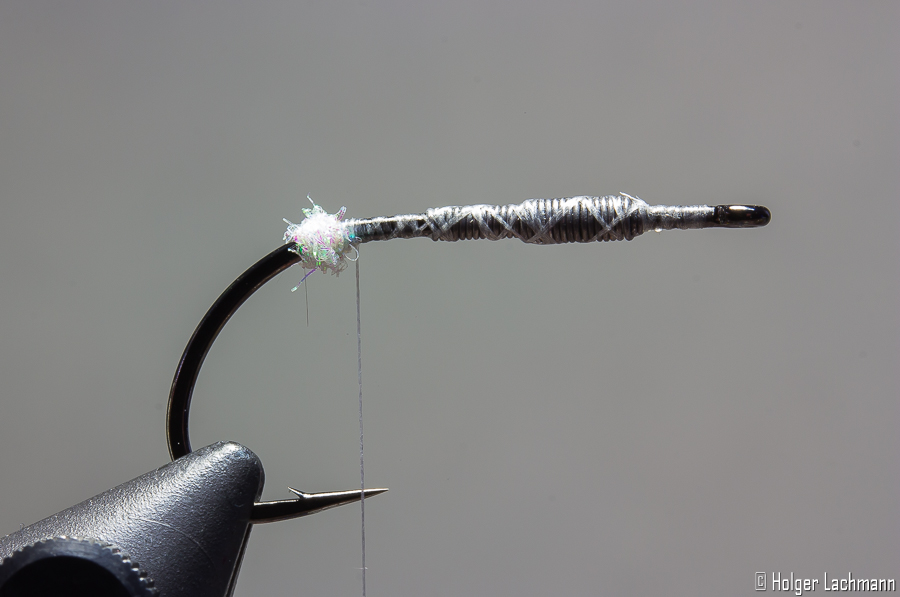
Tie in the Mallard and the pink SLF as „mouth parts“.

Der Loppo (4-1) Der Loppo SBS (5) Der Loppo SBS (6)

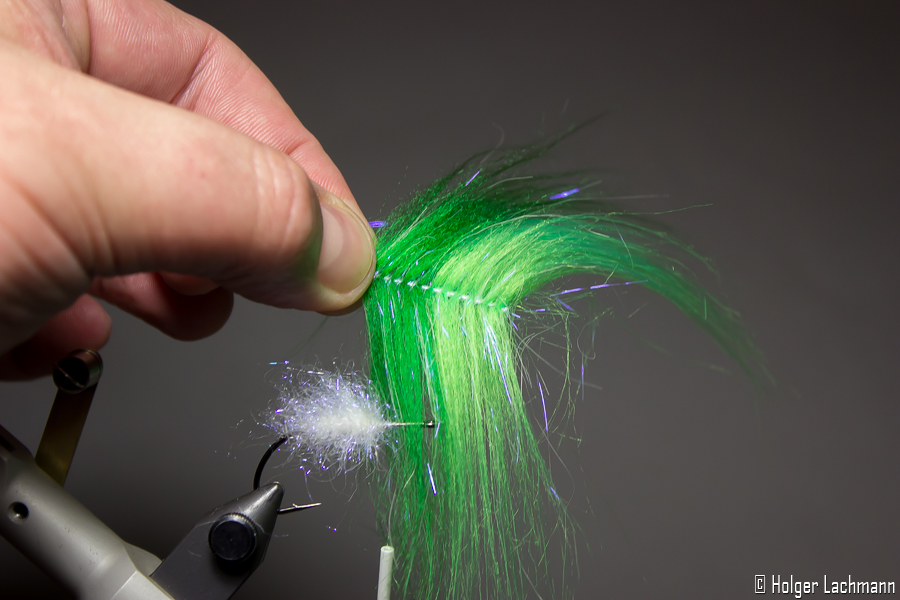
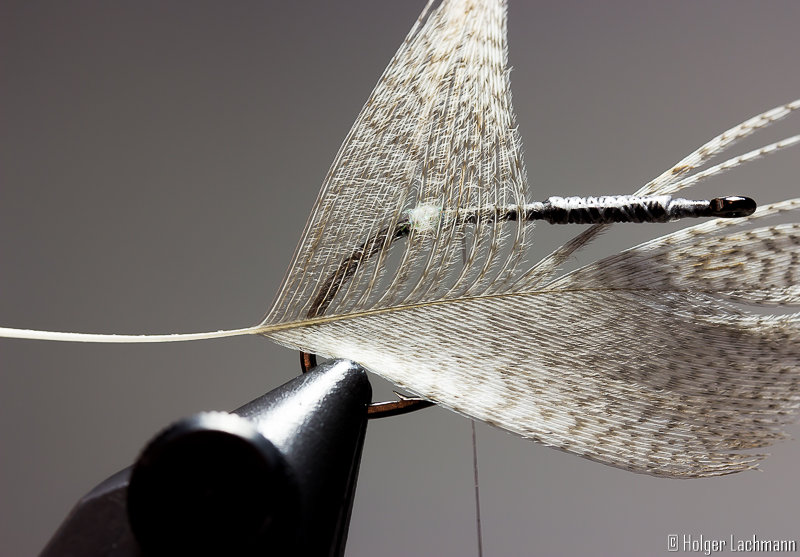
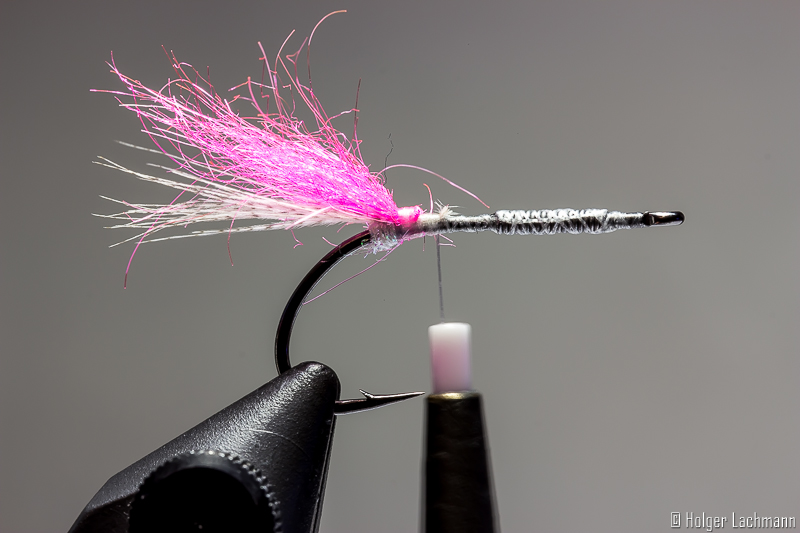
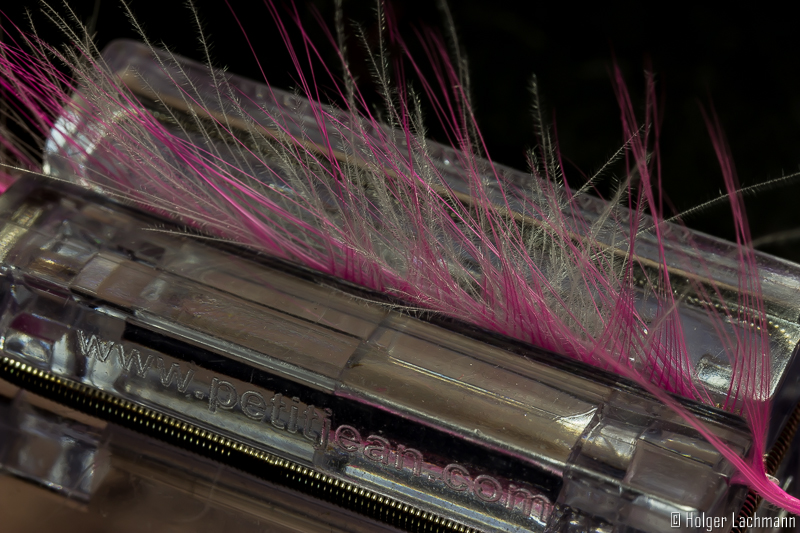
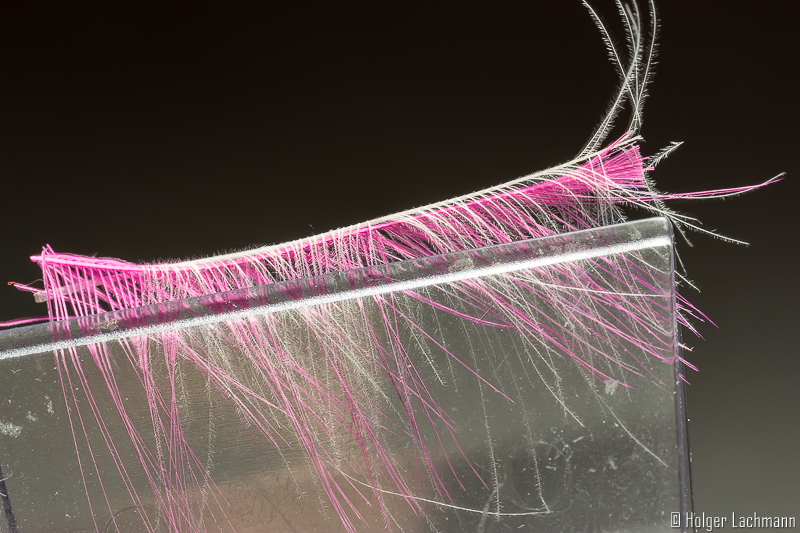
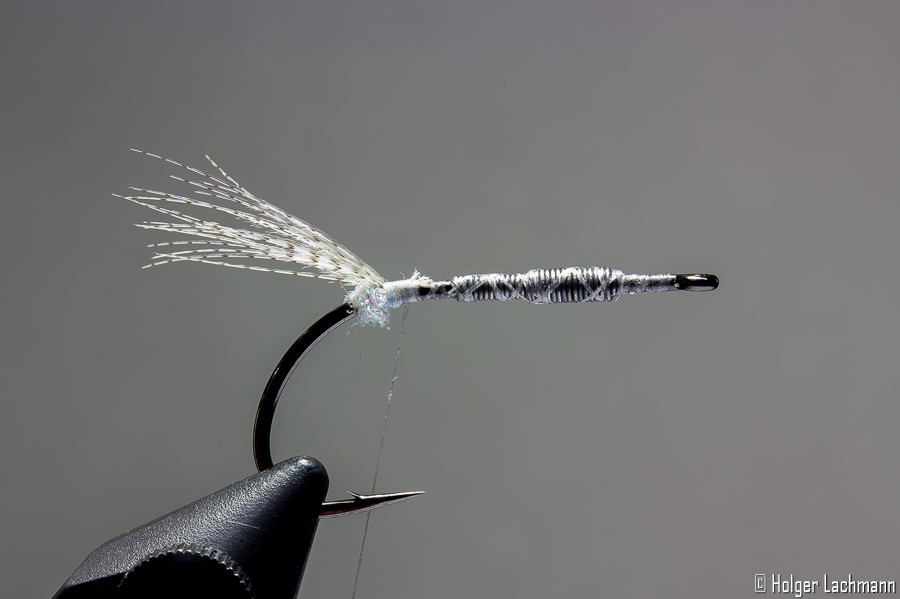
The first spey hackle should be tied in like shown. It’s easier to wind it around this way. Go back with your tying thread to the little bump and secure so the thin fragile stem of the spey hackle. For a little extra color, tie in some Fluoro Fibres in pink.

Der Loppo SBS (7)

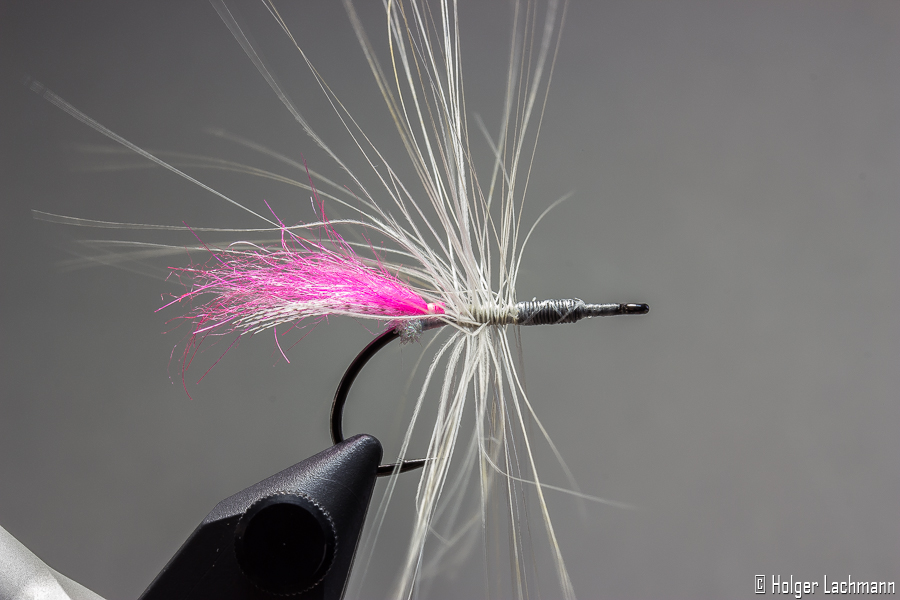
I like to tie in some extra long hackle fibres for the extra movement. If you think they are too long, just skip this tying step.

Der Loppo SBS (8) Der Loppo SBS (9) Der Loppo SBS (10)

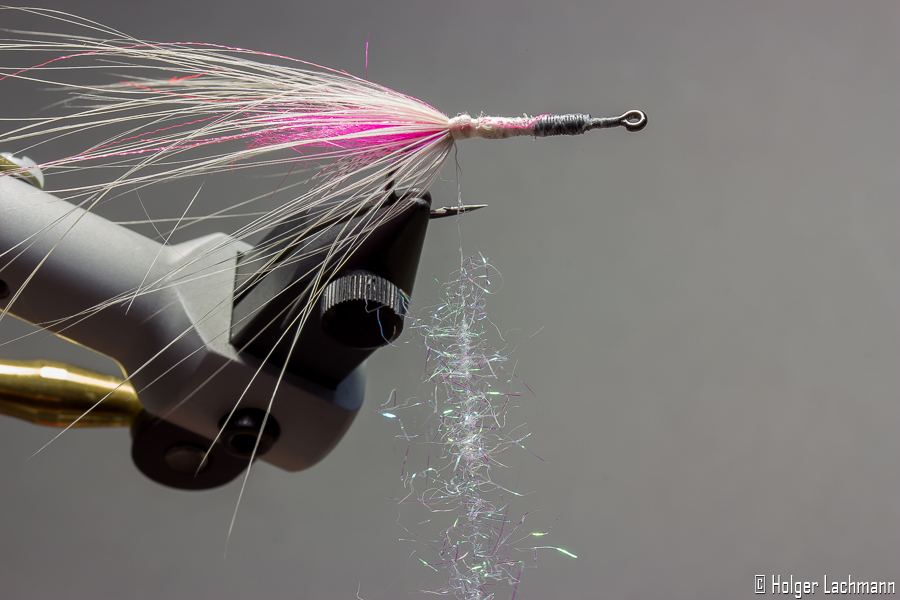
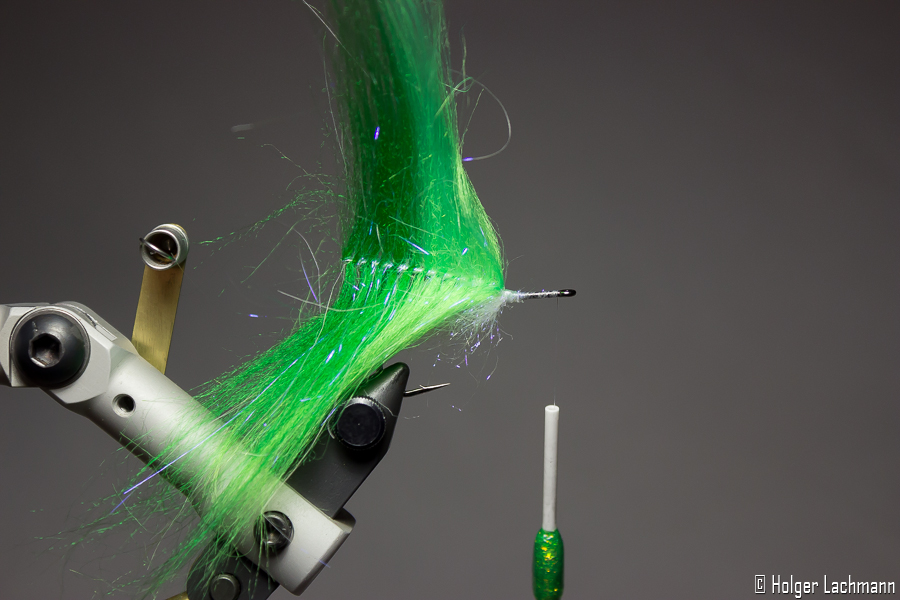
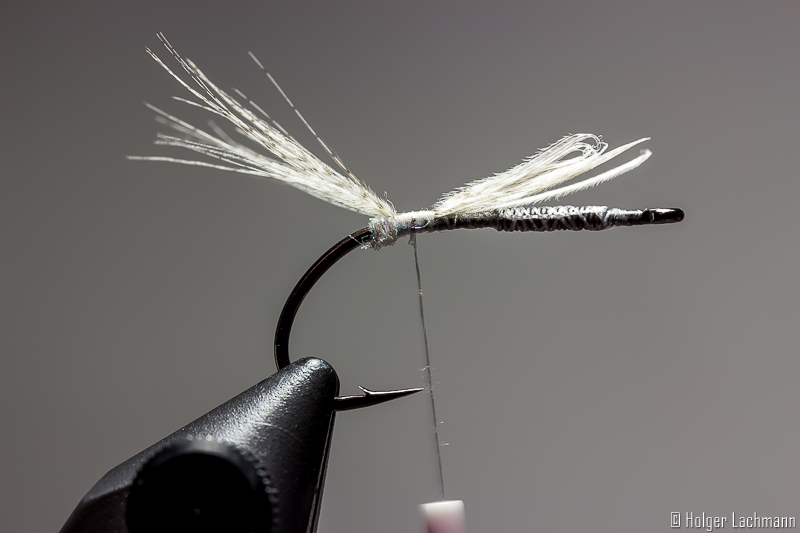
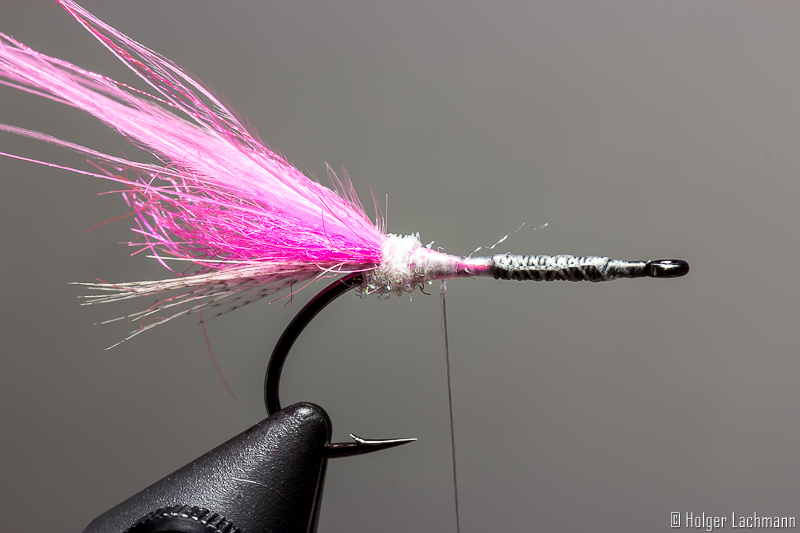
Split the thread and put some Ice Dub in the gap, then twist the bobbin and wind the dubbing around. After that, give the dubbing a brush with your velcro.

Der Loppo SBS (11)

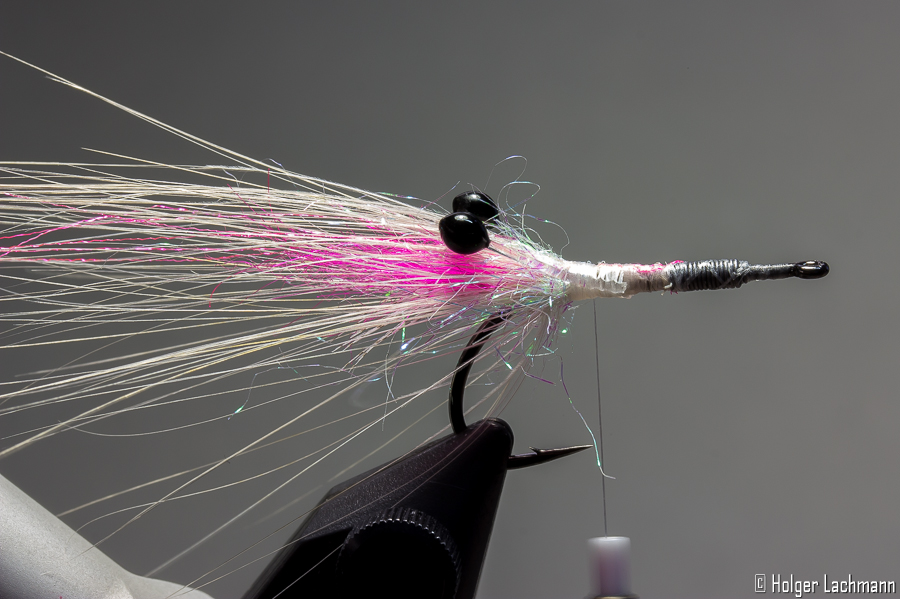
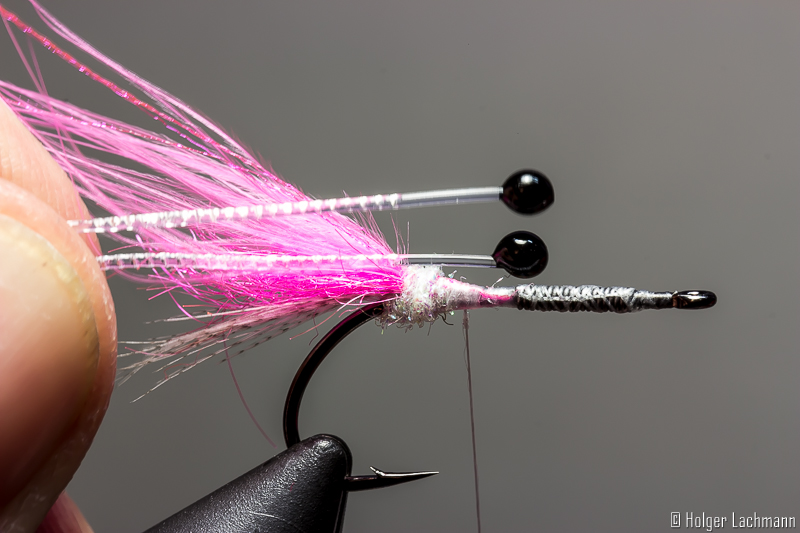
Now the eyes and the mono for ribbing should be tied in.

Der Loppo SBS (12)

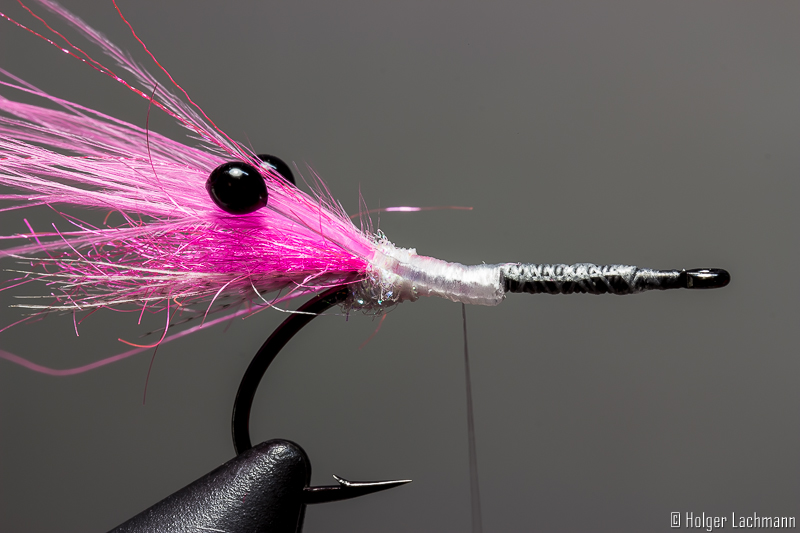
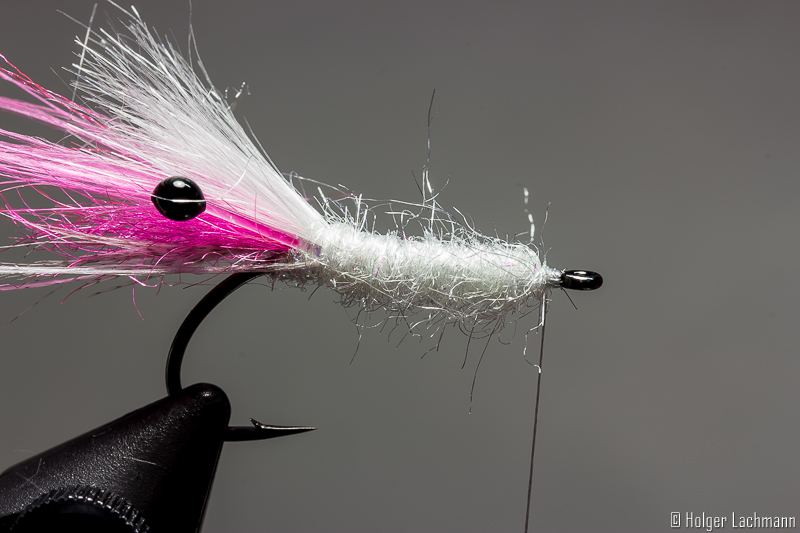
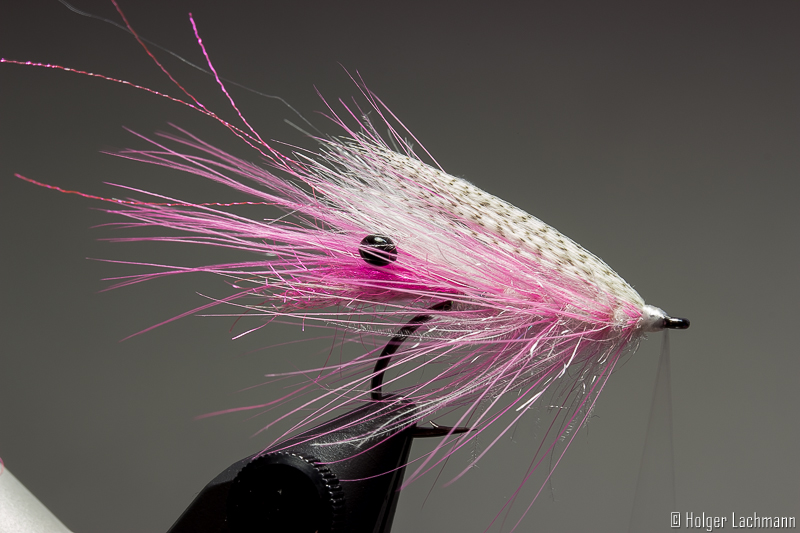
For the horn section, tie in the Laser dub and do a first turn with the white/pearl SLF Saltwater Dub.

Der Loppo SBS (13) Der Loppo SBS (14) Der Loppo SBS (15) Der Loppo SBS (16)

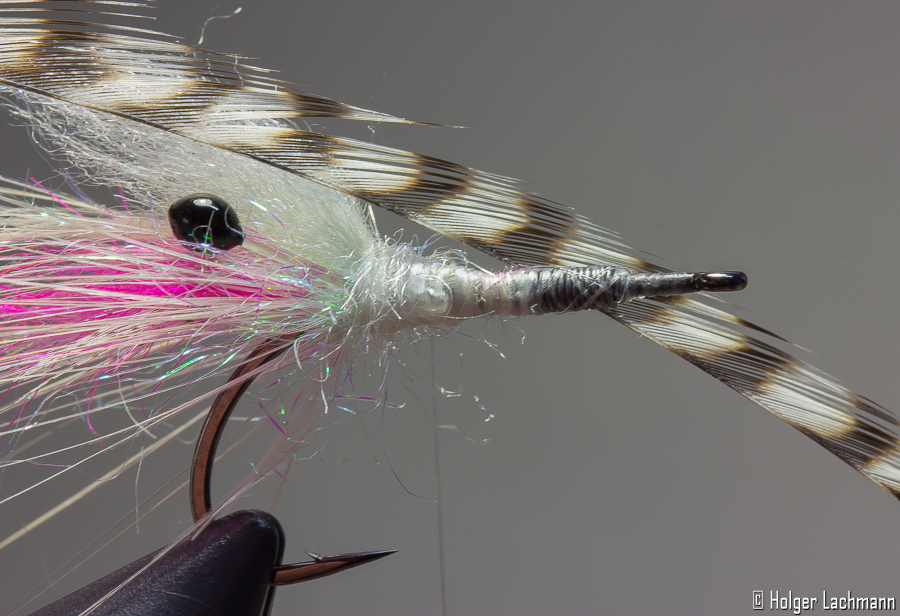
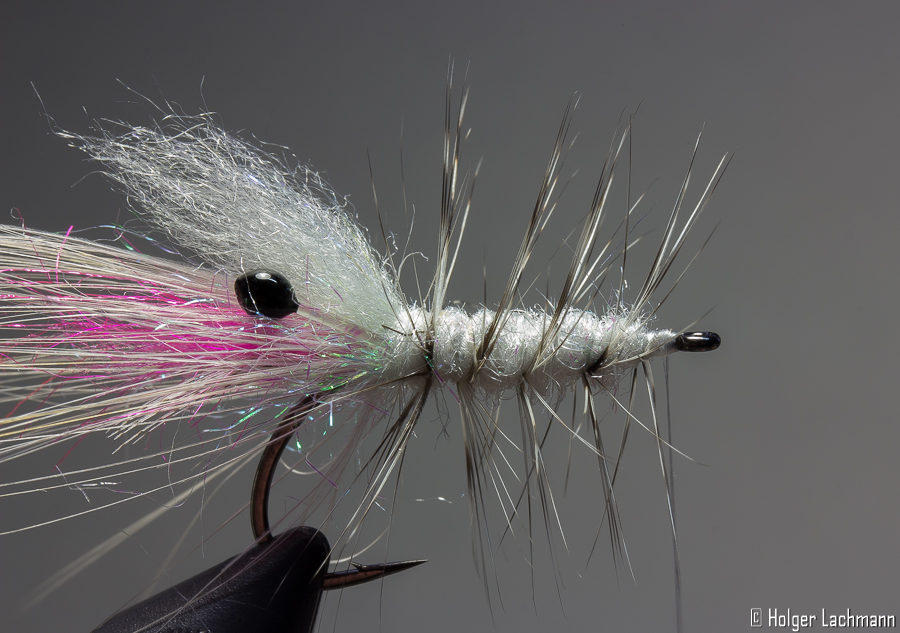
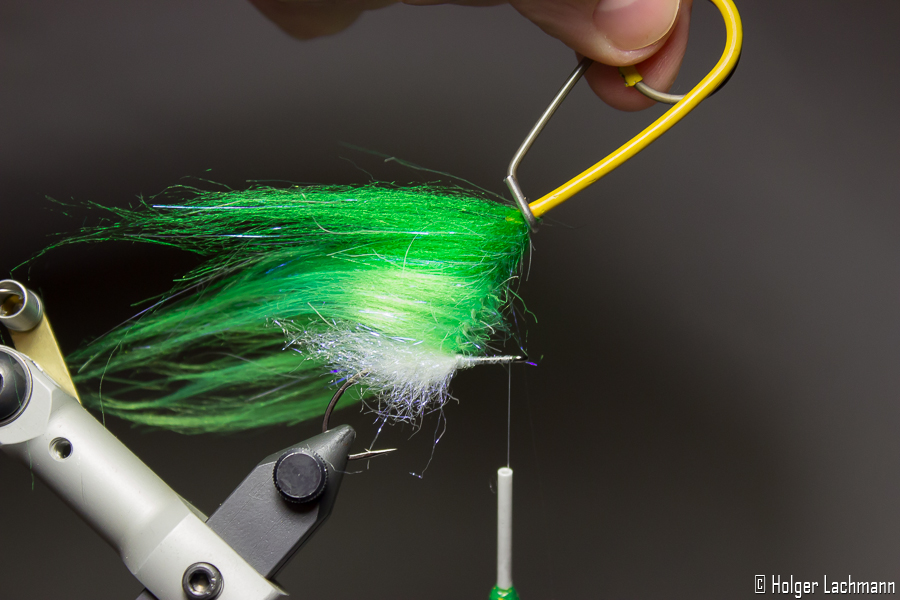
Tie in the grizzly hackle which was stripped on one side and dub the body using the SLF Saltwater Dub. Wind the grizzly hackle to the eye and leave enough space for the final hackle. Secure the hackle by ribbing the body incl. the hackle with the mono and catch it with the tying thread. Don’t forget the ribbing! ;) At the end, give the body and the hackle a strong brush with your velcro. The mix of hackle and SLF looks really cool in the water.

Der Loppo SBS (17)

Der Loppo SBS (18)

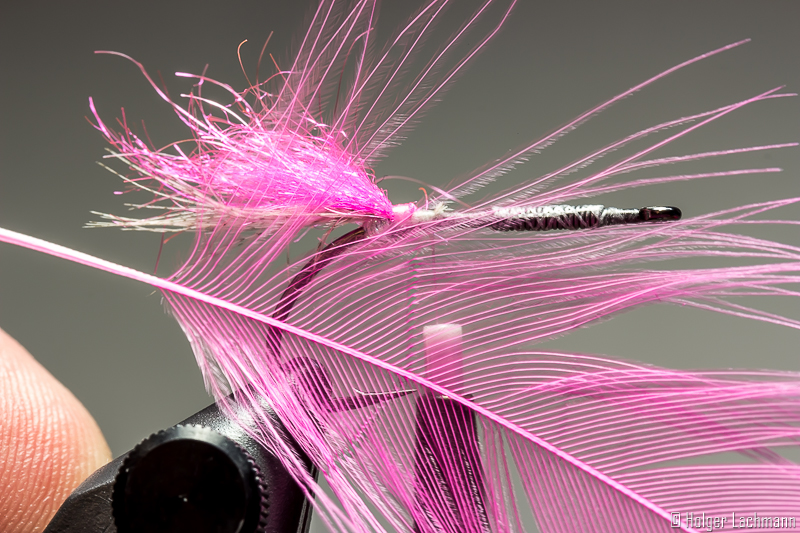
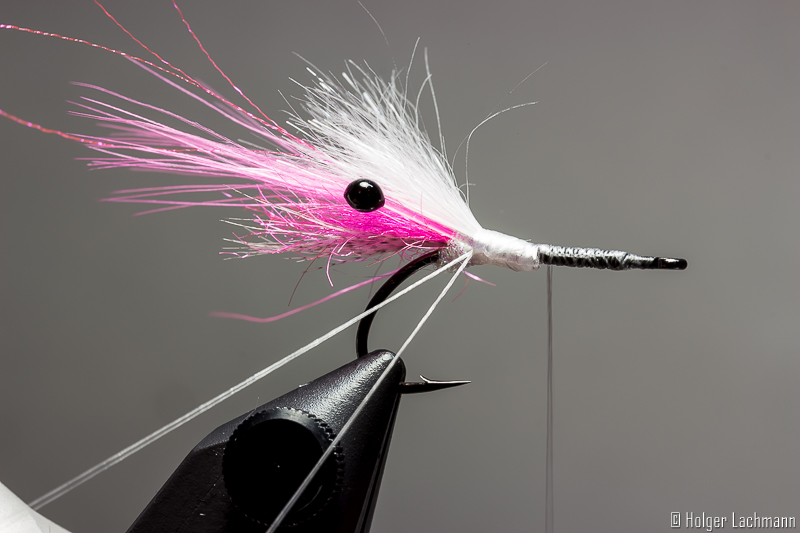
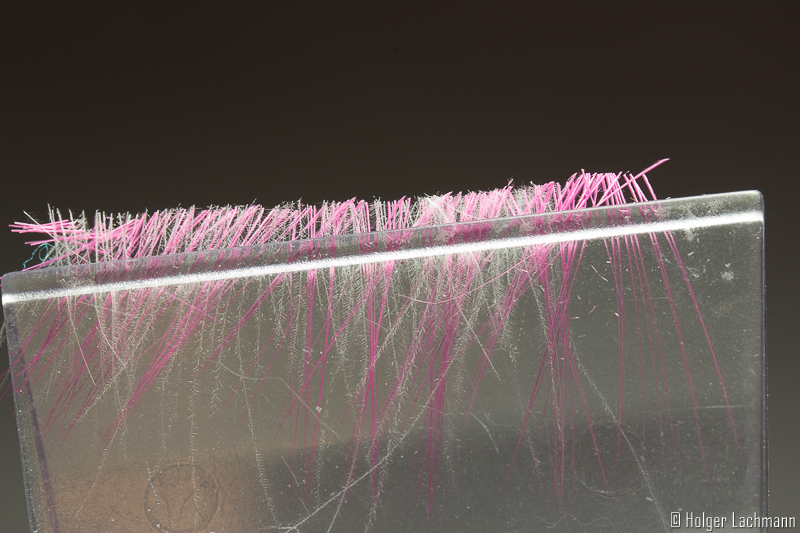
Wind around the second spey hackle and again secure the stem with your thread. It doesn’t matter, when in looks a bit bulky.

Der Loppo SBS (19)

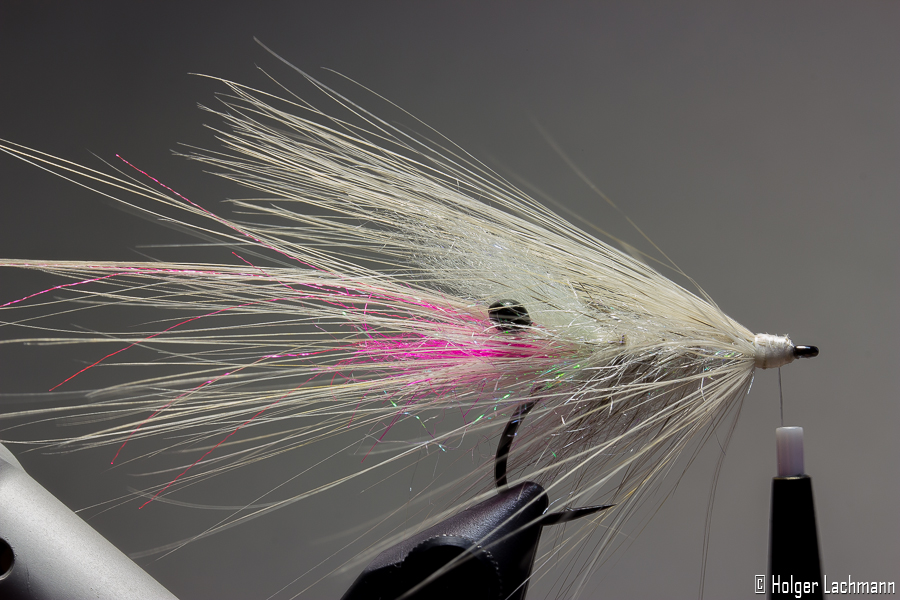
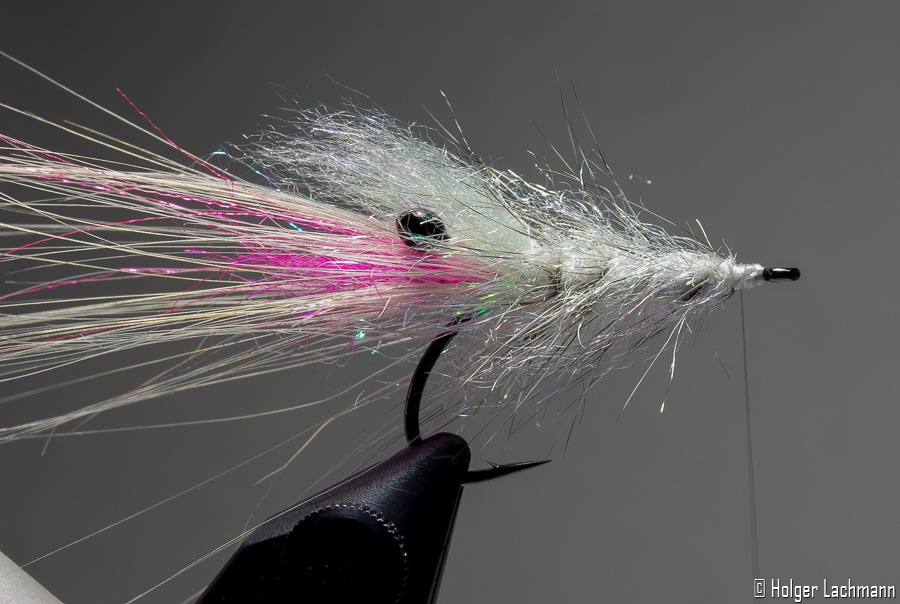
Take some extra spey fibres and tie them on top as a back. Looks in the water like the shrimp shell and makes sure the fly will always swim straight.

Der Loppo SBS (20) Der Loppo SBS (21)

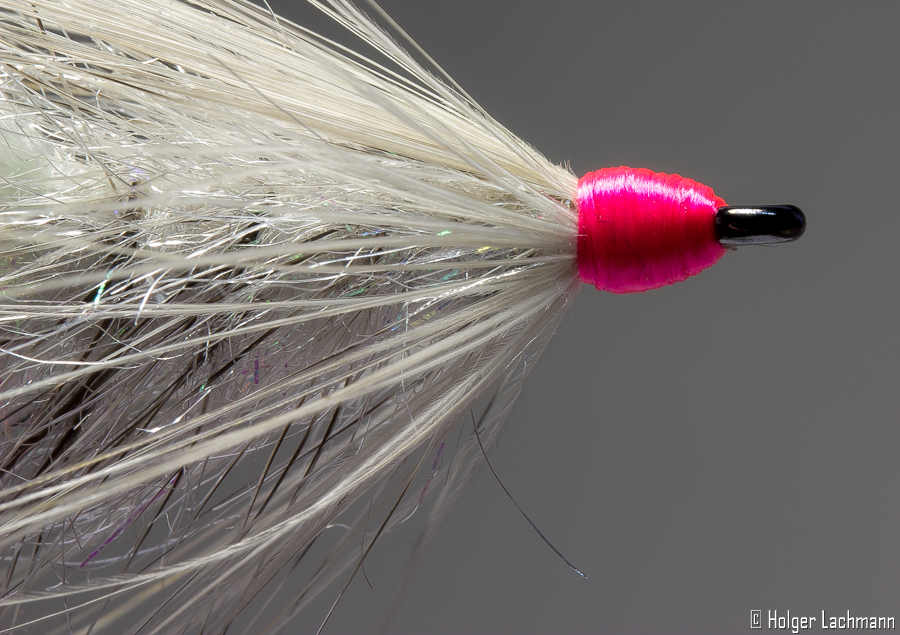
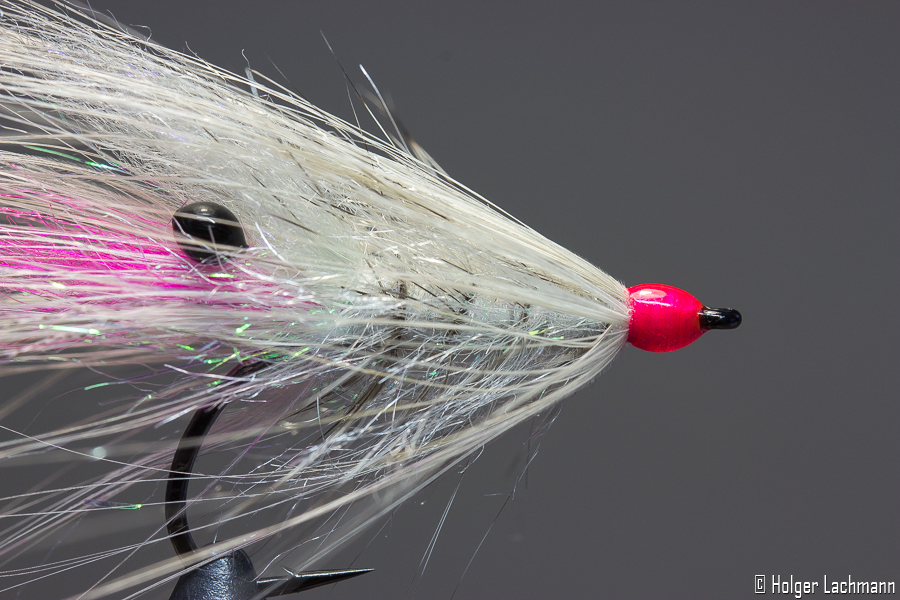
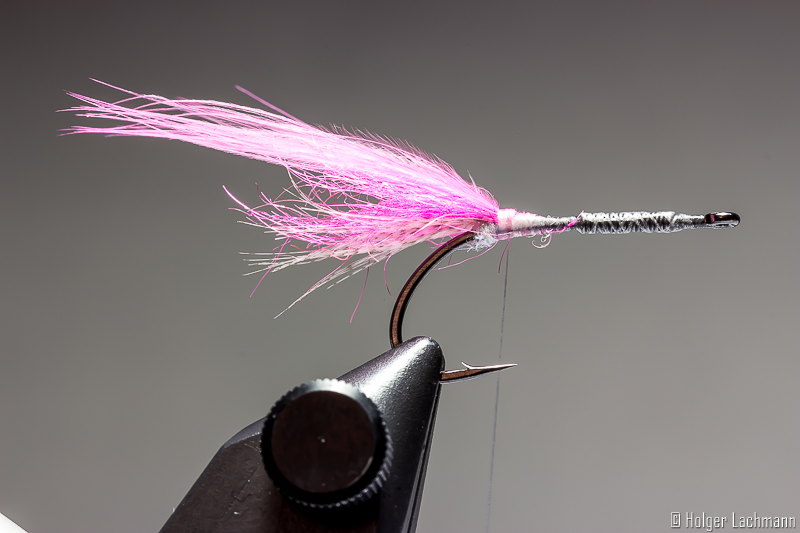
Do a whip finish with the GSP thread and cut it of. Then do a nice head using the fluo pink thread as a trigger point. Varnish the head or use Bug Bond uv resin to get a nice, shiny head.
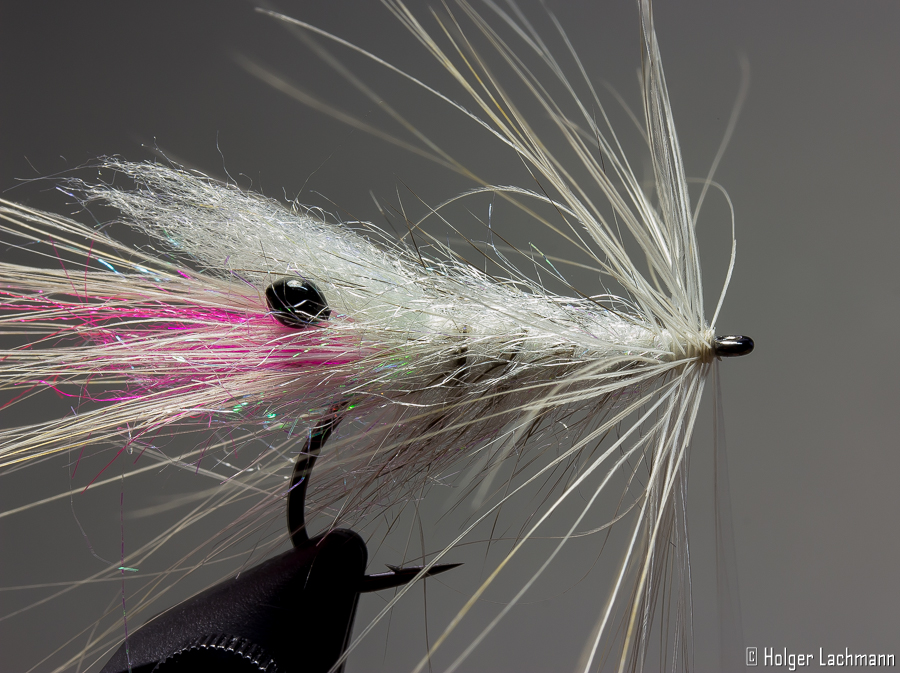
That’s it!

Der Loppo ist fertig! :)  I wish you a lot of fun tying and fishing this fly!