Craft Fur Sandeels

IMG_6447-1-2

Some weighted sandeels made with Craft Fur # 4 for sea trout.

Materials:

  • Hook: Gamakatsu F 314 # 4
  • Weight: Lead Wire
  • Thread: Mono
  • Body: Craft Fur white, gray and olive
  • Flash: Angelhair ice and pearl
  • Eyes: Flat stick on eyes
  • Resin: Bug Bond Original and Lite
  • Coloration: Marker Pen

THE BURNER „Saltwater Edition“

IMG_6387-1

A Burner tied on a Tiemco 811s saltwater hook #2. You can find the step by step tutorial here: BURNER STEP BY STEP

CDC Spinner #16

IMG_6337-1

Some Spinner #16

Materials:

  • Hook: D04BL from Troutline
  • Tail: Coq de Leon
  • Abdomen: Polish Quills secured with Bug Bond UV Resin
  • Thorax: Oliver Edwards Masterclass Dubbing
  • Wings and WIngcase: CDC
  • Thread: GSP 50D

„Flybei Special“

IMG_6312-1-2

Alex Keus from FLYBEI Fly Fishing School and Guide Service said to me, that I should tie a „FLYBEI-Nymph“. I asked how it should look like and he just answered „Surprise me!“.

I know that he’s great in modern nymph techniques, so it has to be a Hanak hook and a little 3mm tungsten bead. Then I remembered, that we once talked about the dubbing I recently bought and he said I’d forgetten to buy the best – the blue one! Ok, he likes blue… time to use the blue Polish Quills. I’ve never used this color before. Just a little Coq de Leon tail and some Peacock Dubbing and the fly is finished. He likes simple nymphs, which sinks extremly fast, so no legs or fancy CDC on this nymph, which slows down the sinking speed of the fly. I hope he likes it! ;-)

Slick Jim

IMG_6292-1-2

Click to enlarge for a better quality of the picture

  • Tungsten Bead
  • Hanak # 14
  • Coq de Leon
  • Fluo Thread
  • Polish Quills
  • Peacock Dubbing
  • Bug Bond UV Resin

How to tie in Bead Chain Eyes and Dumbbell Eyes ROCK-SOLID!

I was often asked, how bead chain eyes or dumbbel eyes should be tied in, so they won’t twist around the hook shank or getting loose. It seems like a simple task to tie them in, but there are some mistakes you can avoid to get a better result.

I didn’t wanted to do a „how to…“ about it, but I saw a good tying video about a nice streamer pattern yesterday. The fly tyer in the video did the same common mistakes like so many others. He used super glue to fix the eyes, but only at the end on the turns as a kind of topping, and as a topping, super glue can’t show it’s real strength.

So, I made some pictures and I will show you how to tie the eyes in – the ROCK-SOLID-WAY !

Twisted GSP

If you use G.S.P. thread, you should rotate your bobbin to twist the thread. Otherwise the G.S.P. is too slippery to create a good solid basement for the eyes.
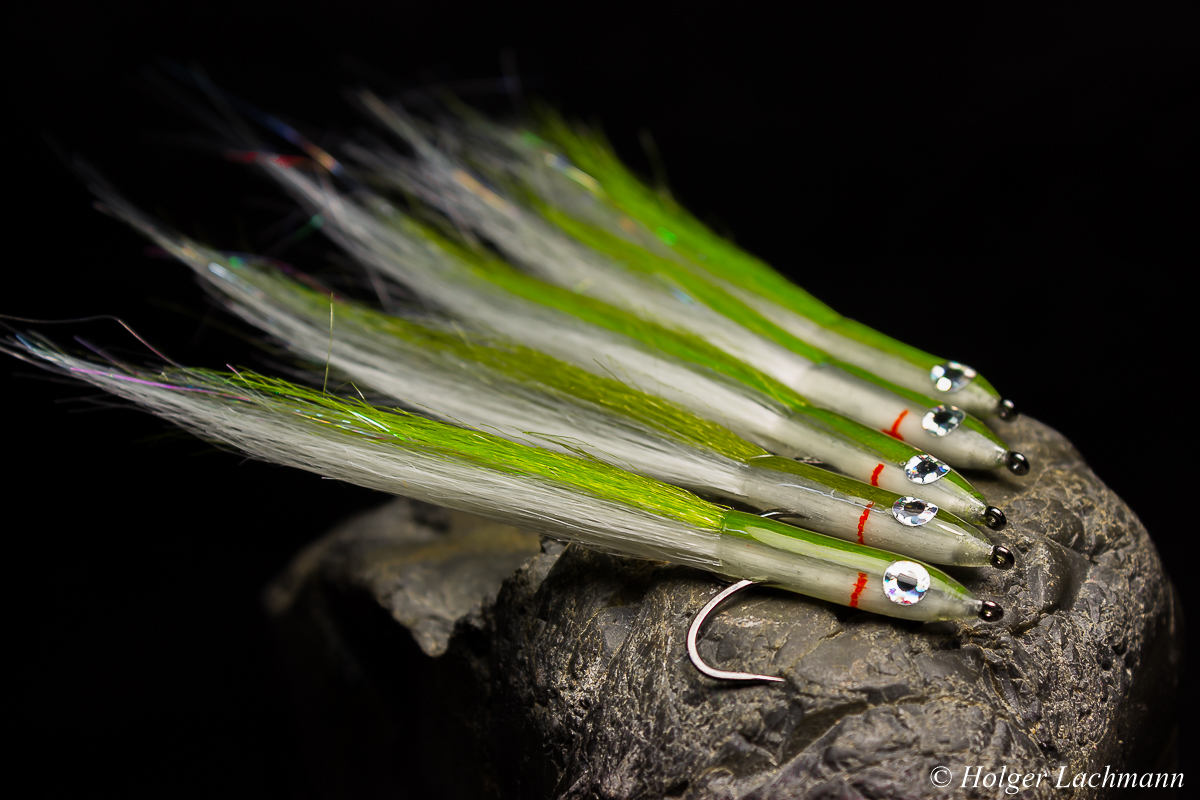
 

BEAD CHAIN EYES

Bead Chain Eyes (1)

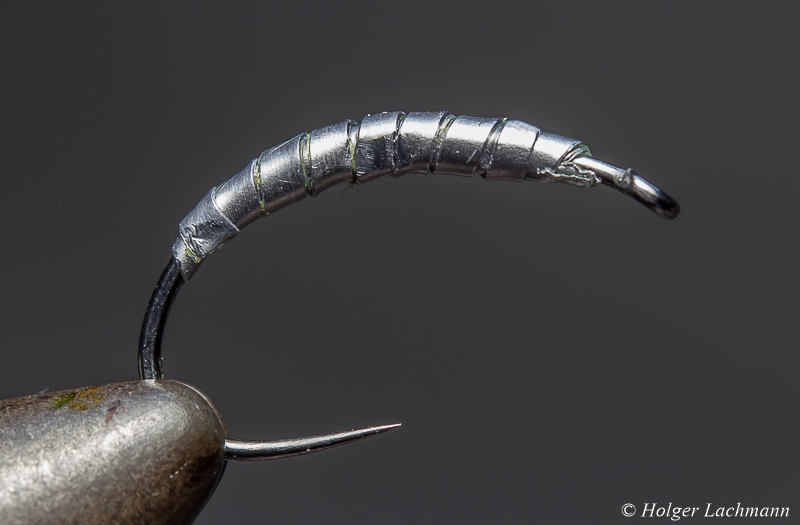
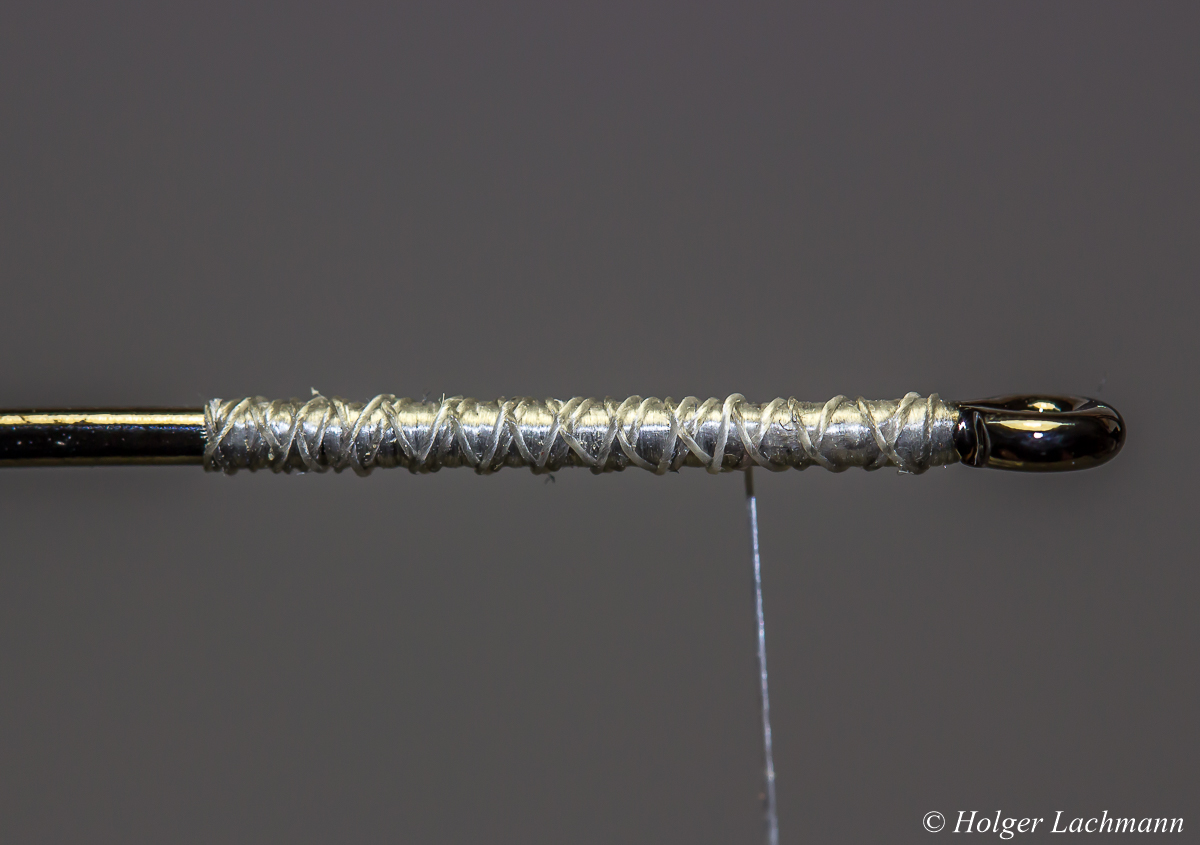
Ok, let’s start with the bead chain eyes: First, brush some super glue onto the hook shank. I like to use super glue gel.

Bead Chain Eyes (2)

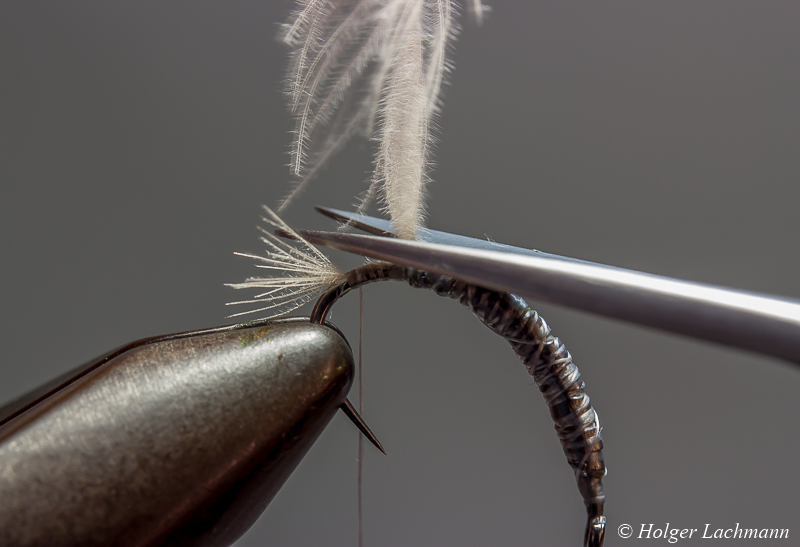
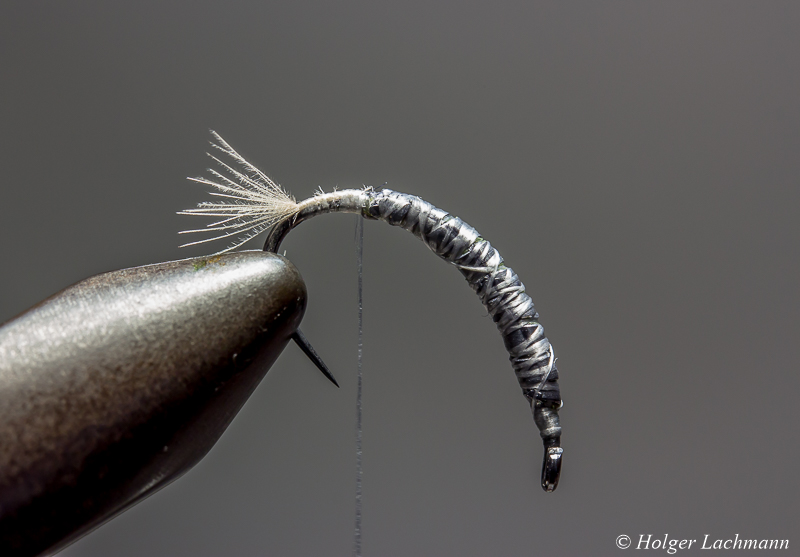
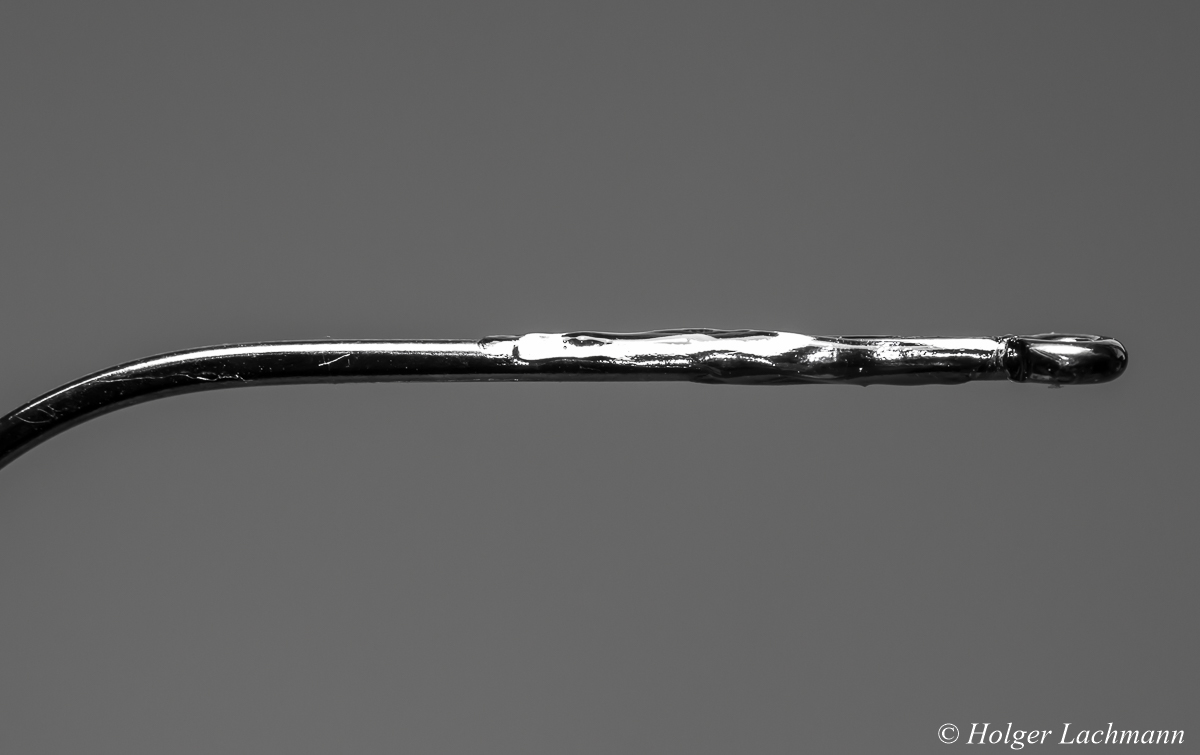
Twist the tying thread and do a nice layer of thread as a basement. Some glue will be pushed out between the windings of the thread. Don’t whip the glue away.

Bead Chain Eyes (3)Bead Chain Eyes (4)

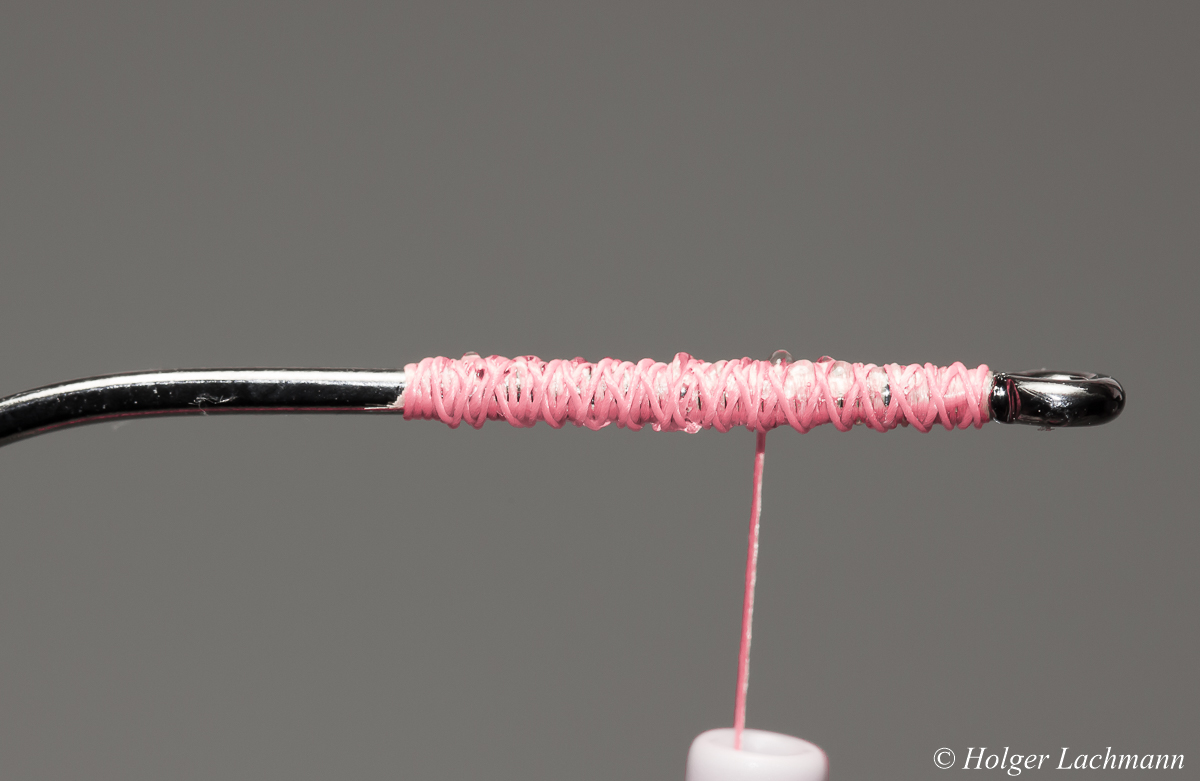
Go with thread in open windings from the back to the front and then to the back again. Then, wind the thread to the position, where you want to tie in the eyes. You can see, why you shouldn’t wipe off the super glue from the first tying step. You should tie with maximun thread-tension ALL THE TIME!

Bead Chain Eyes (5)

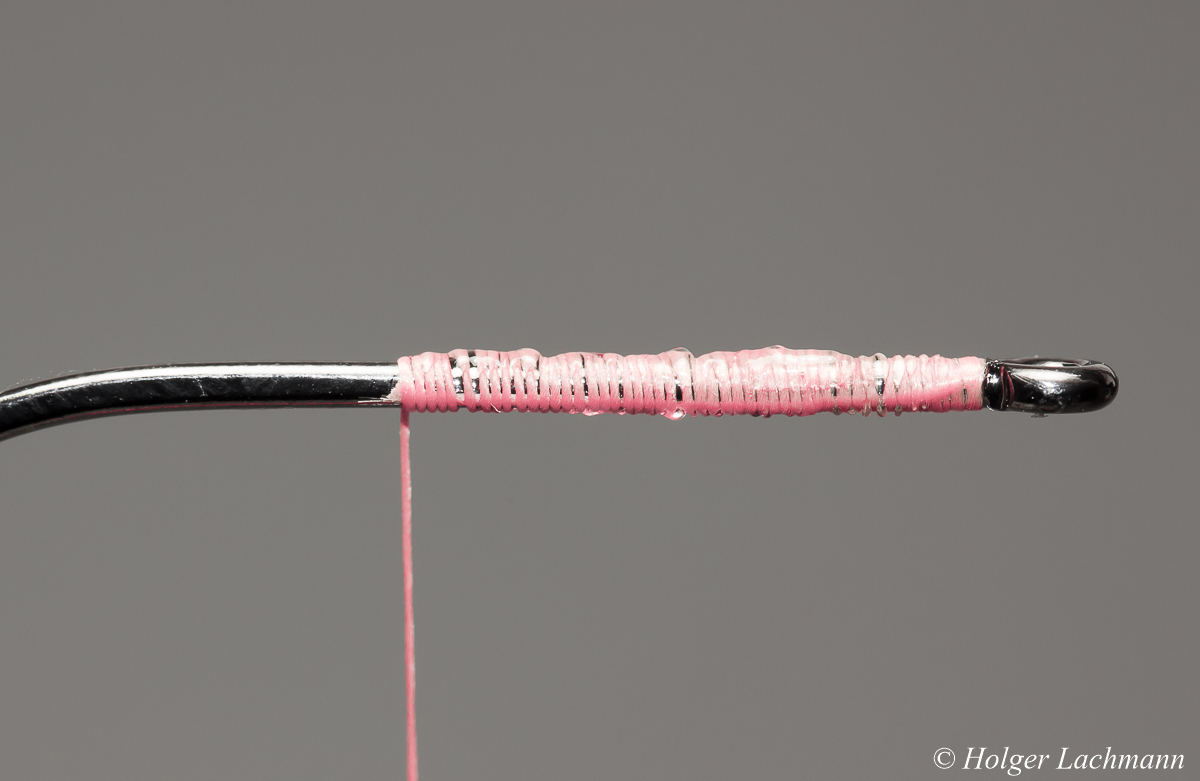
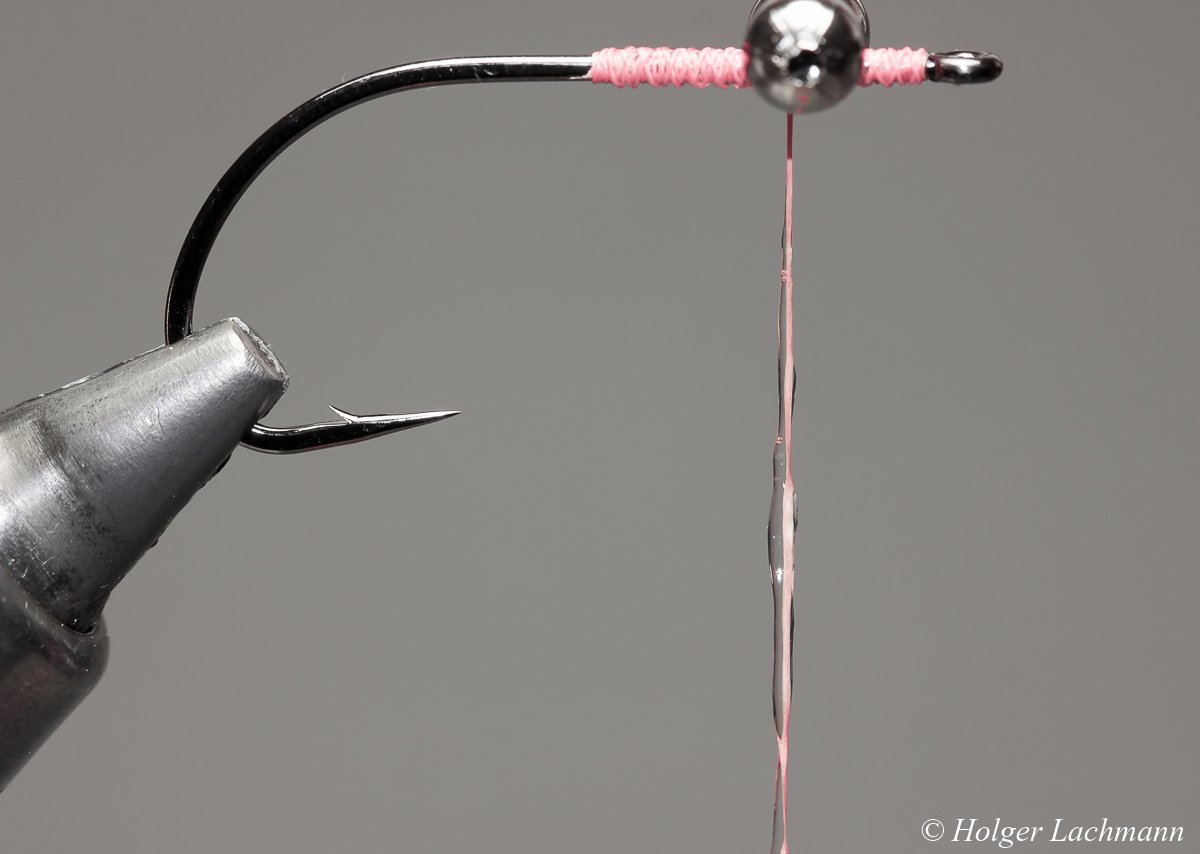
Tie in the bead chain eyes with only 2-3 turns of thread, not more!

Bead Chain Eyes (6)

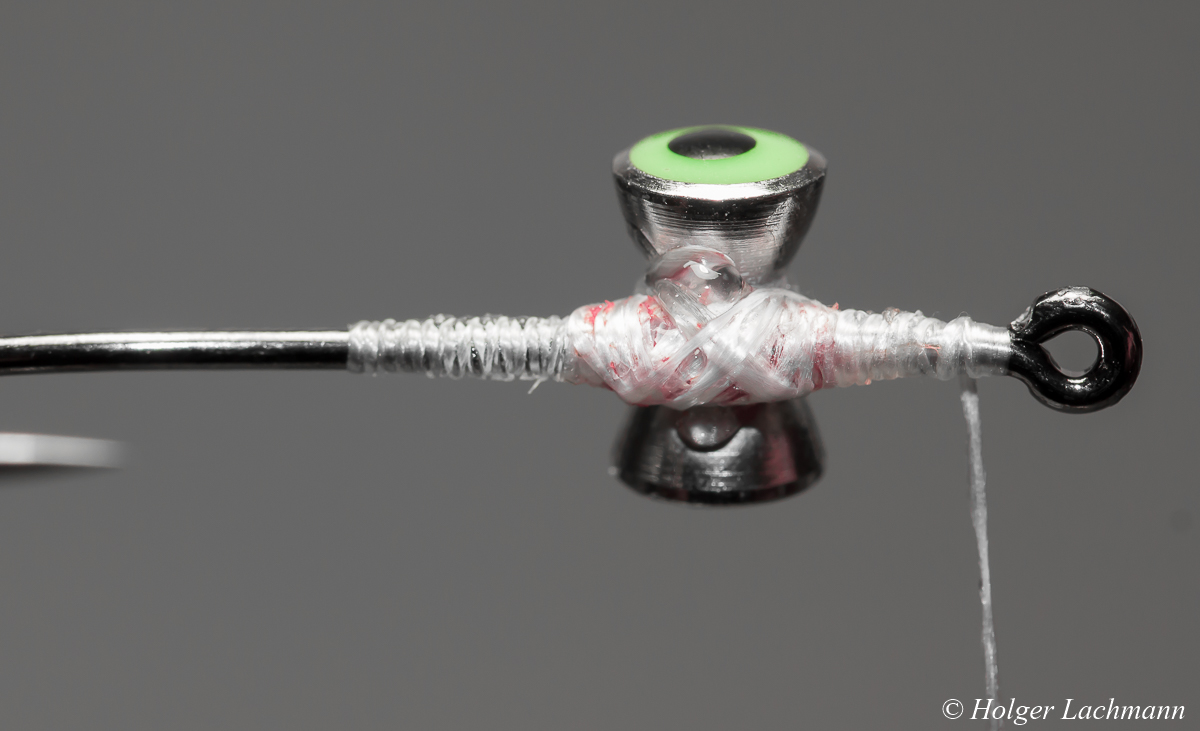
Now comes the „trick“: Brush some super glue on your tying thread like shown on the pictures.

Bead Chain Eyes (7)

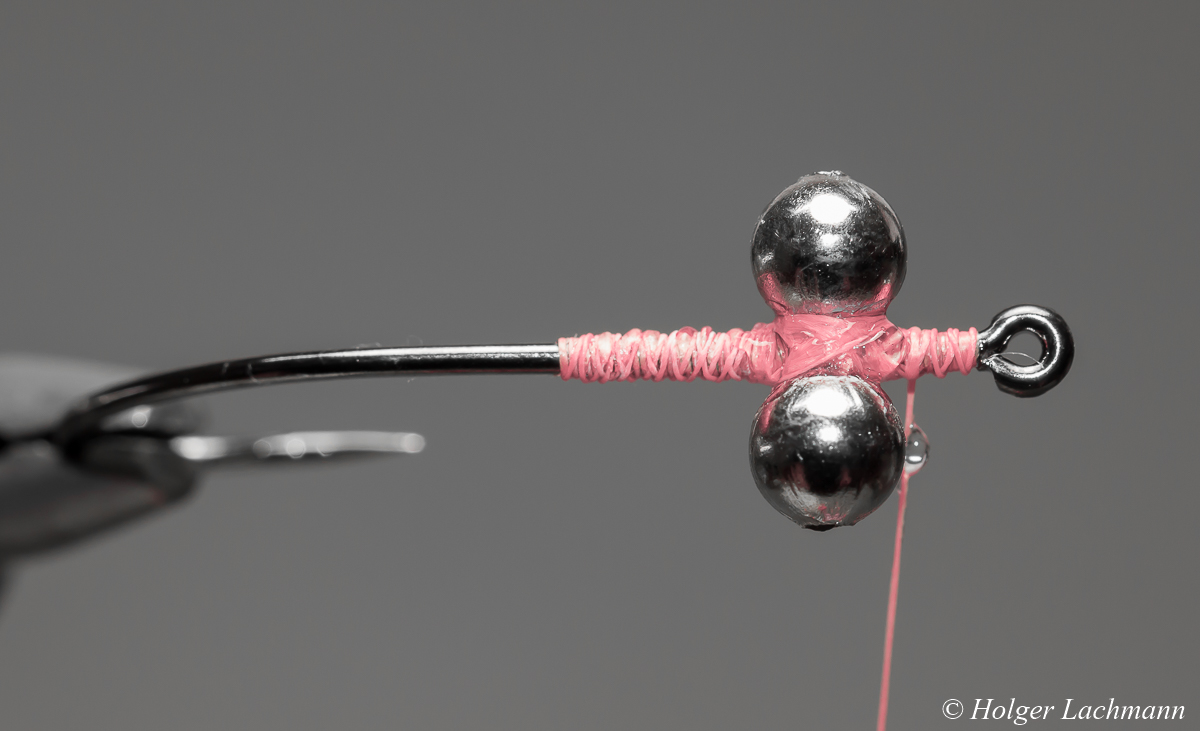
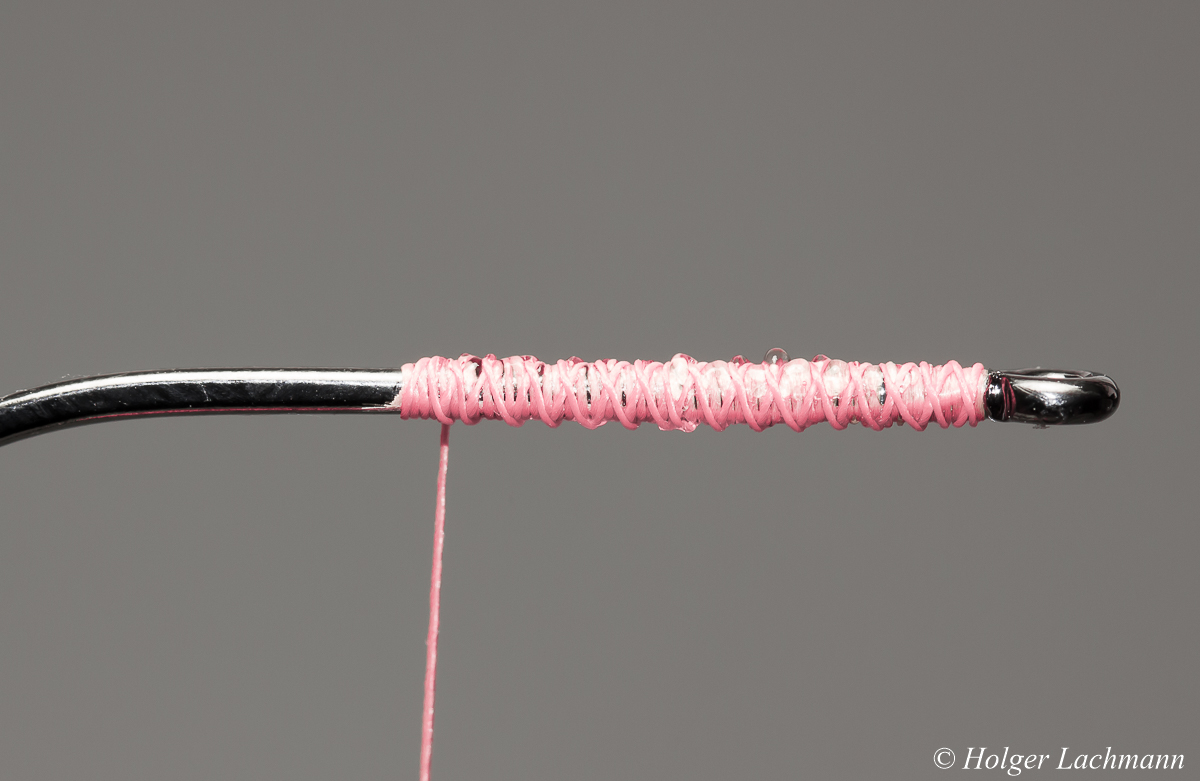
Wind the thread with the super glue in figure-8-turns around the eyes and the shank, like you normally do. Make sure, that the glue is everywhere. That’s the most important thing. The glue is not only on the top of the windings, it secures every single turn of thread and so it creates a perfect connection between hook shank, bead eyes and thread.

Bead Chain Eyes (8)

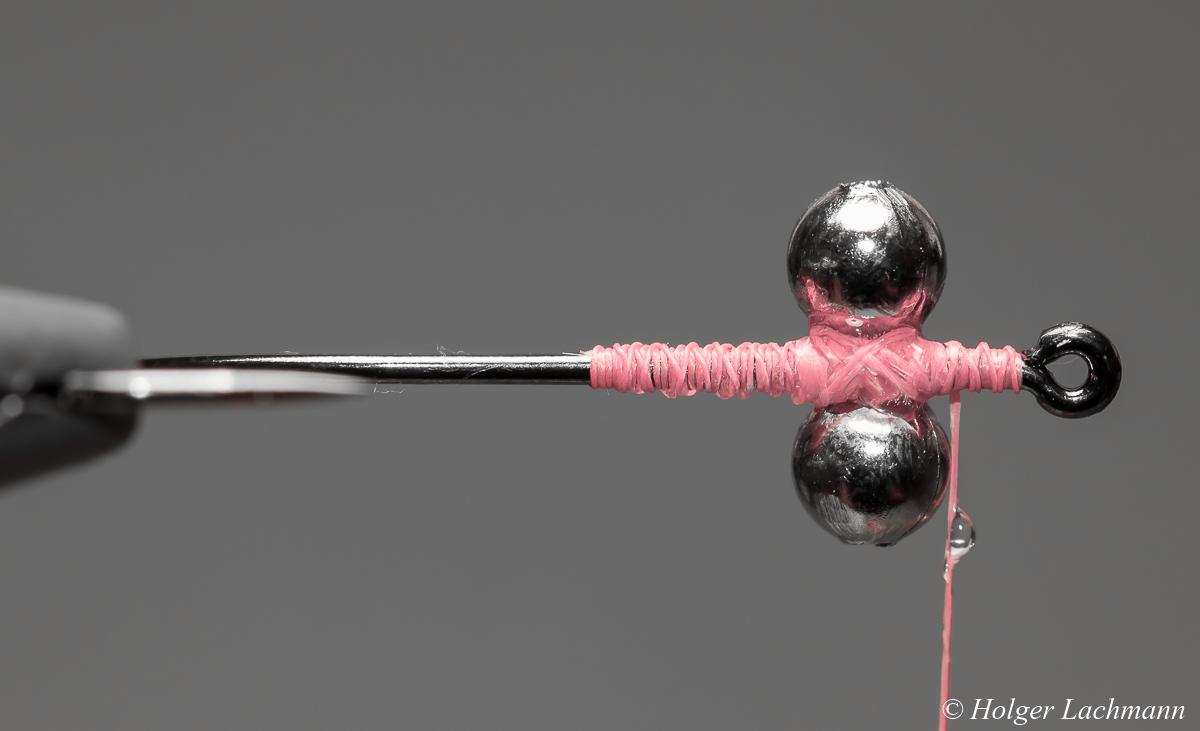
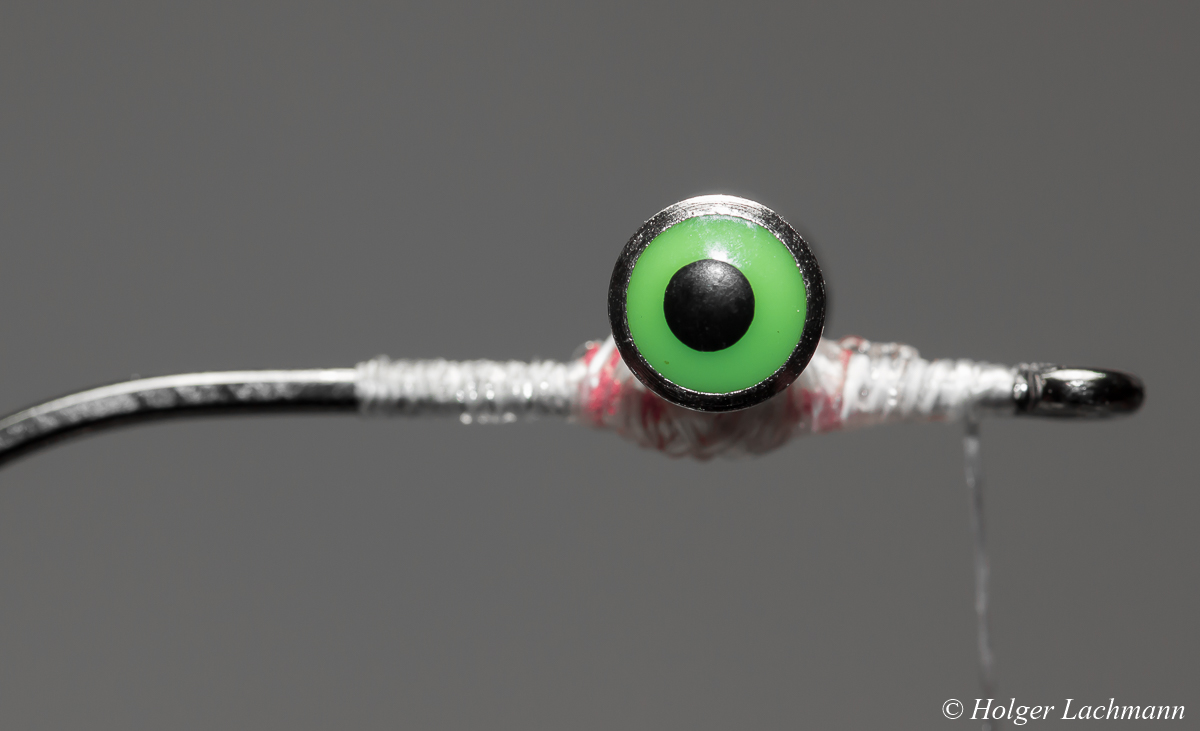
View on the underside of the eyes. You can see how the glue is pushed from one turn of thread to the next to create rock-solid bead eyes which won’t move, twist or slip no matter what you are doing to them during fishing. If you did it right, you will need pliers to twist them. The only way to connect them even more solid to the hook is to weld them onto the hook shank….! ;-)


Dumbbell Eyes

When you like to use dumbbell eyes, you may need a larger basement to secure them.        Dumbbell Eyes (1)

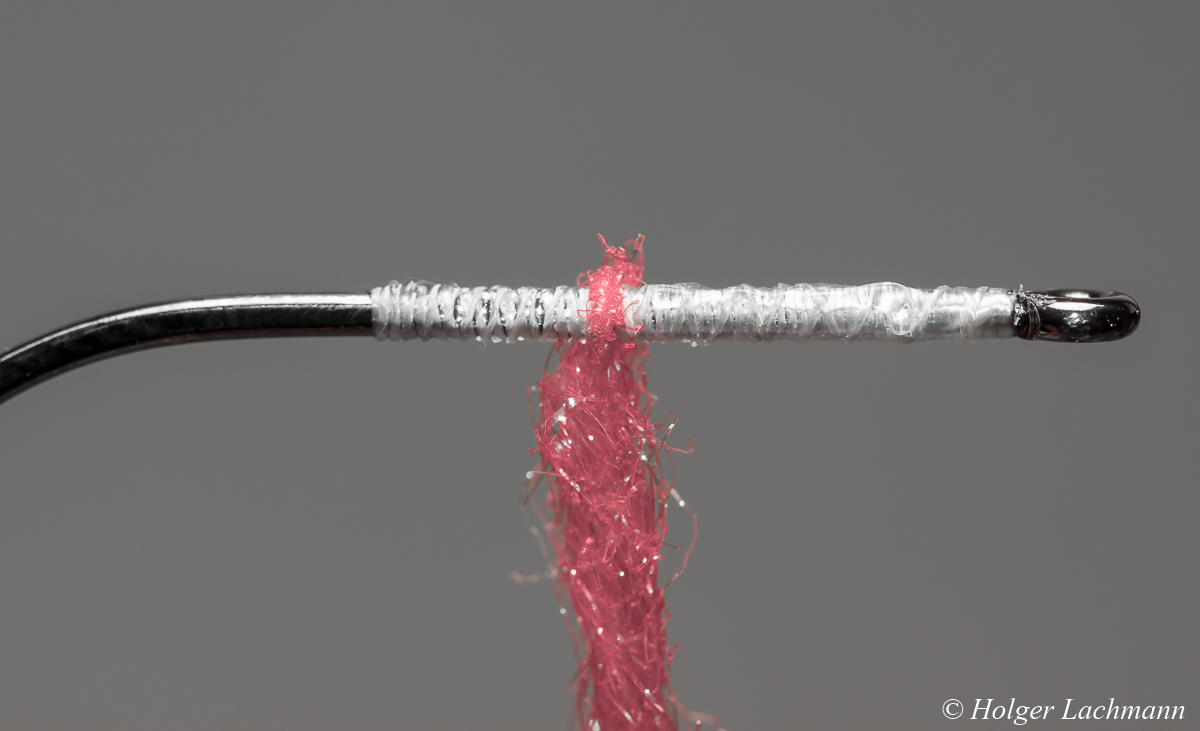
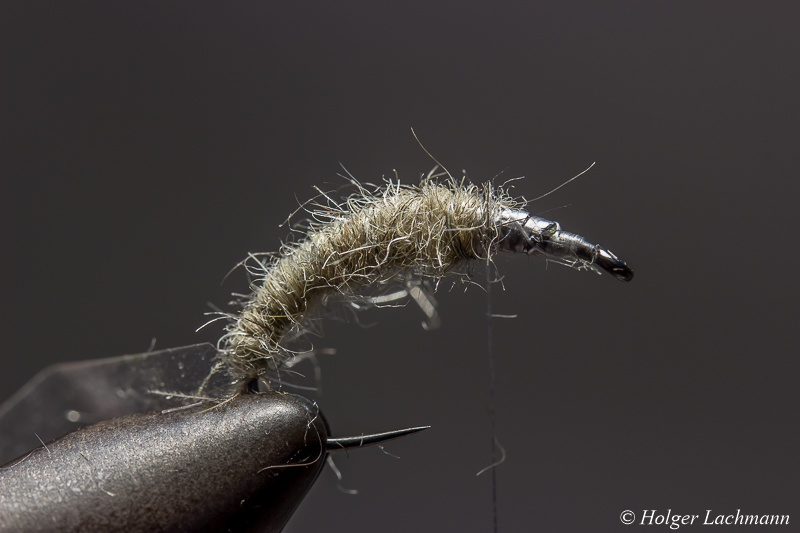
Tie the thread on the hook shank in the same way, like shown before with the bead chain eyes. Then take some dubbing (no matter what kind of dubbing, but synthetic works best), make a first turn.

Dumbbell Eyes (2)

Twist the dubbing around the thread to create a little dupping rope and wind it around the hook shank.

Dumbbell Eyes (3)

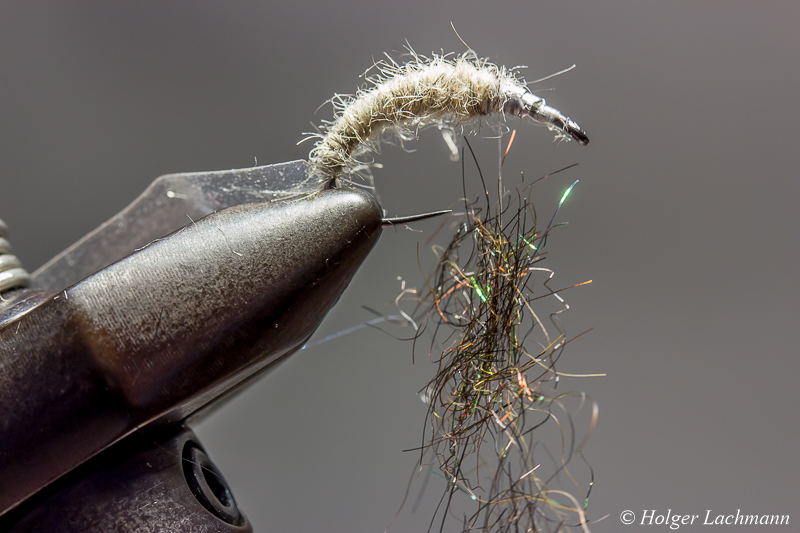
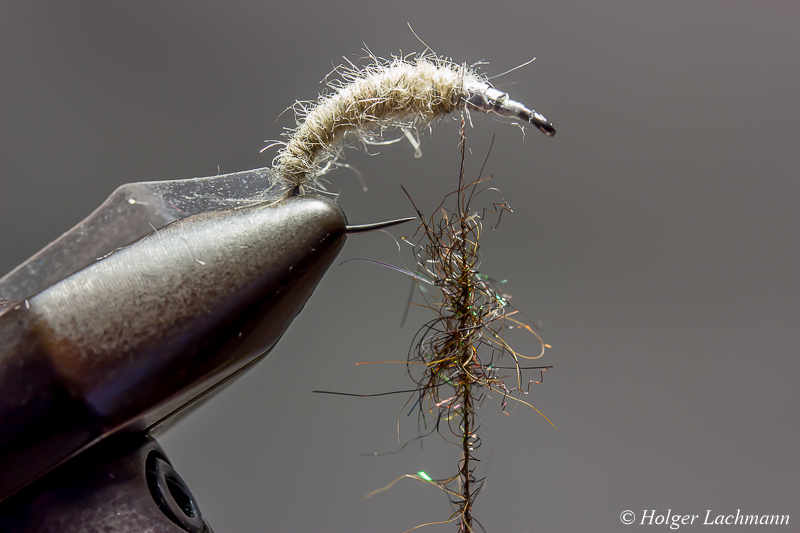
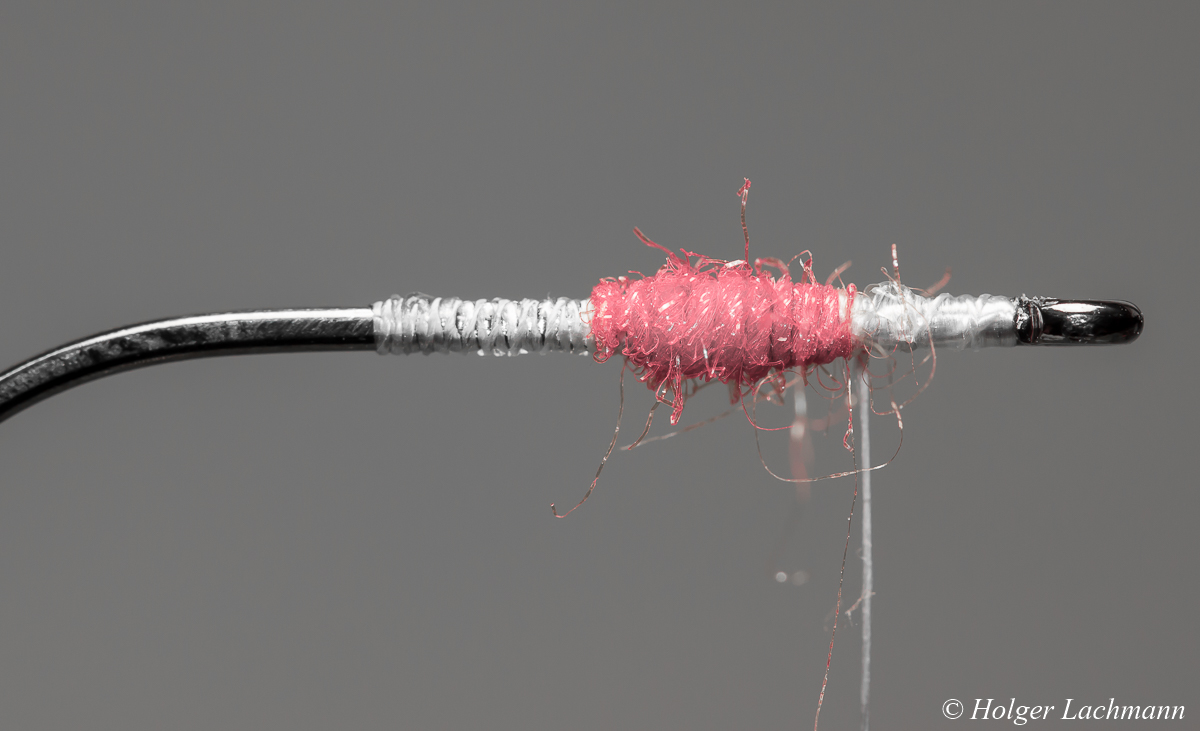
Put some super glue on the thread and do some open turns with your glue-thread back and forth over the dubbing with HIGH THREAD TENSION! Now, you got a larger solid basement for the dumbbell eyes.

Dumbbell Eyes (4)

Dumbbell Eyes (5)

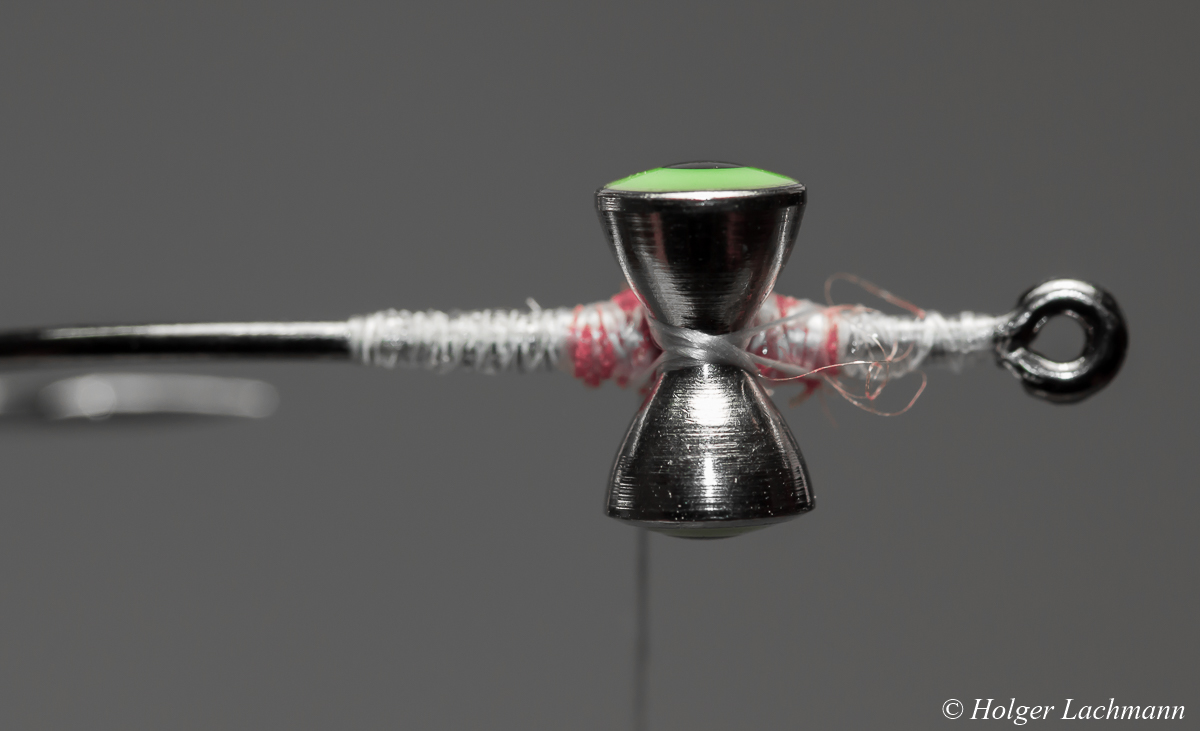
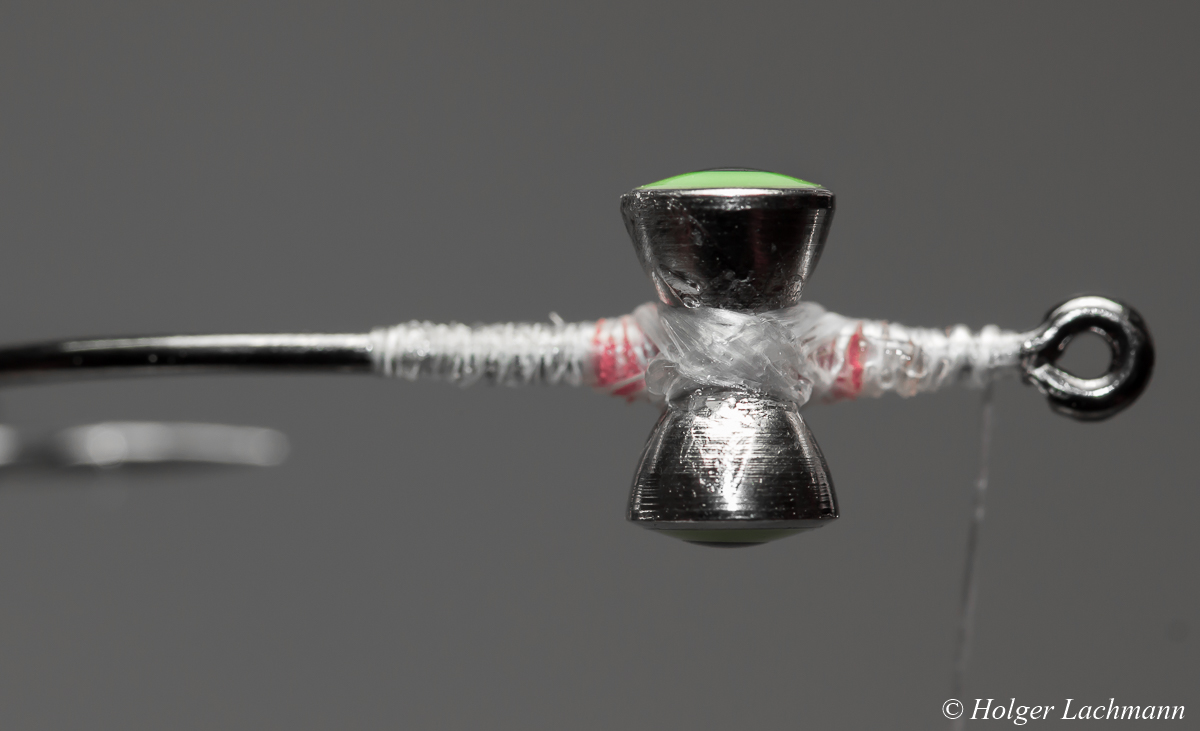
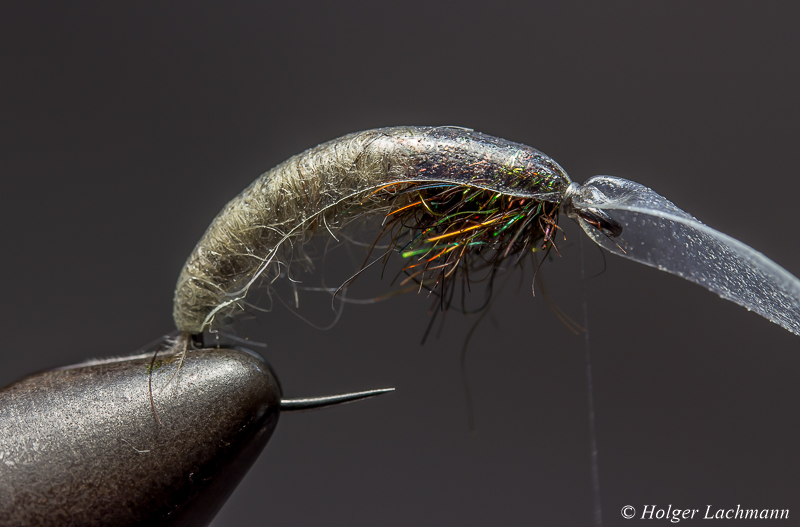
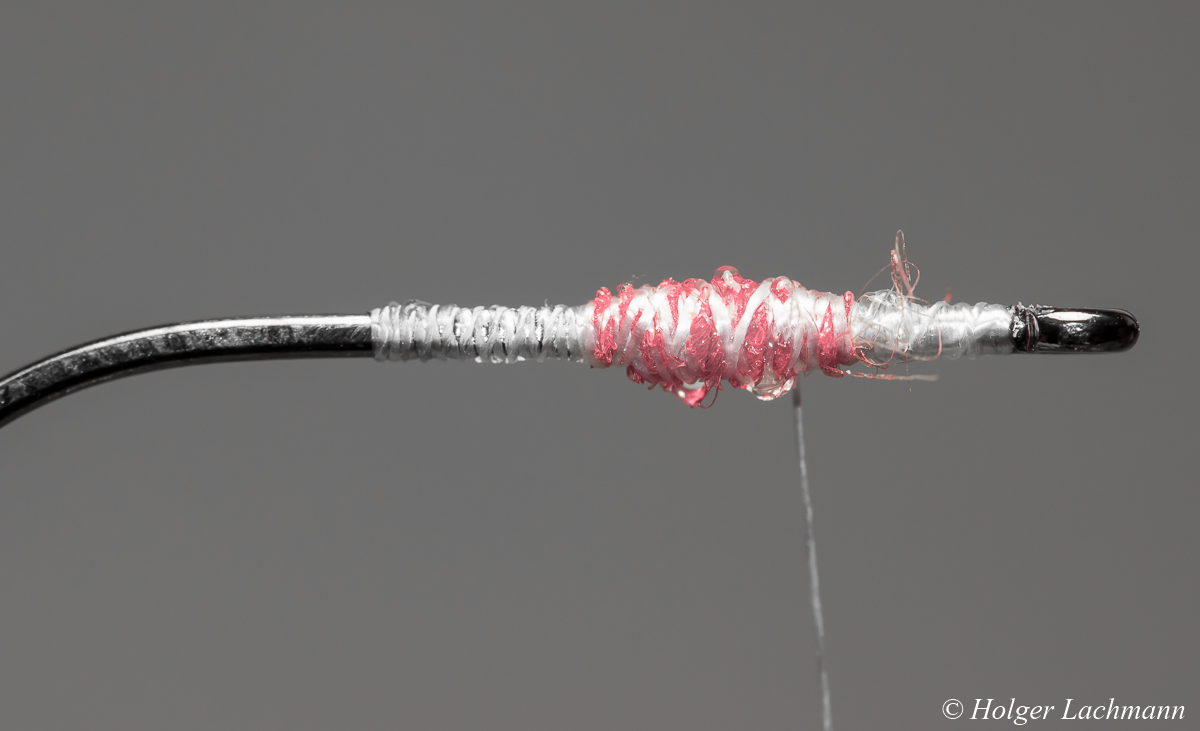
The next steps are the same like with the bead chain eyes. Attach the dumbbell eyes with 2-3 turns on the hook, put some super glue on the thread and wind it figure-8-like around the dumbbell eyes.

Dumbbell Eyes (6) Dumbbell Eyes (7)

That’s it! The dumbbell eyes will stay there forever! Now throw them to the toothy beasts ! :-D

Fishing For Chub At Noon

20150621_133334-1

I didn’t got a lot of time today, but I was able to drive at noon for an hour to the river to look for the chubs. On the 5th or 6th cast, I hooked a really nice fish. It fought very hard, like it was on steroids… I was sure, that the chub ruined the pool, but after some minutes I caught some more fish. A really nice short trip. The nymph I’ve used was tied 20 minutes befor I went to the river. ;-)

20150621_130545-1-2

A perfect big chub in top condition! Flawless! It doesn’t have to be trout or grayling all the time. Sometimes, the big chubs are harder to catch than trouts!

IMG_6246-1

Cased Caddis 2.0

IMG_20150515_105806

This time a Cased Caddis without tungsten beads. Weighted with lead wire. A simple pattern, but a good one.

Cased Caddis

IMG_5994-1

I didn’t tie a cased caddis since a looooooooooong time, but the nice flies of my buddy Thomas inspired me to think about a new pattern. To be honest, this is a mean fly because of the two tungsten beads. It sinks really fast. The case is secured with Bug Bond Lite, so it’s super durable and hard as the original. I will tie some more with less weight and different weight balances…

Fuzzy Emerger

IMG_5981-1-2

Tied on a Tiemco 212y #15, the nice segmented body made out of Stretch Flex is hanging in the surface. The dubbing, a mix of Hare’s Ear and Peacock Dubbing is imitating the legs and the CDC and Deer Hair makes this emerger float quite well. Just don’t put floatant on the body.

Good during mayfly hatches and works on a caddis hatch, too.

Captain FuzzyBug’s ready for a new mission

Is it a wetfly? Is it a nymph? Is it a flymph? – It’s CAPTAIN FUZZYBUG!

IMG_5930-1

Sometimes trout like flies, which are presented actively. That happend to me the last time at the river. Dead drift was not what they liked. The „Leisenring Lift“ brought fish and wet fly swing with a little bit shaking.

Normal wetflies often fish to high in the water, especially in spring, when the water is still very cold and the fish are not willing to rise. CAPTAIN FUZZYBUG is weighted and swings deeper in the water column.

The mix of partridge, hare’s ear, ice dub, tinsel and CDC gives this fly the fuzziness and the trouts the illusion of something eatable. It’s a „in case of“-fly which produces takes even if the normal patterns won’t work.

It’s also not complicated to tie, so tie 3-4 and put them in your fly box. You’ll never know when you’ll need the help of CAPTAIN FUZZYBUG! ;-)

Caddis Larva Step By Step

IMG_5634-1

Here we go again! After moving to a new server, it’s time for a new step by step tutorial. This Caddis Larva is a very nice imitation of the original and it’s still quite easy to tie. So, it’s not a drama, when you lose it on the river bottom.

You have to fish this larva deep, that’s why there is a lot of weight in it. It still got a slim body, so it sinks fast to the ground. You will find Caddis in almost every river and it’s an important part of the fish’s menu.The coloration with the brown line on the abdomen is not a must. I just did it to show you what for possibilities you have with ordinary marker pens. It’s tied on a # 10 hook, which sounds pretty big, but the body length is close to the original, just try to keep a slim, natural looking body. Ok, let’s start!

Materials:

  • Hook: Demmon Competition G601 BL Fly Hook # 10
  • Weight: Lead-Foil
  • Ribbing: Mono 0,10mm
  • Back: Stretch Flex Clear
  • Abdomen: Sow Scud Dubbing Beige
  • Thorax: Siman Peacock Dubbing Brown
  • Thread: G.S.P. 50 D
  • Coloration: Edding 3000 Marker Pens

IMG_5603-1

IMG_5605-1

Wind the lead foil in multiple layers around the hook.

IMG_5607-1-2

IMG_5608-1

IMG_5609-1

IMG_5610-1

IMG_5611-1

Take a CDC feather and cut out the feather steam on the top and tie the feather in like shown on the pictures to create the little tail.

IMG_5612-1

IMG_5613-1

Take the stretch flex and tie it in at the back of the fly. Do the same with the mono for ribbing.

IMG_5614-1

Dub the abdomen on 3/4 of the hook shank with a nice tapering.

IMG_5616-1

IMG_5618-1

IMG_5619-1

Split the thread with your dubbing needle, put the peacock dubbing in the gap, rotate your bobbin to spin the dubbing and wind it around the hook to create the thorax and the legs in on step. Leave a little bit space for the head next to the hook eye.

IMG_5621-1

IMG_5623-1

IMG_5624-1

Fold the stretch flex to the front and catch it with your tying thread next to the hook eye. Fold it back, catch it again with your thread and cut away the excess. That’s the easiest way to form a nice head.

IMG_5625-1

IMG_5628-1

Take the mono and ribb the abdomen in small segments and the thorax in two bigger segments. Catch the ribbing with your tying thread and cut it off. Do two whip finish, cut the tying thread and the tying is done.

IMG_5631-1

IMG_5632-1

IMG_5634-1

With the marker pens, you can give the larva the coloration of your liking or the spicific colors of the originals in your home waters. Put a drop of varnish on the head and the fly is finished, ready to be presented to the fish of your dreams! :-)

Tight lines!