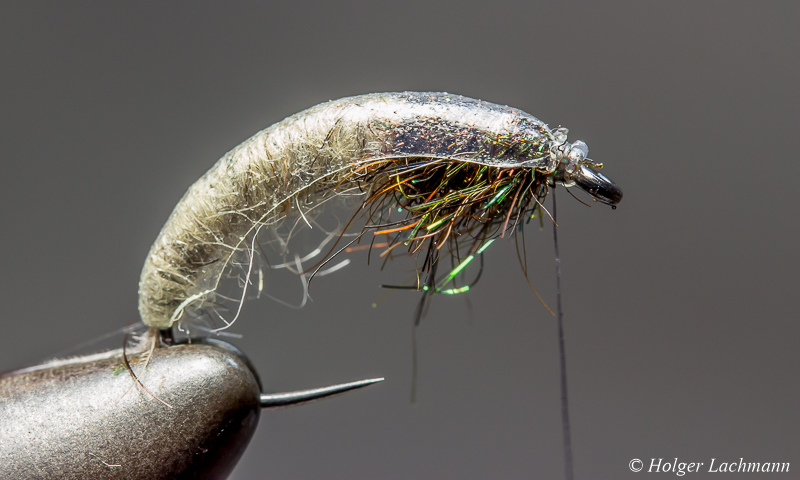
Peeping Caddis
Antworten


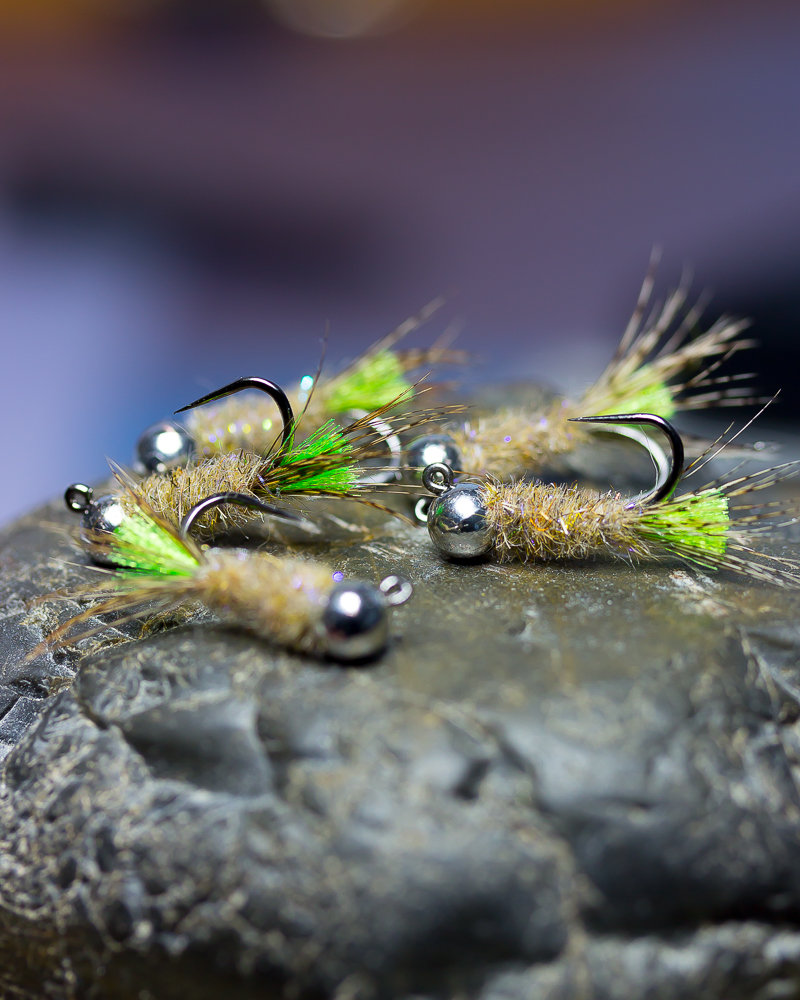
I like those kind of nymphs. Easy to tie, very durable and it sinks extremely fast, because of the weight and the slim profile. Top fishing fly.

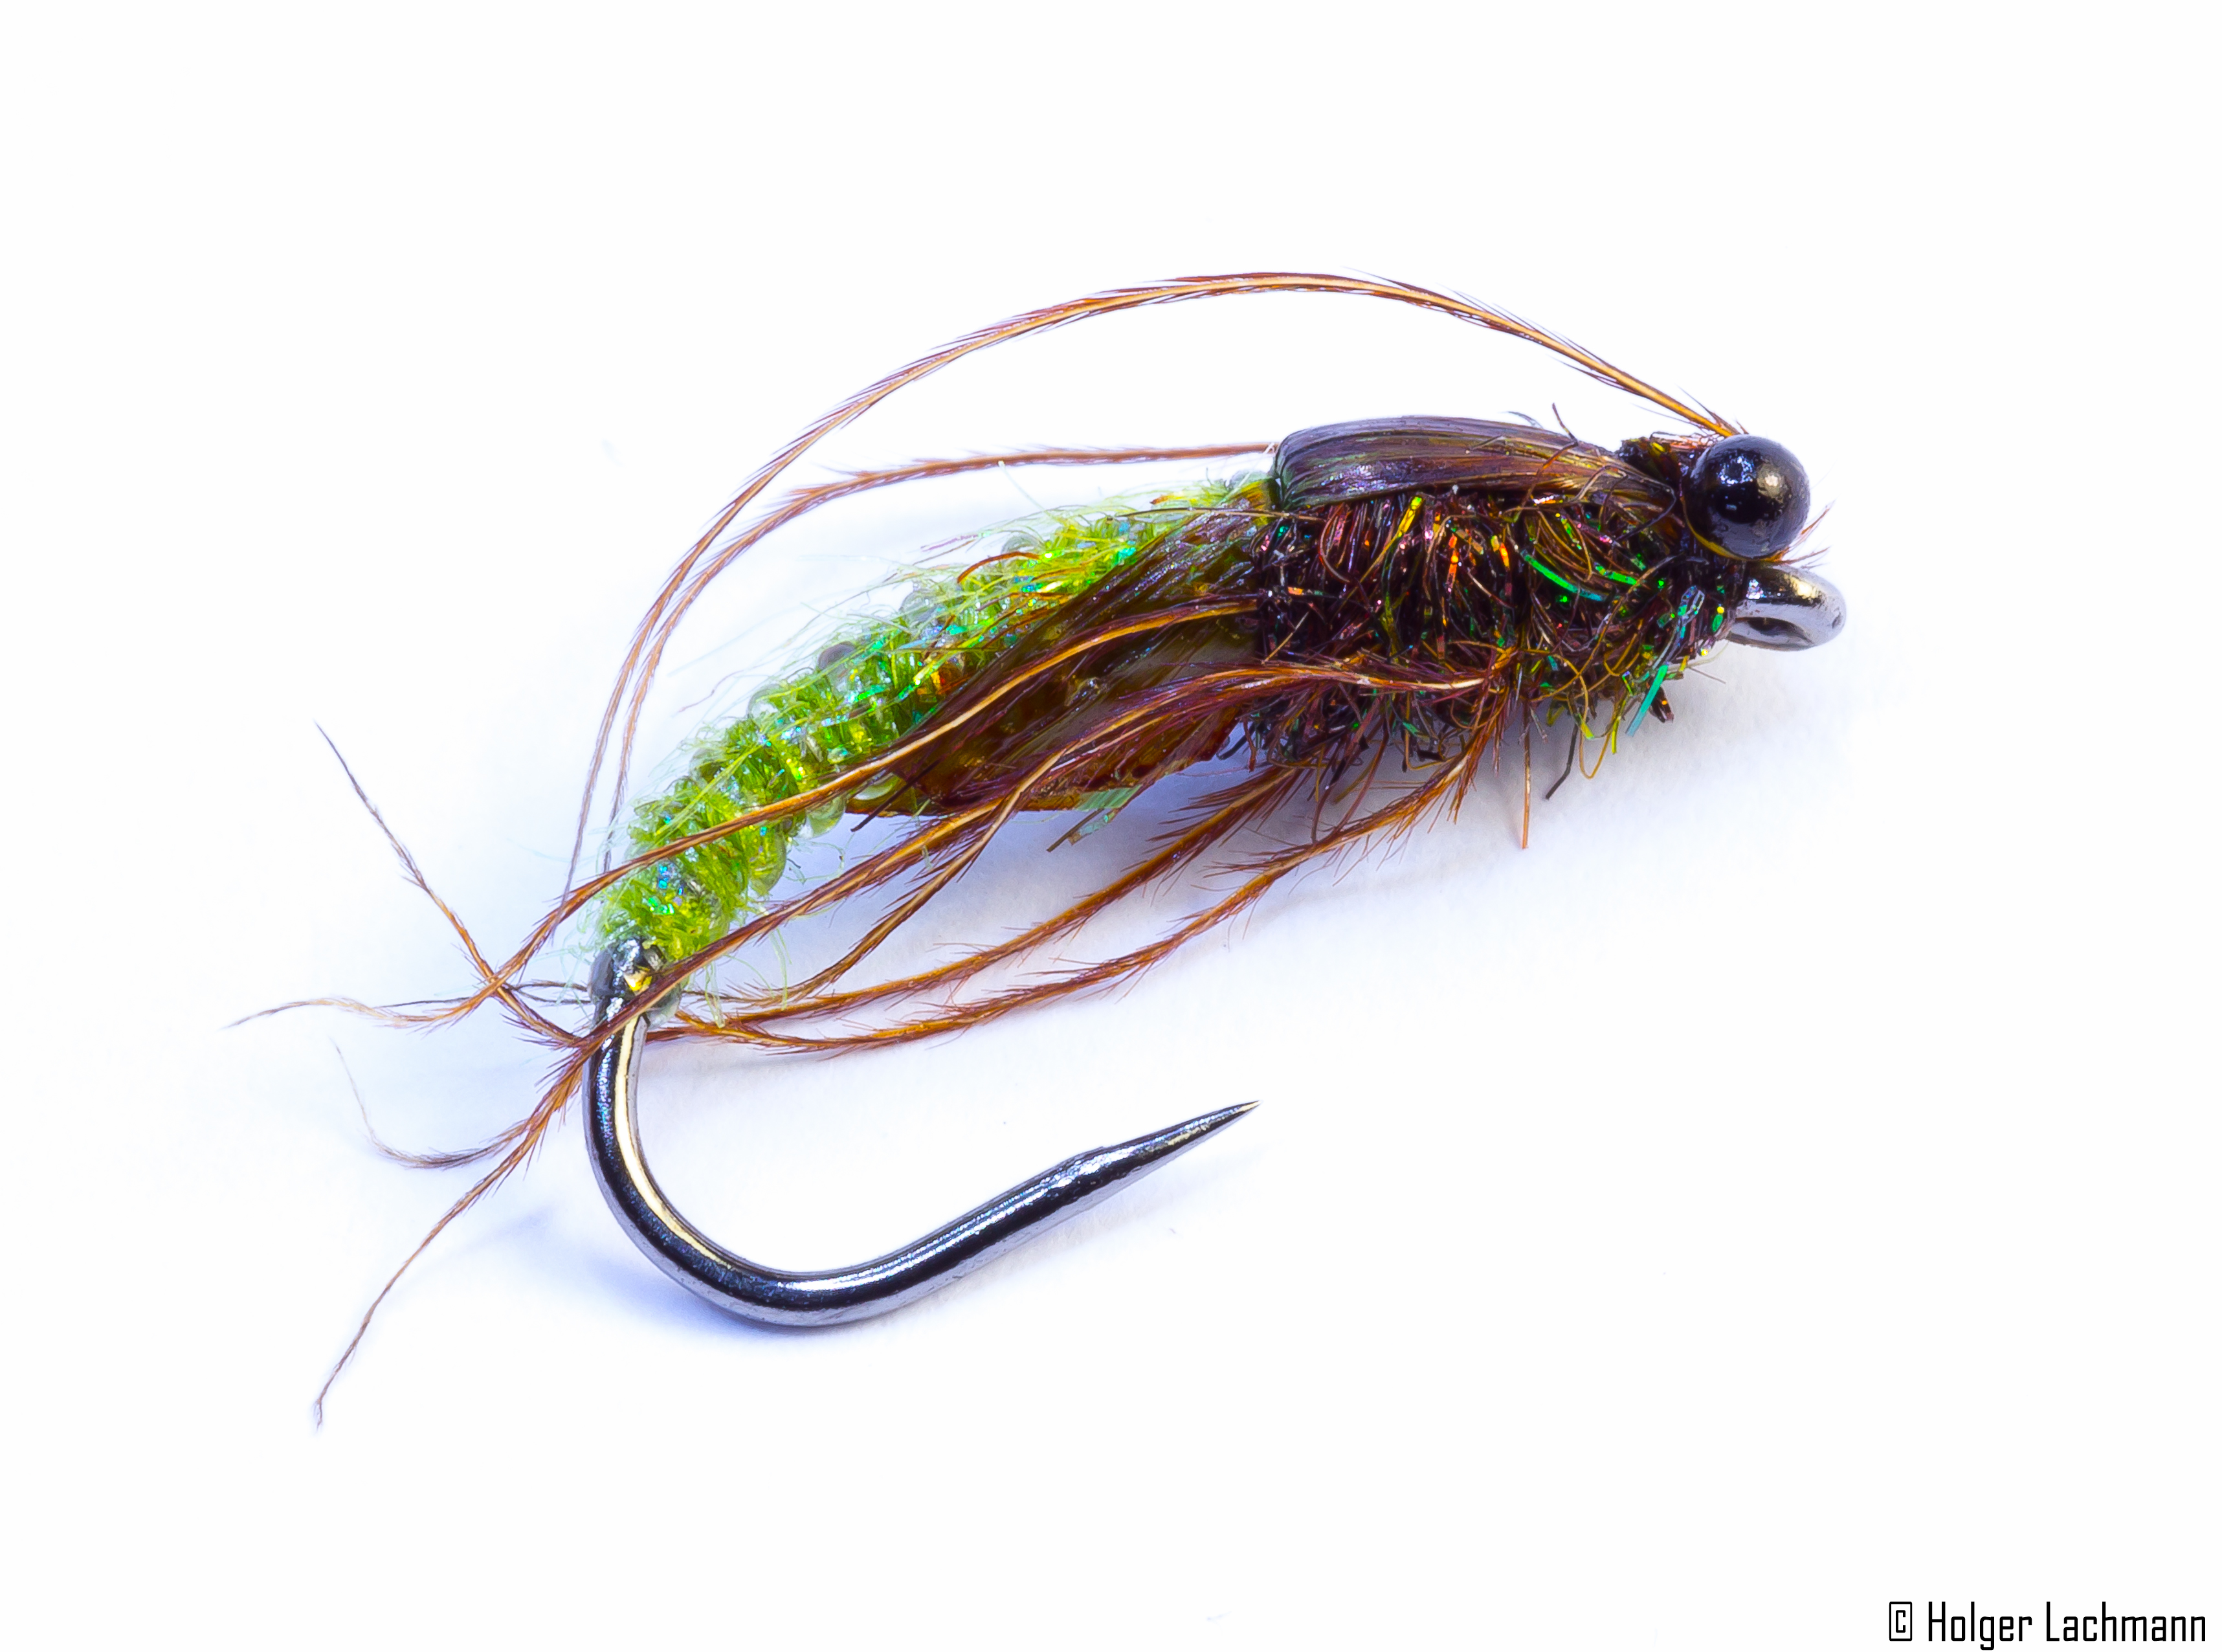
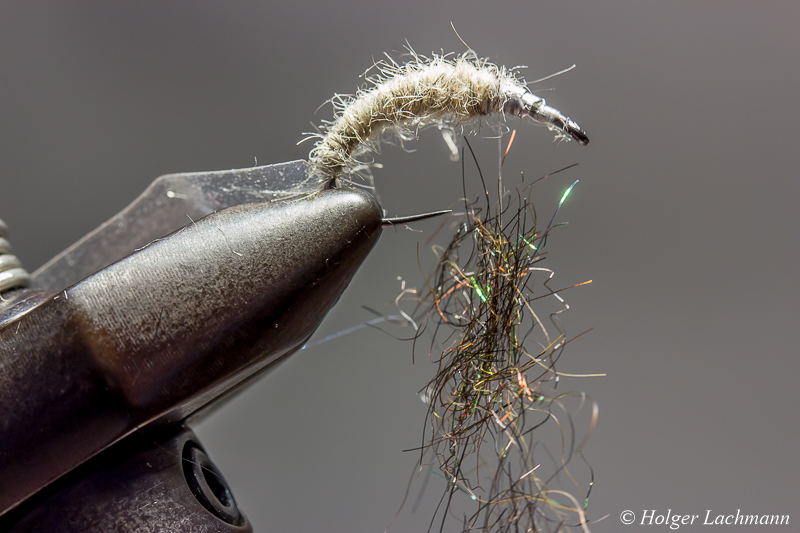
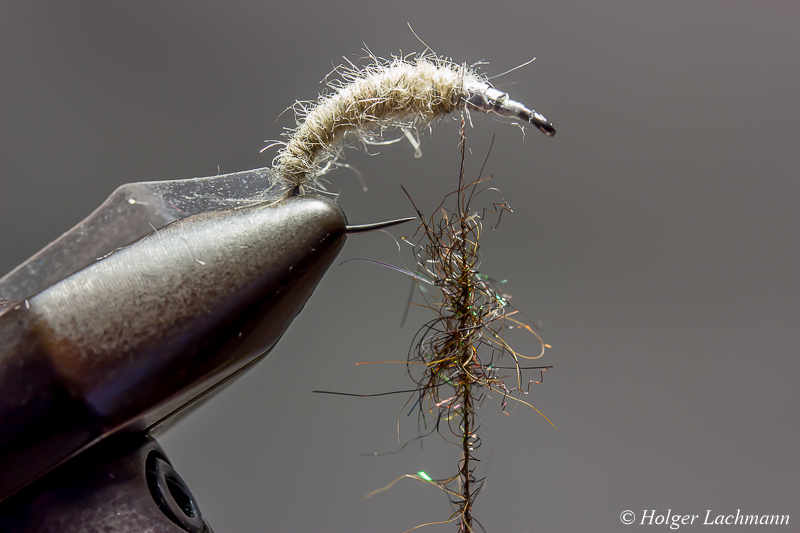
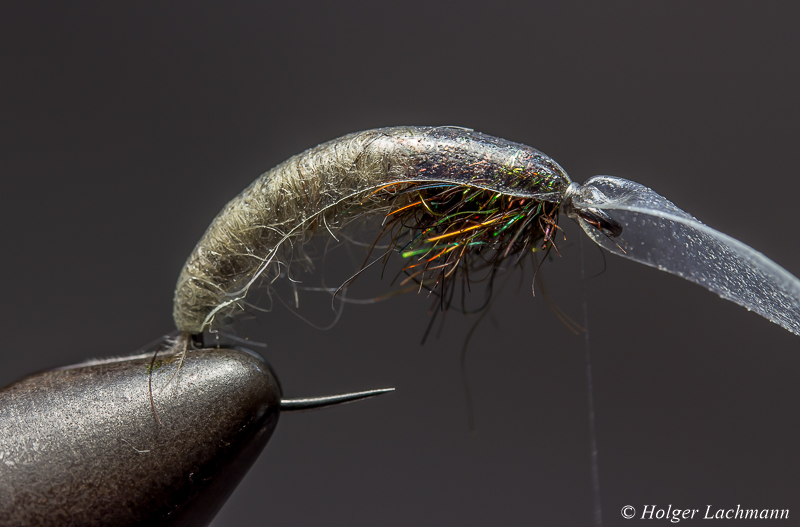
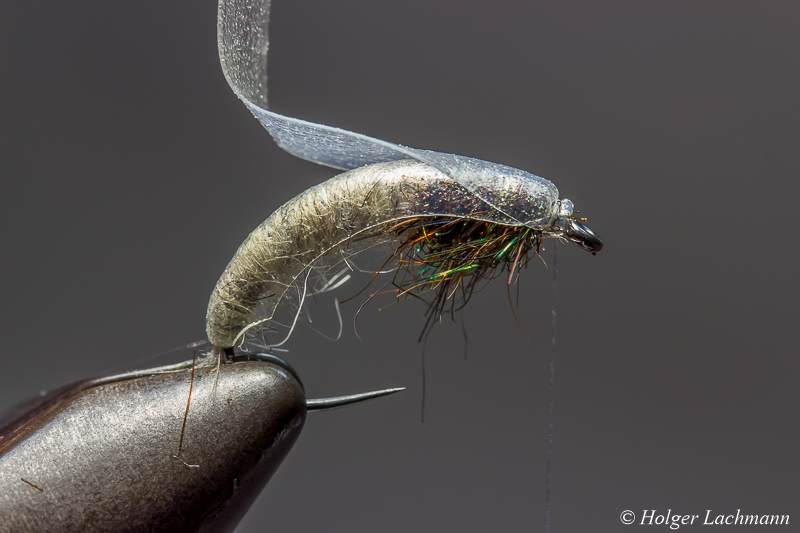
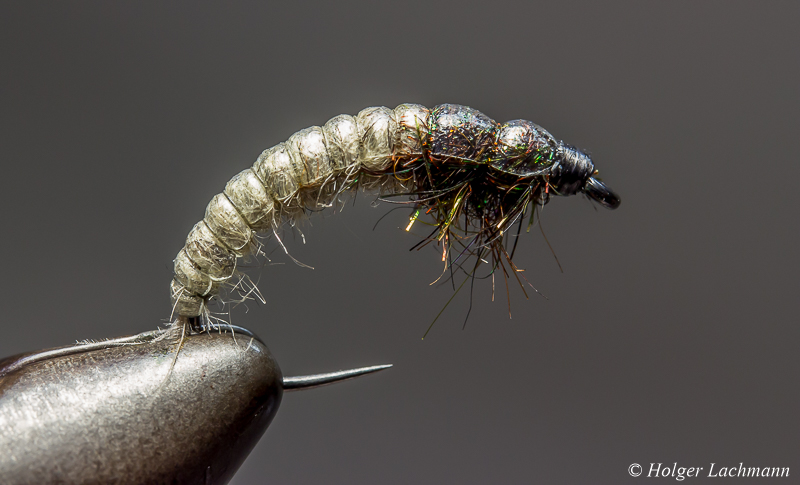
This time a Cased Caddis without tungsten beads. Weighted with lead wire. A simple pattern, but a good one.
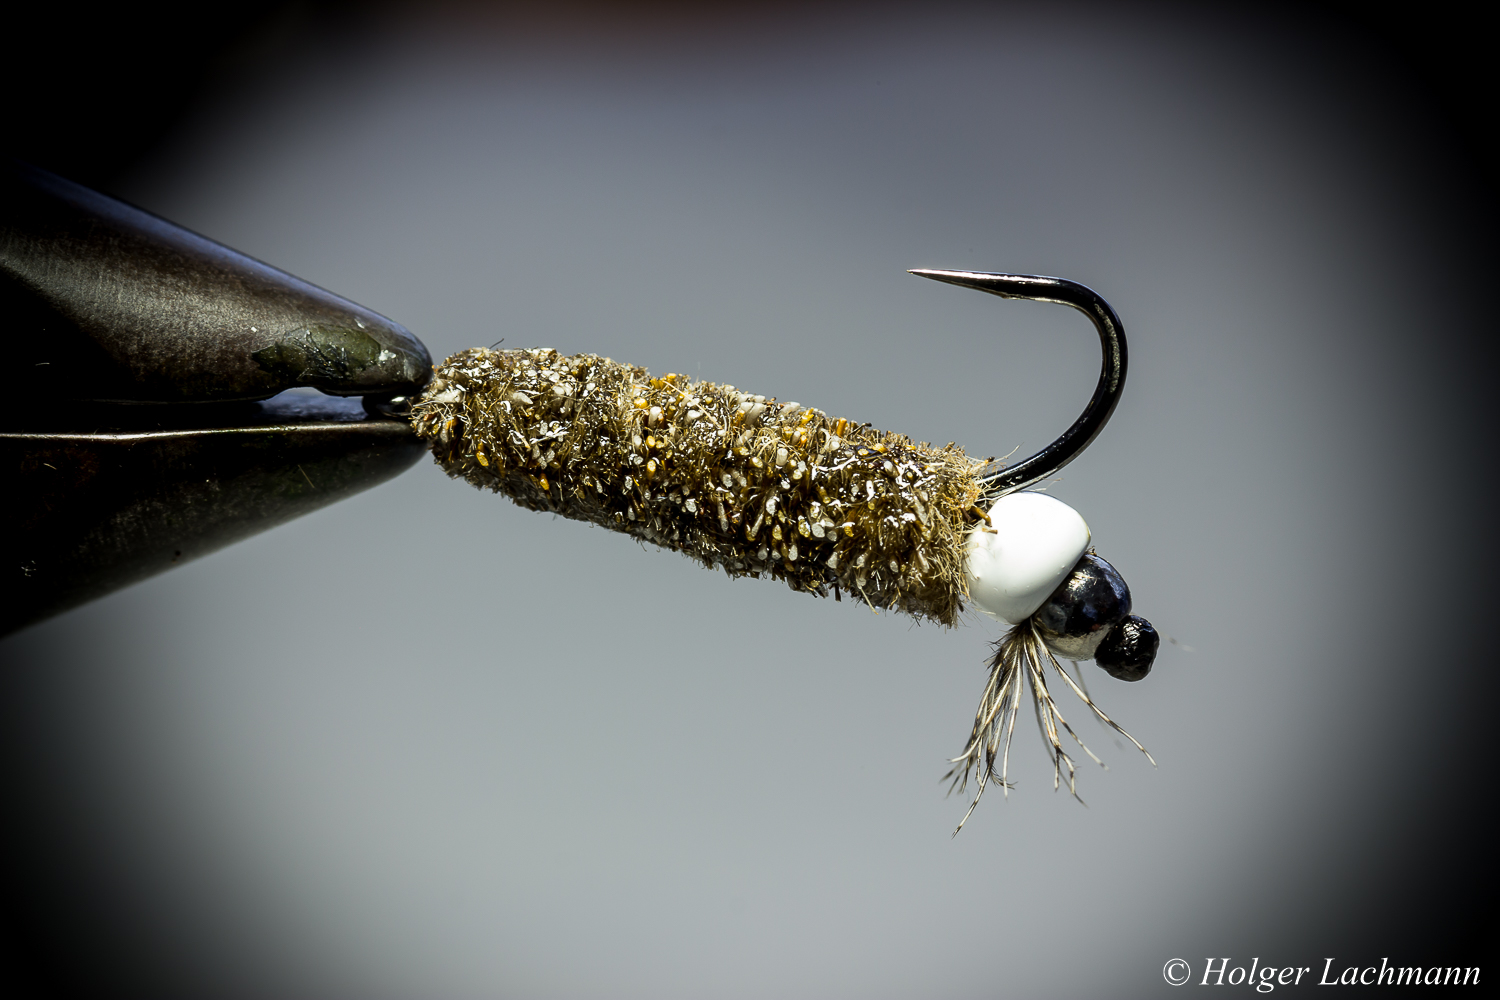
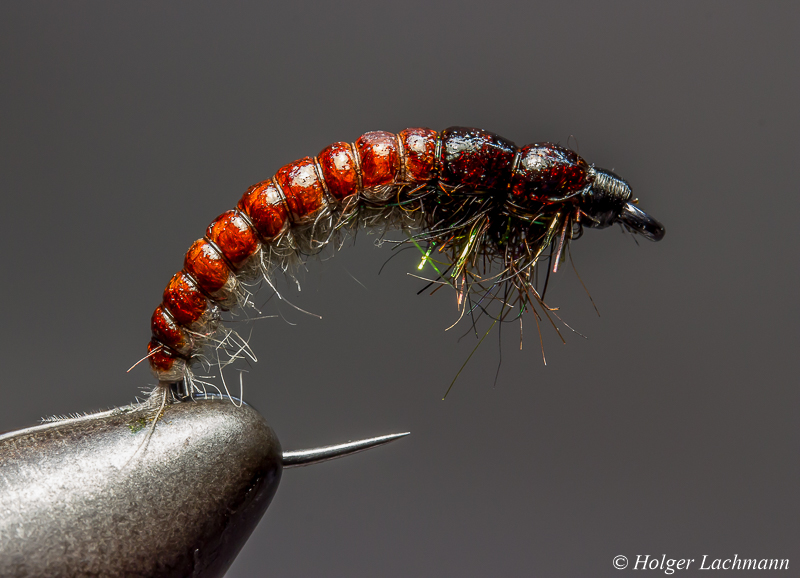
I didn’t tie a cased caddis since a looooooooooong time, but the nice flies of my buddy Thomas inspired me to think about a new pattern. To be honest, this is a mean fly because of the two tungsten beads. It sinks really fast. The case is secured with Bug Bond Lite, so it’s super durable and hard as the original. I will tie some more with less weight and different weight balances…
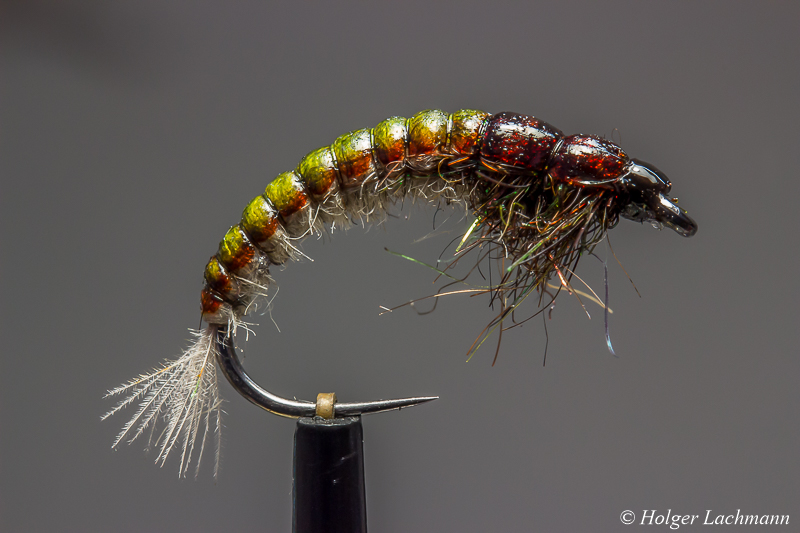
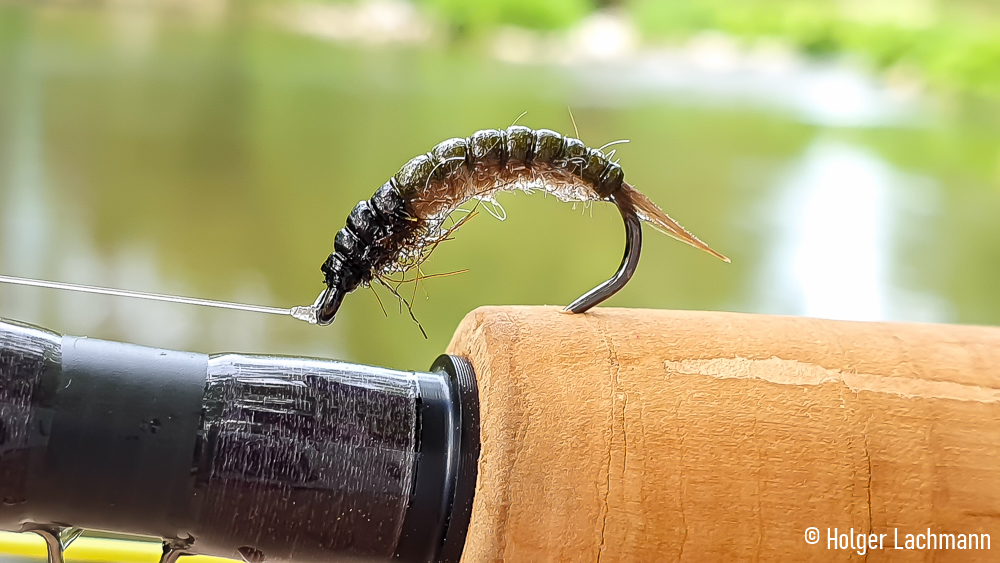
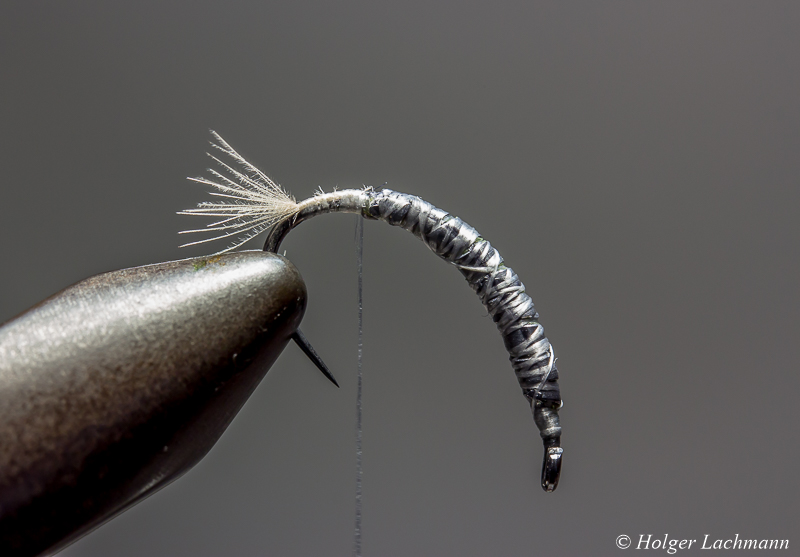
Here we go again! After moving to a new server, it’s time for a new step by step tutorial. This Caddis Larva is a very nice imitation of the original and it’s still quite easy to tie. So, it’s not a drama, when you lose it on the river bottom.
You have to fish this larva deep, that’s why there is a lot of weight in it. It still got a slim body, so it sinks fast to the ground. You will find Caddis in almost every river and it’s an important part of the fish’s menu.The coloration with the brown line on the abdomen is not a must. I just did it to show you what for possibilities you have with ordinary marker pens. It’s tied on a # 10 hook, which sounds pretty big, but the body length is close to the original, just try to keep a slim, natural looking body. Ok, let’s start!
Materials:
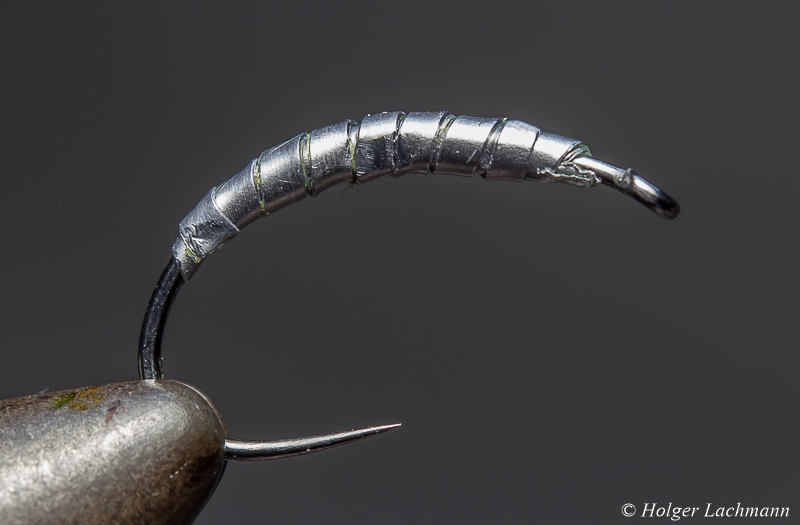
Wind the lead foil in multiple layers around the hook.
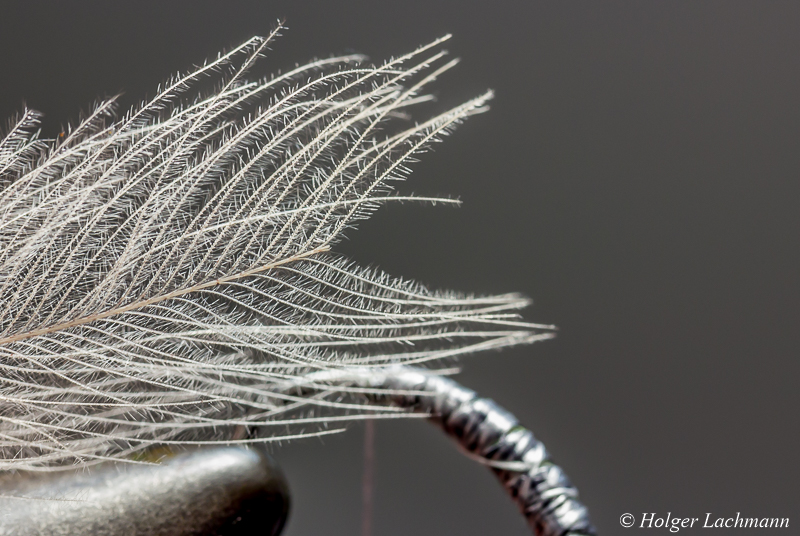
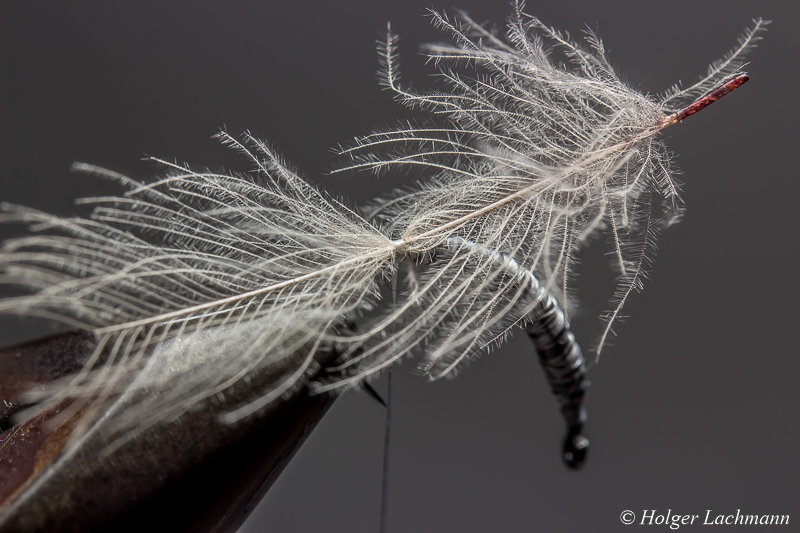
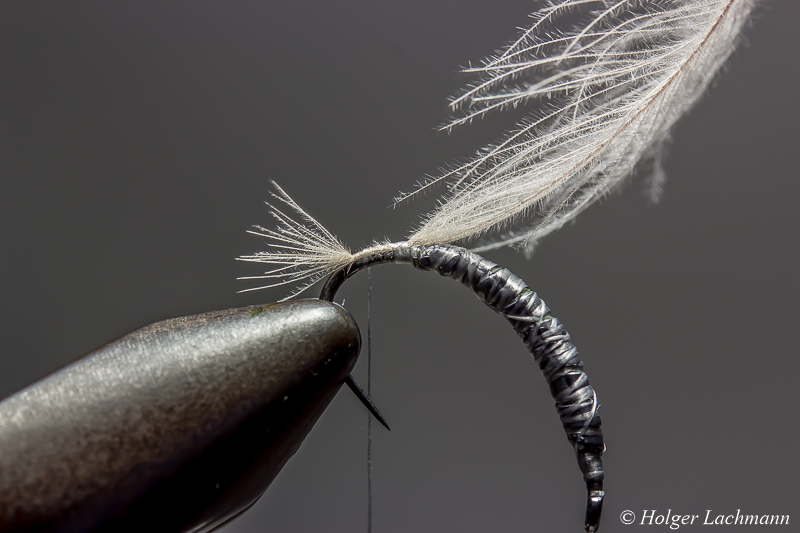
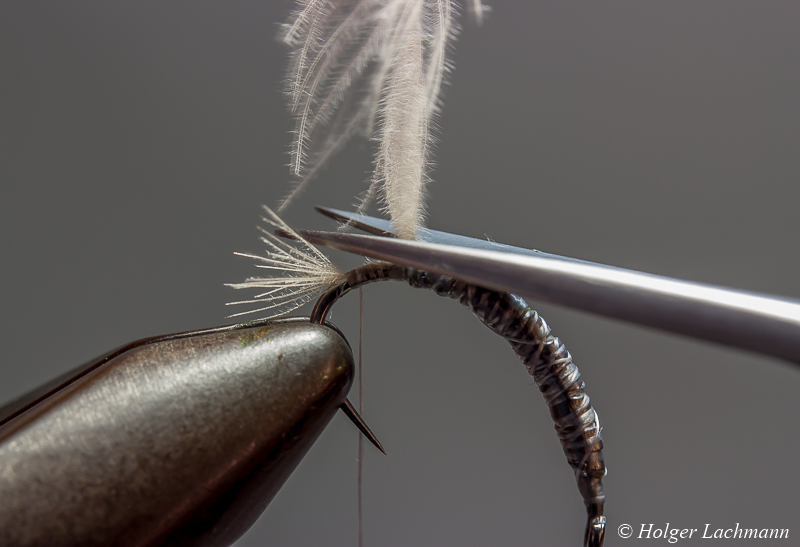
Take a CDC feather and cut out the feather steam on the top and tie the feather in like shown on the pictures to create the little tail.
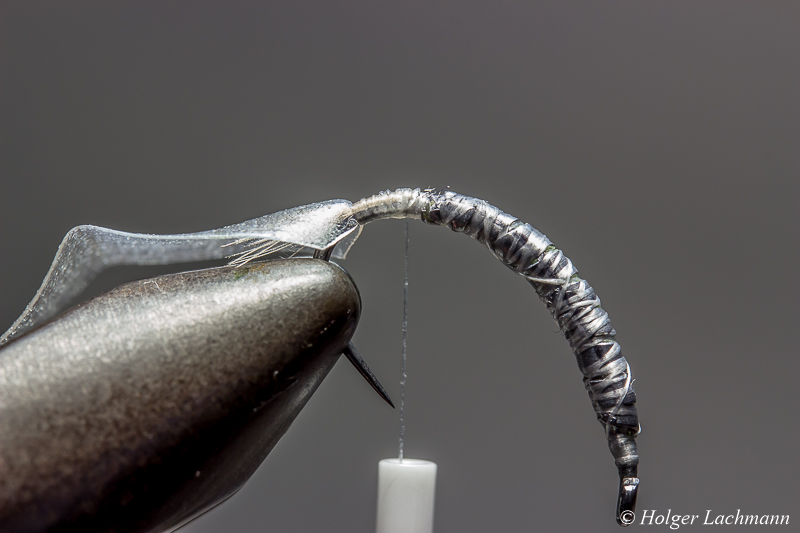
Take the stretch flex and tie it in at the back of the fly. Do the same with the mono for ribbing.
Dub the abdomen on 3/4 of the hook shank with a nice tapering.

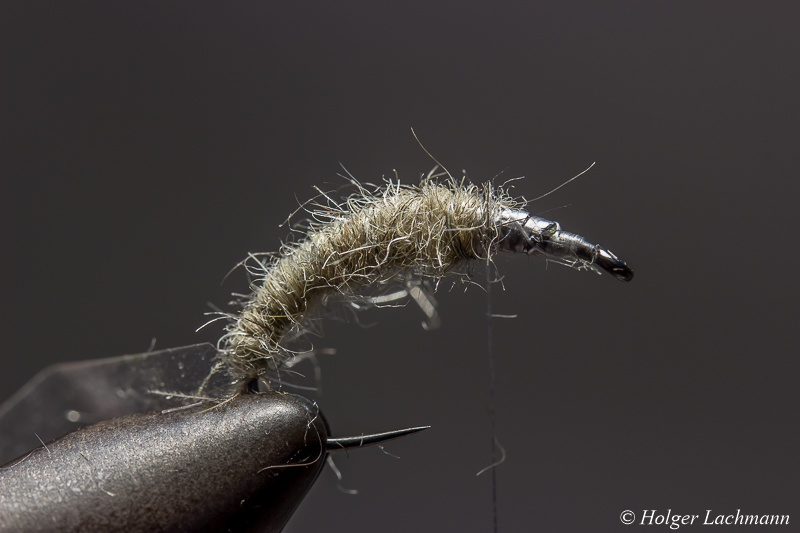
Split the thread with your dubbing needle, put the peacock dubbing in the gap, rotate your bobbin to spin the dubbing and wind it around the hook to create the thorax and the legs in on step. Leave a little bit space for the head next to the hook eye.
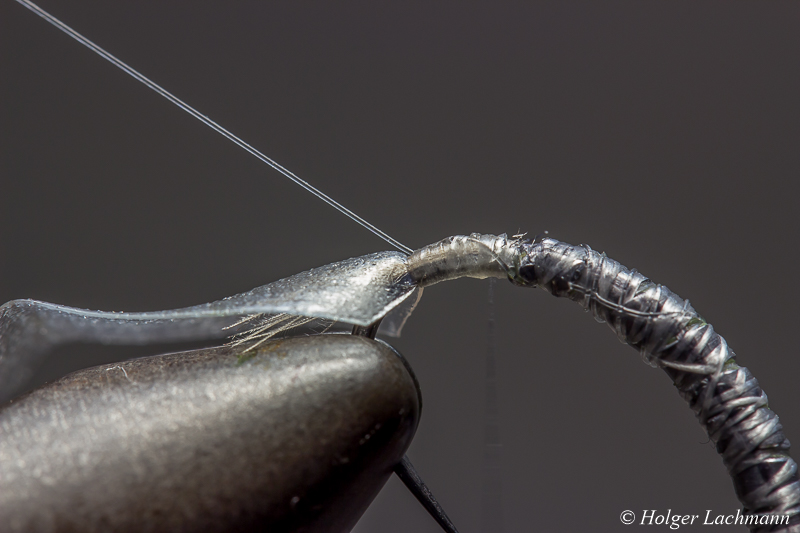
Fold the stretch flex to the front and catch it with your tying thread next to the hook eye. Fold it back, catch it again with your thread and cut away the excess. That’s the easiest way to form a nice head.

Take the mono and ribb the abdomen in small segments and the thorax in two bigger segments. Catch the ribbing with your tying thread and cut it off. Do two whip finish, cut the tying thread and the tying is done.

With the marker pens, you can give the larva the coloration of your liking or the spicific colors of the originals in your home waters. Put a drop of varnish on the head and the fly is finished, ready to be presented to the fish of your dreams! :-)
Tight lines!
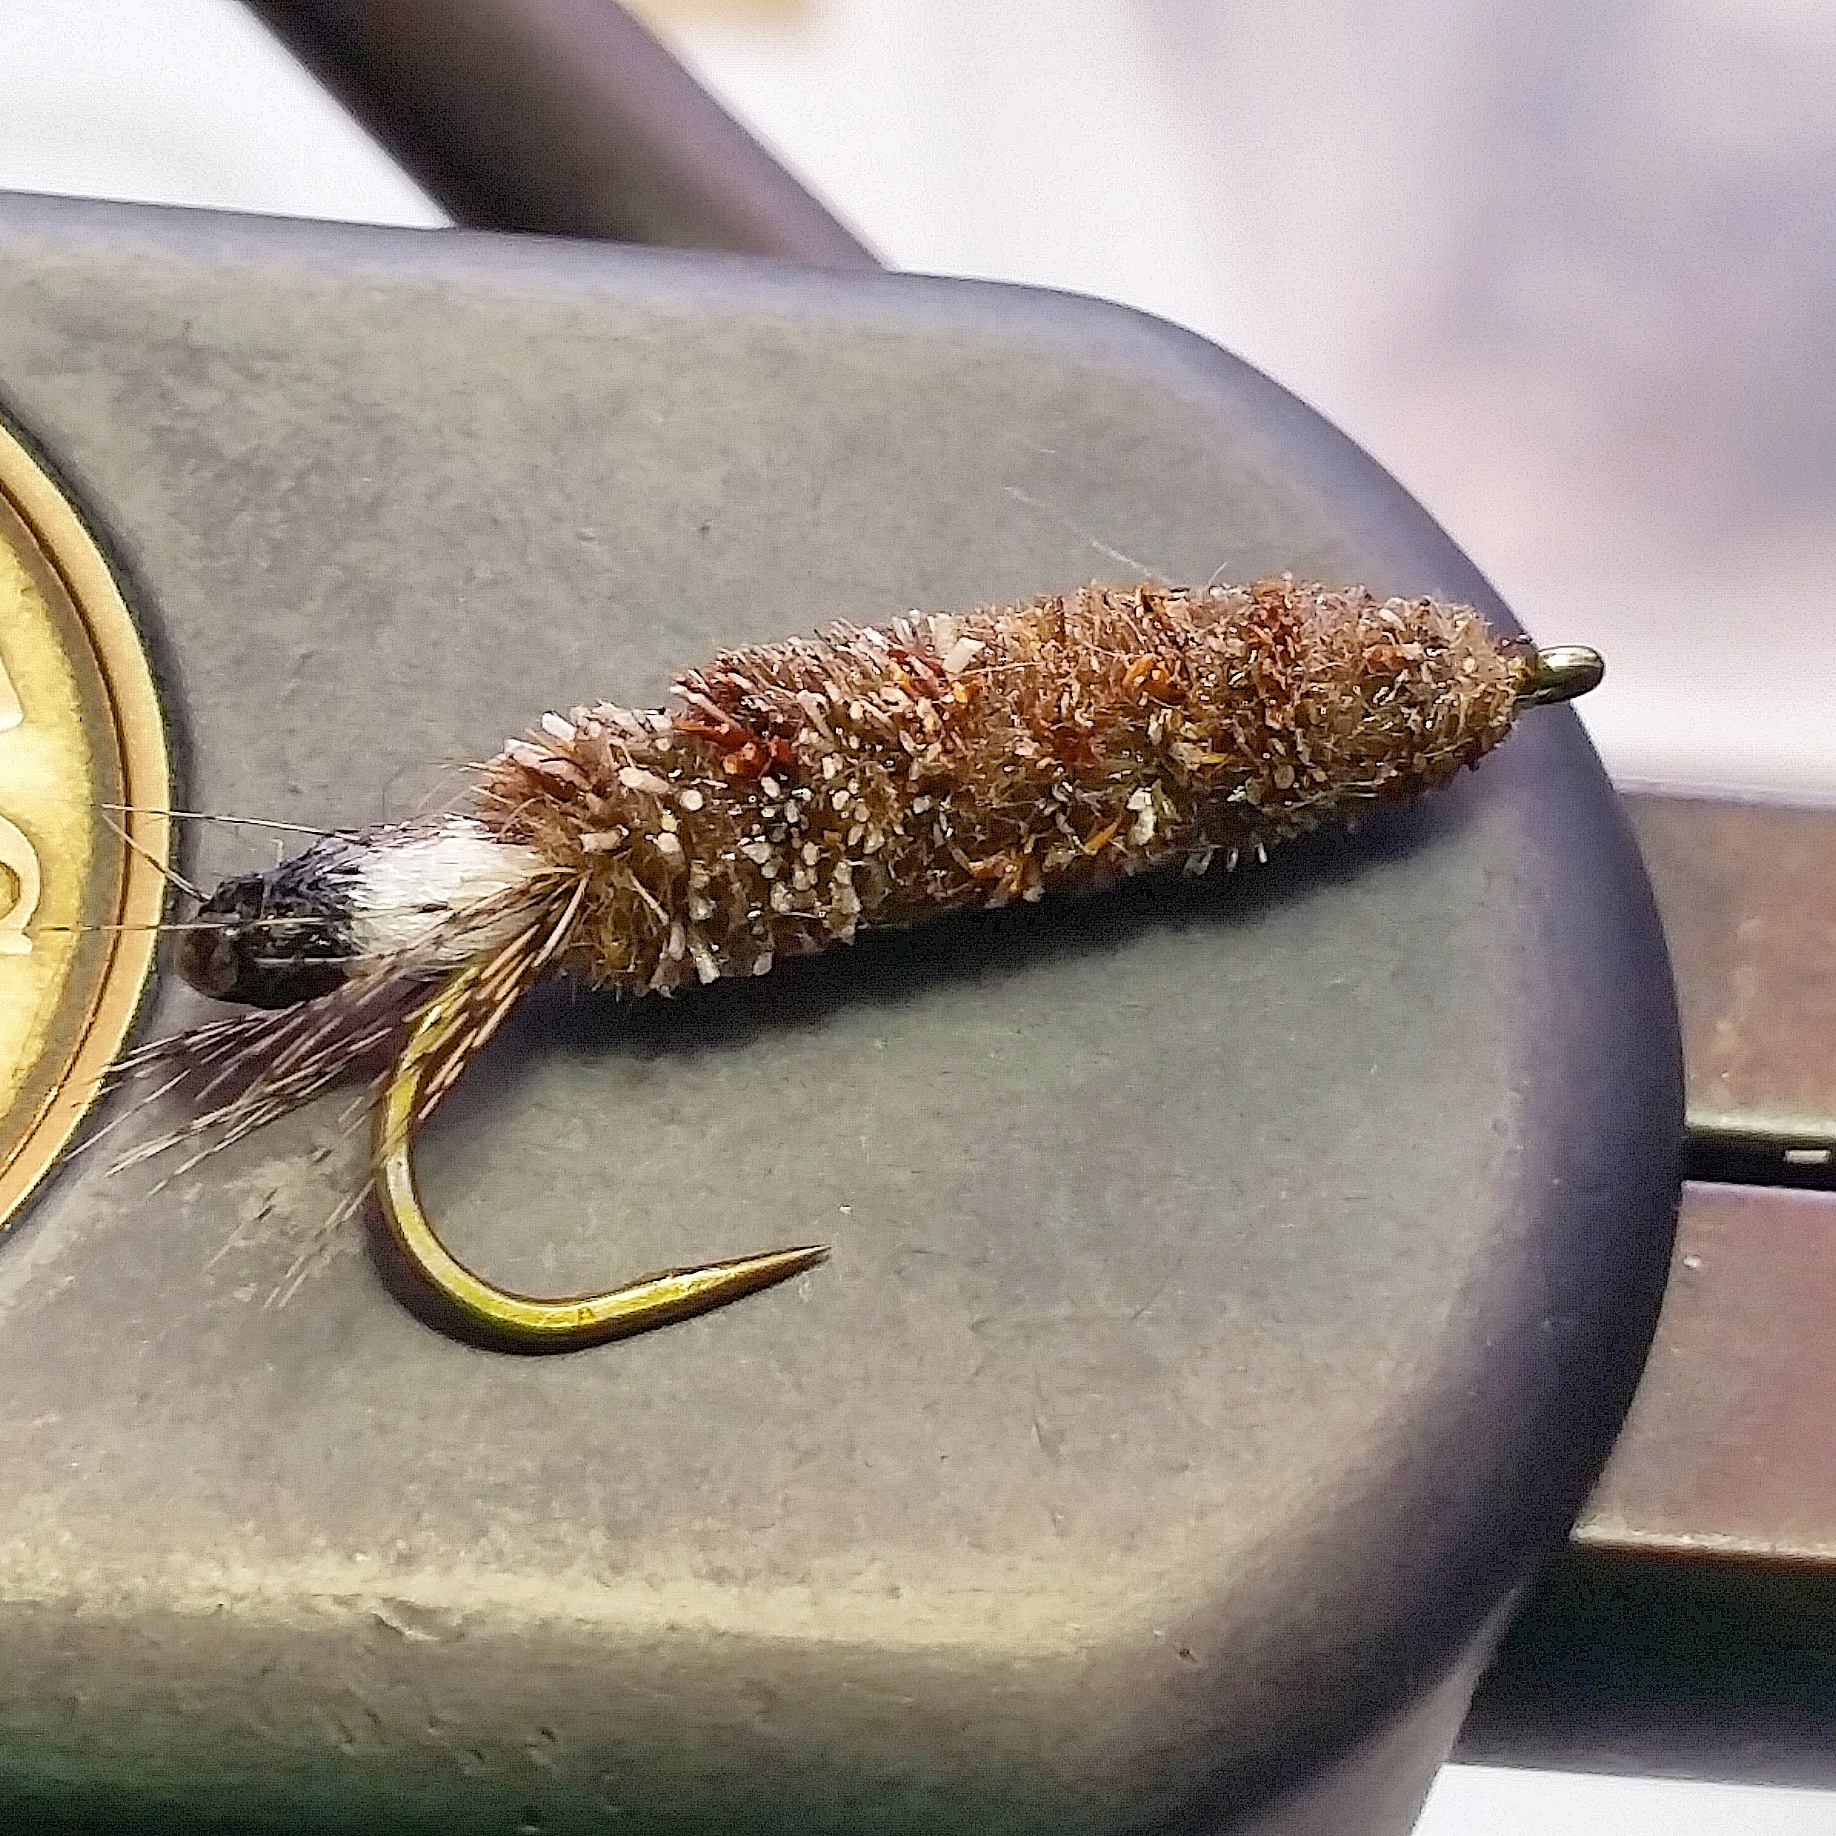
That is a simple weighted Caddis Larva. Not too many materials, just a few tying steps and no expensive materials. Just a good fishing fly.
Materials:

This is a good all around nymph to imitate caddis pupa. The vague looking nymph seems eatable to the fish. It’s a nice combination of a semi-transparent body and the mix of cdc, soft fibres and the dubbing mix of natural hare’s ear and ice dub. Not to flashy. Just that kind of nymph I personally like to fish.
The tying steps are self-explanatory, I guess. So here are just the materials.
If you got questions, just feel free to ask.


This Caddis Pupa, tied on a Daiichi Klinkhamer hook # 14 was the last fly I tied in 2013.


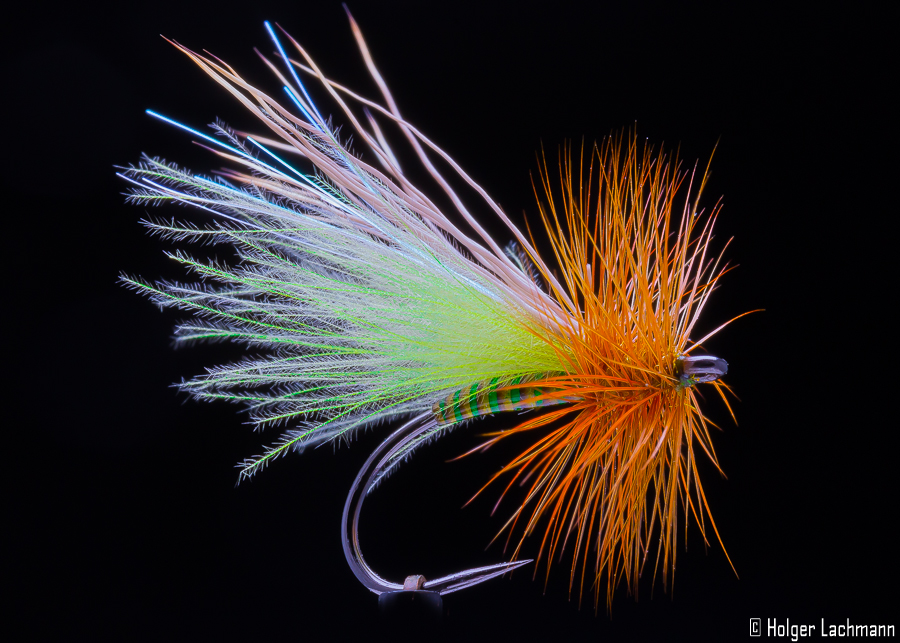
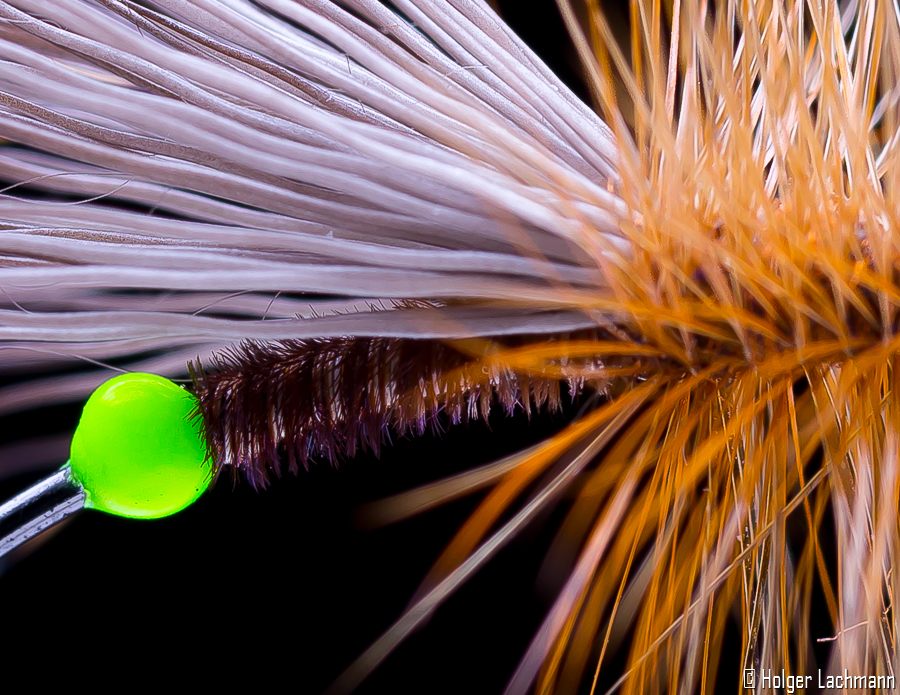
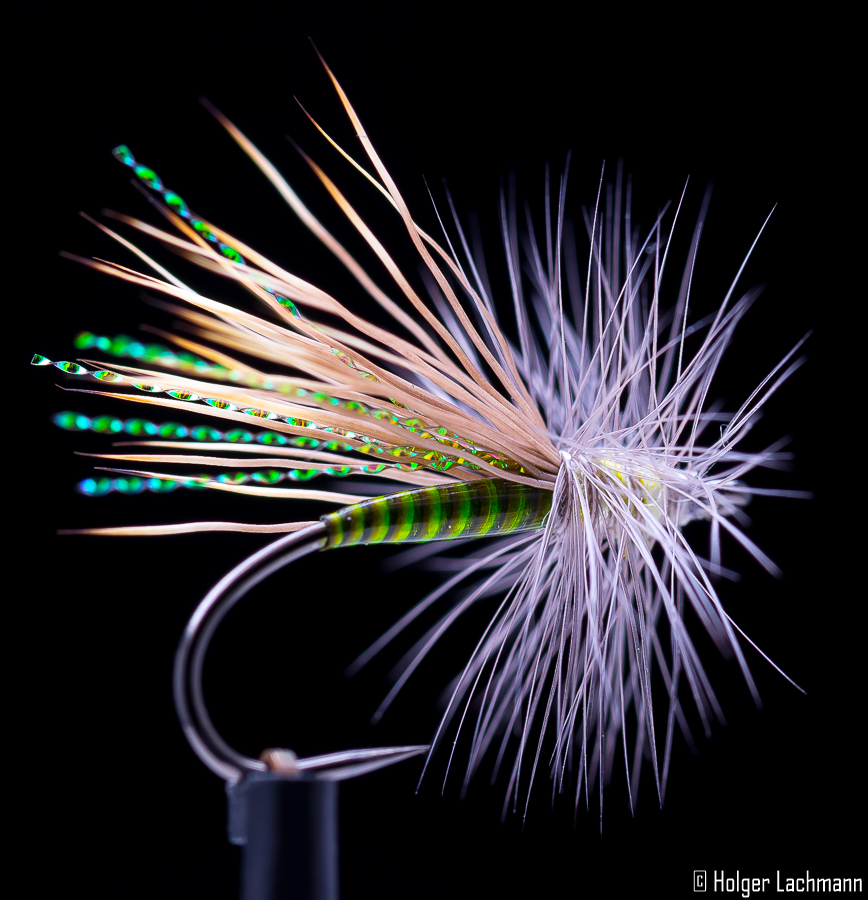
When it’s getting dark on the river, the caddis often become very active. It’s really fun to fish a big caddis fly surfing over the surface. Sometimes the trouts go mad and take the fly very aggressively.
I don`t want to check all the time, if the fly is floating well. The fly should float like a piece of cork all night long. That`s why I like to use materials like CDC and foam for those kind of flies. If you want to treat the fly with fly floatant, you should use a highly fluid floatant like Water Shed. Very important, Water Shed must be completely dried before fishing.
Materials:

Put a needle in your vise and tie a layer of thread. Very important: Use NOT a waxed thread. If you do, you may get problems pushing the finished body from the needle.
")
Put a 3 mm wide strip of foam on the needle.
")
Create some nice segements with your thread. If you got problems creating the body, just google „extended foam body“. There you find some nice videos.
")
Finish the body behind the last segment with a whip finish.
")
Pull the extended body from the needle and tie it in.
")
With a permanent marker you can give the body a nice colour.
")
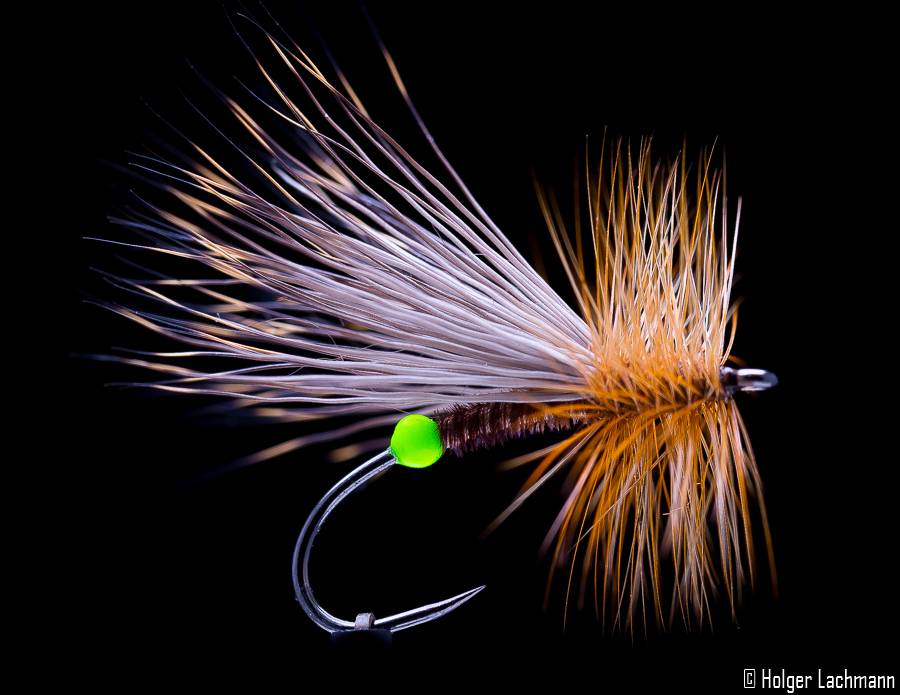
As a wing, tie in three CDC feathers. They should be longer than the body.
")
Over the CDC wing, you should tie in some moos hock hair in the same length like the CDC. It push the CDC down, so the wing is always flat over the body and it increases the floatability. Then tie in some fibres from a pheasant tail. Split the thread, put in some CDC and twist the the thread by rotating the bobbin. I like to work with the Petitjean Magic Tool when preparing the CDC.
")
")
If necessary, repeat spinning the CDC and wind it around a second time.
")
Fot the antennae I used two hair of moose hock.
")
Pull the pheasant fibres foreward and catch it with the thread.
")
Spinn some CDC as dubbing around the thread and create a little head, then fold the pheasant fibres back, cut it and whip finish the fly.
")
To secure the thread and the pheasant use a bit of varnish or really thin uv-resin, which makes the fly very durable.
")
Finished fly from underneath, or „the fish view“. ;-)
tight lines
Holger Lachmann