Sedge Pupa Step By Step Tutorial

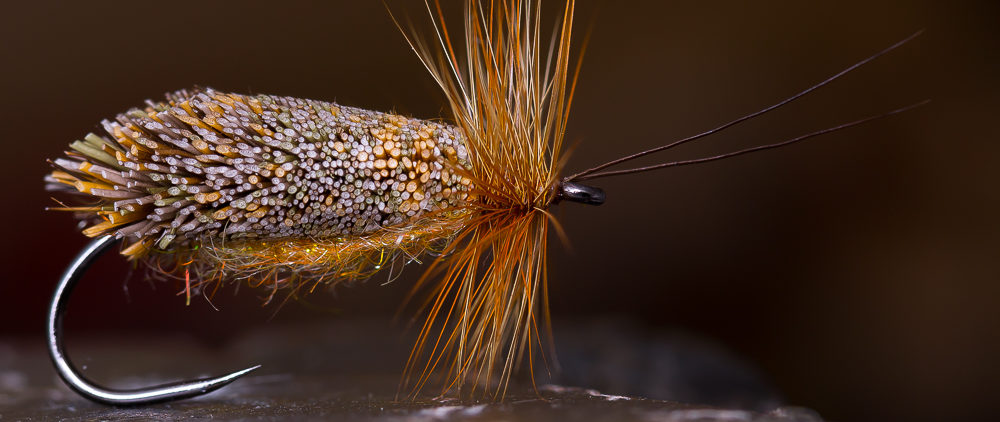
I posted this pattern some weeks ago on my blog and on Facebook and I was asked, if I could do a step by step tutorial about it. So, here it is. I hope you like it as much as I do.


Materials:

  • Hook: Maruto C47 BL # 12
  • Weight: Tungsten Bead Black Nickel
  • Thread: Dyneema
  • Body: Thread-Underbody, olive marker pen,  Flashabou, Polish Quills green
  • Resin: Bug Bond Lite
  • Dubbing: SLF light olive and cinnamon
  • Wings: Flashabou Mirage colored with a brown marker pen
  • Wing Case: Pheasant
  • Legs: Partridge

Put the hook with the tungsten bead in the vise.


Form the unterbody with your thread and tie in the Flashabou and Polish Quill.


Color the underbody with an olive marker pen and wind the Flashabou and then the Polish Quill around the body and secure it with your tying thread.


Put some Bug Bond Lite on the body and cure the resin with your Bug Bond torch. Then, tie in some strands from a pheasant tail feather as shown.


Dub some SLF light olive on the fly and tie in the brown colored Flashabou Mirage. Cut the Mirage like shown on the photo.


Dub the rest with SLF in cinnamon till you reach the tungsten bead.


Cut a „V“ out of  a partridge feather and tie in the fibres of the partridge as legs. Then fold the pheasant strands to the front to create the wing case and catch it with your tying thread. Put a drop of Bug Bond Lite on the wing case incl. the thread with which you catch the pheasant. Cure the Bug Bond Lite with your Bug Bond torch and cut the thread. You’re done! The Bug Bond Lite makes it super strong! You don’t need to do whip finish!


That’s it! Now grab your fly rod and catch some nice trout or grayling or whatever you like to catch with nymphs and pupas!

tight lines!

Holger
Tangloppen For Seatrout

The Tangloppen imitates Gammarus and Idotea Baltica. These little crustaceans are a very important source of food for seatrouts, even if they are quite small. There are times, seatrout just feed on these small snacks. Also the very big fish, which normally chasing fish like herring and sandeels. So, you always should have some of these little nibbles in your fly box, when you fish in the Baltic Sea. ;-)

I tied these Tangloppen on a Gamakatsu F 314 hook # 4. This hook got a very big gap and a short shank. The body length is around 2cm.

For the tail and the antennas, I used Spanflex. The body is made out of a dubbing mix. The carapace is made with Pro Sportfisher Gammarus Shell # large, ribbed with mono and coated with Bug Bond uv resin. I didn’t use any weight, so you can fish the Tangloppen very slow, like the natural model.

Fish Candy

This is a Gammarus pattern, weighted with thin lead foil tied on a shrimp hook # 12. Super simple fly. Lead on the hook, some antennas or legs made from Coq de Lon, mono for ribbing, Pro Sportfisher Gammarus Shell black on clear coated with Bug Bond UV Resin, SLF Saltwater Dub fluo shell pink and tying thread. That’s it! Tasty! ;-)

Czech Nymphs

To be honest, I’m not a fan of czech nymphing. I just love to cast with a flyrod. Czech nymphing is super effectiv, no doubt about that. It’s just too less casting for my liking… ;-)

The Czech Nymphs on the other hand are pretty cool flies. I didn’t fish them much in the past, but I want to try them in the next season, especially the ones with a little hot spot. This is quite hard for me, because I got a lot more faith in natural colors. Maybe I was wrong all the time, we’ll see….

Czech Nymphs should be weighted AND as slim as possible to sink fast. That’s not the easiest task. You have to find the right amount of dubbing. Less is more!

I look forward testing them in a nice stream for trout and grayling. :-)


Hangover Fly – The First Fly Of 2014

01.01.2014

The first fly of the year, the Hangover Fly. A nymph # 14 with a tungsten Bead.

The last fly of 2013

This Caddis Pupa, tied on a Daiichi Klinkhamer hook # 14 was the last fly I tied in 2013.

Some food for trout and grayling

Autumn is almost over and the winter is coming… I already miss to fish for trout and grayling, which I’ve done this year not often enough….

School of Laser Eels

Uuh weeee! I’m done! Don’t wont to tie these Laser Eels for the next weeks ;-)

But it’s a good feeling to see all these Laser Eels together. There are lying some hours of work.