Sedge Pupa Step By Step Tutorial

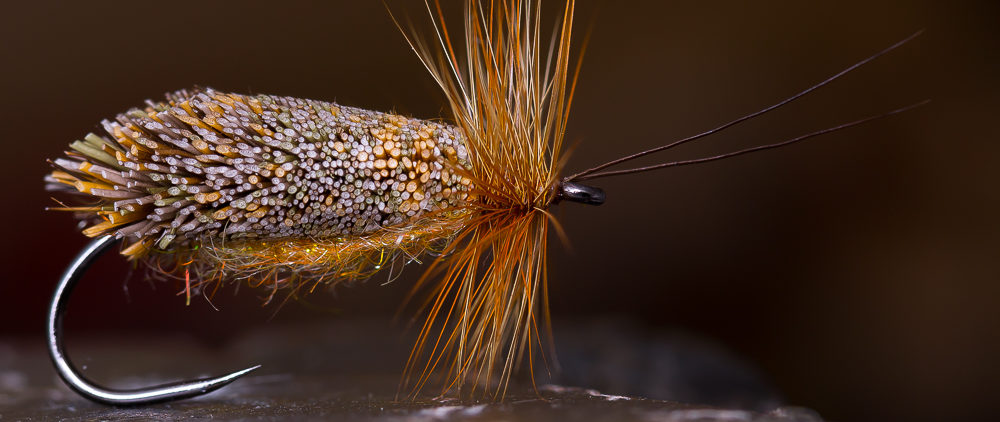
I posted this pattern some weeks ago on my blog and on Facebook and I was asked, if I could do a step by step tutorial about it. So, here it is. I hope you like it as much as I do.


Materials:

  • Hook: Maruto C47 BL # 12
  • Weight: Tungsten Bead Black Nickel
  • Thread: Dyneema
  • Body: Thread-Underbody, olive marker pen,  Flashabou, Polish Quills green
  • Resin: Bug Bond Lite
  • Dubbing: SLF light olive and cinnamon
  • Wings: Flashabou Mirage colored with a brown marker pen
  • Wing Case: Pheasant
  • Legs: Partridge

Put the hook with the tungsten bead in the vise.


Form the unterbody with your thread and tie in the Flashabou and Polish Quill.


Color the underbody with an olive marker pen and wind the Flashabou and then the Polish Quill around the body and secure it with your tying thread.


Put some Bug Bond Lite on the body and cure the resin with your Bug Bond torch. Then, tie in some strands from a pheasant tail feather as shown.


Dub some SLF light olive on the fly and tie in the brown colored Flashabou Mirage. Cut the Mirage like shown on the photo.


Dub the rest with SLF in cinnamon till you reach the tungsten bead.


Cut a „V“ out of  a partridge feather and tie in the fibres of the partridge as legs. Then fold the pheasant strands to the front to create the wing case and catch it with your tying thread. Put a drop of Bug Bond Lite on the wing case incl. the thread with which you catch the pheasant. Cure the Bug Bond Lite with your Bug Bond torch and cut the thread. You’re done! The Bug Bond Lite makes it super strong! You don’t need to do whip finish!


That’s it! Now grab your fly rod and catch some nice trout or grayling or whatever you like to catch with nymphs and pupas!

tight lines!

Holger
Hangover Fly – The First Fly Of 2014

01.01.2014

The first fly of the year, the Hangover Fly. A nymph # 14 with a tungsten Bead.

Pro Tube Baitfish Step By Step

When I was a child, I got a big box full of LEGO. I loved to play with it for hours! Ok, my mom was often not so happy, because after playing, my room looked like after an explosion of a bomb. :-)

I still „play“ with a kind of LEGO today. Well, it’s more like a fly tying LEGO. I’m talking about the tube fly system from Morten Bundgaard, owner and chief creative of Pro Sportfisher. Like Lego, everything fits together perfectly. It’s just so fun to be creative and to find out, how much is possible.

For this step by step of the Pro Tube Baitfish, I used several products of Pro Sportfisher, especially the new Pro Raw Weights made out of tungsten and the brand new Pro Softheads, which are awesome. Perfect alternative to epoxy and uv resin for cool heads.

Materials:

  • Pro Flexitube clear
  • Pro Soft Sonic Disc clear
  • Pro Raw Weight
  • Pro Softhead
  • STS-Dubbing Fluo Flame
  • Ice Dub Pearl
  • Arctic Fox White
  • Pro Angelhair HD Pearl Green
  • Senyo’s Laser Dub White and Olive
  • 3D Eyes

Put the Pro Flexitube on the Pro Tubefly-Needle and do some turns with the thread. Split the thread and put some STS-Dubbing ind the gap and spin the bobbin. After twisting, give the dubbing a good brush with your velcro and wind it around.

Put a little bit of super glue on the thread and do some turns. Cut of the thread and put a clear Pro Soft Sonic Disc on the tube. In front of the disc, attach the thread to the tube again.

Take a bunch of fox and tie it in directly in front of the disc. Take some strands of Pro Angelhair HD and tie them in, too. At last, take another bunch of fox, slightly longer than the first bunch, spread it a little bit and tie it on top.

Split the thread again, put some ice dub pearl into the gap, spin the bobbin and brush the twisted dubbing. Wind the dubbing around, brush it again and put the Pro Raw Weight in front of the dubbing. This will give the tube a nice balance with a little bit jigging.

Take the white Laser Dub and tie it underneath the tube, then so the same with the olive Laser Dub on top. If you want, you can give the dubbing on top some dots or stripes by using a permanent marker.

Make a short whip finish and cut off the thread. Put the Pro Softhead on the tube and border the tip of the tube with your lighter. Just do a little drop of super glue into the recess and glue in some 3D-eyes of your liking. That’s it, you got a great baitfish tube! Just attach a single hook like the Owner Mosquito for example and you are ready to go!

New Zonker Muddler

This a kind of pimped Muddler Minnow. I use a piece of zonker stripe for the tail, some fancy dubbing mixed with flash dubbing, krinkle flash, a deer hair muddler head, funky eyes and and a heavy tungsten bead to get it down to the predators. One of my absolut favorite streamer pattern for trout and seatrout!


Mini Sculpin Step By Step


I was invited to tie at the Dutch Fly Fair last weekend. A small Mini Sculpin pattern was lying on my desk in front of me while tying. It was less then 5 cm long. A lot of people liked it, especially Walter Bayer from Ireland (great flytyer) and Roger Enger Lie (great caster) from Norway and I had to promise to them, that I will do a step by step tutorial of this little guy.

So guys, this one is for you! ;-)


Material:

  • Hook: Gamakatsu SC 15 # 4
  • Weight: Tungsten Bead
  • Tail: Pine Squirrel Zonker
  • Pectoral Fins: Pine Squirrel Zonker
  • Head: Senyo’s Laser Dub
  • Eyes: 3-D Eyes


Put a tungsten bead on the hook.


Tie in a piece of pine squirrel zonker as a tail.


Put some pine squirrel hair in the clamp, then split the thread and put the hair in the gap.


Rotate the bobbin to twist the hair and the thread. Put a litlle bit of water on the hair, so it’s easier to wrap it around the hook shank.


Tie in bunches of Senyo’s Laser Dub. Remember, this is a up side down pattern, so tie in the bright color on top of the fly and the dark color underneath. You can create different shades by using different colors. Finish the tying with a whip finish behind the tungsten bead.


Now, start the cutting to create a sculpin head. The easiest way is to begin with the flat underside.


Before the cutting is finished, use some superglue to fix the 3-D eyes on top of the sculpin head and press the eyes into the Laser Dub to give the head strength. Now, you can do the final cutting.

That’s it! A small sculpin which swims down on the bottom of the river, because of the tungsten bead.

Note: Please press down the barb of the hook! Trouts will take the sculpin very aggressively!

tight lines

Holger Lachmann

Tungsten Quill Body Nymph Step By Step

Put a tungsten bead on the hook (here it’s a TMC 2312 #12)


Tie in some fibres from a Coq de Leon hackle as tail.


Tie in stripped peacock quill.


Create a tapered body with the tying thread.


Wind the quill around the hook shank. The dark side of the quill should point to the hook bend.


Put a small drop of uv-resin on the body and cover the quill with a small coat.


The uv-resin after curing. Now, the quill body looks really nice and it’s secured against the trouts teeth. A tack free uv-resin works best.


Tie in some pheasant tail fibres for the wing case.


Tie in a hen hackle with the tip first. The hackle will create the legs of the nymph.


Dub the thorax with a dubbing of your choice. I used SLF-Spicky-Dubbing.


Fold the hen hackle first and then the pheasant tail fibres to the hook eye and catch it with the thread close to the tungsten bead.


Cut the hen hackle and the pheasant tail fibres close to the tungsten head and make a whip finish.


Finish the fly with a drop of uv-resin on the wing case.

A heavy nymph with quiet a real shape, nice colours and very durable.


Holger