Pro Tube Baitfish Step By Step

When I was a child, I got a big box full of LEGO. I loved to play with it for hours! Ok, my mom was often not so happy, because after playing, my room looked like after an explosion of a bomb. :-)

I still „play“ with a kind of LEGO today. Well, it’s more like a fly tying LEGO. I’m talking about the tube fly system from Morten Bundgaard, owner and chief creative of Pro Sportfisher. Like Lego, everything fits together perfectly. It’s just so fun to be creative and to find out, how much is possible.

For this step by step of the Pro Tube Baitfish, I used several products of Pro Sportfisher, especially the new Pro Raw Weights made out of tungsten and the brand new Pro Softheads, which are awesome. Perfect alternative to epoxy and uv resin for cool heads.

Materials:

  • Pro Flexitube clear
  • Pro Soft Sonic Disc clear
  • Pro Raw Weight
  • Pro Softhead
  • STS-Dubbing Fluo Flame
  • Ice Dub Pearl
  • Arctic Fox White
  • Pro Angelhair HD Pearl Green
  • Senyo’s Laser Dub White and Olive
  • 3D Eyes

Put the Pro Flexitube on the Pro Tubefly-Needle and do some turns with the thread. Split the thread and put some STS-Dubbing ind the gap and spin the bobbin. After twisting, give the dubbing a good brush with your velcro and wind it around.

Put a little bit of super glue on the thread and do some turns. Cut of the thread and put a clear Pro Soft Sonic Disc on the tube. In front of the disc, attach the thread to the tube again.

Take a bunch of fox and tie it in directly in front of the disc. Take some strands of Pro Angelhair HD and tie them in, too. At last, take another bunch of fox, slightly longer than the first bunch, spread it a little bit and tie it on top.

Split the thread again, put some ice dub pearl into the gap, spin the bobbin and brush the twisted dubbing. Wind the dubbing around, brush it again and put the Pro Raw Weight in front of the dubbing. This will give the tube a nice balance with a little bit jigging.

Take the white Laser Dub and tie it underneath the tube, then so the same with the olive Laser Dub on top. If you want, you can give the dubbing on top some dots or stripes by using a permanent marker.

Make a short whip finish and cut off the thread. Put the Pro Softhead on the tube and border the tip of the tube with your lighter. Just do a little drop of super glue into the recess and glue in some 3D-eyes of your liking. That’s it, you got a great baitfish tube! Just attach a single hook like the Owner Mosquito for example and you are ready to go!
Great Dubbing Mixes In 30 Seconds

Here is a super easy and fast way to mix dubbings. You only need the dubbings, a wire brush for pets and a dubbing neddle.

Here are the dubbings I choose for this demo. Two bright colors and flash dubbing.

Make a sandwich out of the three dubbings.

Take the dubbing sandwich and stroke it into the wire brush.

Take your dubbing needle to pull the dubbing out of the brush.

Here is the first result after the first round. Looks nice! If you want the dubbing do be better mixed, go for another round on the brush.

Here is the result after the second round on the wire brush.

Finally the result after the third turn on the brush. Super mixed two toned dubbing with flash highlights in less than 30 seconds!  What could be more easy?

tl

Holger Lachmann

Easy Pike Zonker Step By Step

One of my most fished patterns for pike. It’s easy to tie, very durable, you can tie it in the length you want and it wiggles nice through the water. You can also use arctic fox for the front collar instead of finn raccoon. Works well, too.

Materials: 

  • Hook: Gamakatsu F 314 # 1/0
  • Ribbing: Mono
  • Body: Ice Dub Holographic Silver and Ice Dub Pearl mixed together
  • Wing/Tail: Finn Raccoon
  • Flash: Gliss’n Glow Pearl, Krinkle Mirror Flash Pearl and Lateral Scale Pearl
  • Front Collar: Finn Raccoon or Arctic Fox
  • Hot Point: Fluo Thread
  • Eyes: Deer Creek
  • Head: Bug Bond

Tie in a piece of mono for the ribbing and mix ice dub pearl and ice dub holographic silver. Then split the thread and put the dubbing mix into the gap. Spin the bobbin to twist the dubbing. Wind the dubbing hank around the hook shank and give it a good brush with your velcro.

Tie in a piece of finn raccoon zonker 5mm next to the hook eye. Then ribb the raccoon zonker with the mono to secure it on the hook shank and catch the mono with your thread.

Tie in the krinkle mirror flash and the gliss’n glow. Then form a loop with your thread and wax the loop. Put a piece of finn raccoon in the loop and cut away the leather. Twist the loop with the raccoon slowly. When the fur is secured in the loop, wind the raccoon around the shank to the hook eye. Comb the twisted raccoon after every turn.


Tie in a strand of lateral scale pearl on each side and split the thread. Put again some dubbing in the gap und twist the bobbin Wind the twisted dubbing around and brush it with your velcro to give the head some extra sparcle.


If you like it, you can do a little hot point with some fluo thread. Glue some sexy eyes on the head and secure the head with Bug Bond.

Ready for pike!

tl Holger Lachmann

Articulated Pike Streamer Step By Step

Here’s an example for an articulated pike streamer, which is easy to cast, because we try to create volume without putting to much material into the fly. To much material makes the just inflexible (and expensive ;-) )

I used for this pattern the new articulated shanks from the Flymen Fishing Co. in 35mm to get the right movement and position of the hook.


Material:

  • Hook: Gamakatsu SL 12 S # 4/0  (be carefull, they are soooooo sharp!)
  • Articulated Shank: 35mm from Flymen Fishing Co.
  • Tail and Wing: Arctic Fox chartreuse and black
  • Feather: Green Grizzly Hackle
  • Body: Ice Dub Pearl
  • Flash: Krinkle Mirror Flash pearl and Flashabou Mirage Saltwater
  • Eyes: Hareline fluo yellow
  • UV-Resin: Bug Bond


Put the hook into the vise, do some turns with your thread and tie in the fox as tail and some strands Flashabou Mirage.


Split your tying thread or form a dubbing loop and put the ice dub between and twist it. Then brush it with your velcro and wind it around the hook shank.


Tie in some fox with the tips pointing to the hook eye, cut the waste, put again some dubbing between the thread, twist it and wind it to the front. Then go with the thread between the fox hair to the hook eye.


Push the fox hair with an empty pen towards the hook bend. Then tie in a green grizzly hackle on each side and some strands of krinkle mirror flash. Whip finish and secure with super glue.


Attach the hook with the articulated shank and put the shank into your vise. Then close the gap with a strong thread and super glue (the little pearls on the thread) to fix the hook. This will hold forever!


Create another dubbing hank and wind it around to create a little bump. Then tie in a bunch of artic fox on the hook shank and a bunch underneath. Comb the hair carefully. Another dubbing hank will follow.


Tie in two green grizzy hackles and some krinkle mirror flash. Then comb a bunch of black arctic fox and tie it in like shown on the picture. Trim away the waste and do some rounds with dubbing and do a quick whip finish secured with super glue.

Push the black fox backwards, attach the eyes and secure the whole head with Bug Bond.

That’s it! Ready to go. Have fun with the pikes!

Holger Lachmann

Fleye Foil Fox Candy – Step By Step

Here’s a Surf Candy style pattern tied with the new Fleye Foils by Bob Popovics. The tail made out of arctic fox wiggles nice in the water. Much better than most synthetics. It’s not just a battern for the saltwater fisherman, you can also fish it in freshwater. Small sizes for trout and char for example, bigger ones for asp. Just give it a try.

Materials:

  • Hook: Gamakatsu SS15/T # 4
  • Thread: Mono
  • Tail: Arctic Fox
  • Flash: Krinkle Mirror Flash Pearl
  • Body: Senyo’s Laser Dub, Bob Popovics‘ Fleye Foils „Silverside“ and uv-resin


Tie in the arctic fox as tail and 3 strands of krinkle mirror flash, one on each side and one on top.


3mm in front of the fox, tie in a bunch of white senyo’s laser dub on the top of the hook shank and one underneath.


Do the same with a bunch of laser dub holographic minnow belly 3 mm infront of the white dub.

Now, pick two colors of laser dub of your liking, here it’s light olive and shrimp pink, and tie it in like you see above.

Pull the laser dub backwards, that’s how you put a bit of volume to the head, otherwise it won’t fit to the shape of the foil.

Put a foil on each side. Just tie in the little „nose“ of the foil with a couple of turns and whip finish the fly.

Pull the laser dub and the foils backwards and start to apply the uv resin on the body. The resin should soak into the dubbing, that gives the fly later some translucency. Mostly it’s easier to applicate two layers of uv resin. You got much more control of everything.

If you don’t use a tackfree uv resin, put a thin coating of nail varnish on the uv resin to get a tackfree glossy finish.

That’s it! Ready for fishing!

tl

Holger Lachmann

Mini Sculpin Step By Step


I was invited to tie at the Dutch Fly Fair last weekend. A small Mini Sculpin pattern was lying on my desk in front of me while tying. It was less then 5 cm long. A lot of people liked it, especially Walter Bayer from Ireland (great flytyer) and Roger Enger Lie (great caster) from Norway and I had to promise to them, that I will do a step by step tutorial of this little guy.

So guys, this one is for you! ;-)


Material:

  • Hook: Gamakatsu SC 15 # 4
  • Weight: Tungsten Bead
  • Tail: Pine Squirrel Zonker
  • Pectoral Fins: Pine Squirrel Zonker
  • Head: Senyo’s Laser Dub
  • Eyes: 3-D Eyes


Put a tungsten bead on the hook.


Tie in a piece of pine squirrel zonker as a tail.


Put some pine squirrel hair in the clamp, then split the thread and put the hair in the gap.


Rotate the bobbin to twist the hair and the thread. Put a litlle bit of water on the hair, so it’s easier to wrap it around the hook shank.


Tie in bunches of Senyo’s Laser Dub. Remember, this is a up side down pattern, so tie in the bright color on top of the fly and the dark color underneath. You can create different shades by using different colors. Finish the tying with a whip finish behind the tungsten bead.


Now, start the cutting to create a sculpin head. The easiest way is to begin with the flat underside.


Before the cutting is finished, use some superglue to fix the 3-D eyes on top of the sculpin head and press the eyes into the Laser Dub to give the head strength. Now, you can do the final cutting.

That’s it! A small sculpin which swims down on the bottom of the river, because of the tungsten bead.

Note: Please press down the barb of the hook! Trouts will take the sculpin very aggressively!

tight lines

Holger Lachmann

Asp Streamer Step By Step

The asp is a fun fish for the fly rod. I got some friends, who are really go nuts, when the weather gets warmer and the asp starts to splash through the surface while hunting for baitfish.

The best fly colour for asp is white, so a white 3-D baitfish imitation works well for them. You need to put some weight into the fly, because often you fish in fast water for asp and you don’t want the baitfish pattern to flip over the surface instead of swinging some centimeters below it.

Arctic fox moves fantastic in the water, but you got often the problem, that the hair tangles around the hook while casting. You can avoid this by puting some uv resin on the fox near the hook to make it stiff. That’s an easy way to create a tangle-free fox fly.


Material:

  • Hook: Gamakatsu F 314 # 4
  • Weight: Lead Wire
  • Tail: Arctic Fox White
  • Flash: Electra Scale Pearl
  • Body: Hareline Ice Dub Minnow Belly
  • Head: Hareline Senyos Laser Dub
  • Eyes: Deer Creek
  • UV-Resin: Deer Creek Diamond Hard Tack Free


Wind some lead around the hook shank and secure it with super glue.


Tie in some arctic fox and some strands of electra scale on each side. Secure the fox with uv resin next to the hook and cure it with the uv torch.


Make a loop with your tying thread and put some ice dub in the gap. Twist the loop with your dubbing twister and brush the dubbing with your velcro brush to create a fluffy dubbing strand.


Wind the twisted dubbing around the hook shank and brush it again.

Tie in some laser dub on the top and on the bottom like shown on the picture.


Put some eyes on each side of the fly by using super glue and paint some gills on each side with a permanent marker.

On the first picture, you can see how nice all the materials look, when wet.

tight lines

Holger Lachmann

Mayfly Flex Stretch Nymph – Step By Step

Here’s the step by step tutorial for a mayfly nymph pattern, to imitate the BWO for example. This pattern is durable and looks quite like the natural, when drifting through the river. Don’t use too much material when tying these kind of nymphs. You should always keep the slim original in your mind.

This pattern is another example, how usefull uv-resin could be, when tying even small flies for trout and graylig. For this fly I used Clear Cure Goo Hydro, which is highly fluid like water. It’s perfect for smaller patterns and is soacked up by dubbing and feathers, what makes the flies really durable.


Materials:

  • Hook: Daiichi D 1270 # 14
  • Weight: Flat Lead
  • Tail: Pheasant Tail Fibres
  • Abdomen: Flex Stretch Olive
  • Wing Case: Pheasant Tail Fibres & Clear Cure Goo Hydro
  • Thorax: Oliver Edwards Masterclass Dubbing & Clear Cure Goo Hydro
  • Legs: Partridge


Put the hook into the vise and wind the flat lead on the hook shank. Do a second layer of lead on the front part like shown on the foto.


Tie in three pheasant tail fibres to imitate the tail of the mayfly.


Tie in a small piece od stretch flex and wind it aroung the hook shank.


Cut a piece out of a pheasant tail feather and tie it in for the wing case.


Take a partridge feather and cut a little piece out of the tip. Then tie the partridge feather in with the tip first.


Dub the thorax, then fold the partridge to the front and catch it with your thread next to the hook eye.


Put a little drop of Clear Cure Goo Hydro on the stem of the partridge feather to join the dubbing with the feather. Cure the CCG Hydro with the uv torch. The hackle stem and the dubbing are joined together now. Nothing will ever slip and the legs will stay as shown on the photo.


Fold the pheasant to the front and catch it with your tying thread. Put a little drop of Clear Cure Goo Hydro on the wing case and cure it with the uv torch.


The wing case is now very durable after curing the CCG Hydro. If you want a shiny wing case, that’s what I prefer, put a second drop of CCG Hydro on the wing case and cure it. Now, the mayfly nymph is ready for fishing.

tight lines

Holger Lachmann

Quill Body CDC Emerger No. 2 – Step By Step

It’s the end of April and the trout and grayling season will start soon.

Here’s another very good emerger pattern, which imitates some different may fly species, depending on the colour and size. It’s tied on the new Daiichi 1167 Klinkhamer hook, designed by the famous dutch fly tyer Hans van Klinken.

The Daiichi 1167 got a stronger wire compared to the Tiemco 212Y for example, which makes sure, that the abdomen hangs deep in the surface. That’s really important and that’s the reason, why this pattern got no tail or a trailing shuck, to make sure, that the abdomen is hanging deep in the surface.

The quill body is covered with a thin coating UV Resin.


Materials:

  • Hook: Daiichi 1167 # 14
  • Abdomen: Polish Quills &Tack Free UV Resin
  • Thorax: Oliver Edwards Master Class Dubbing
  • Wing case: CDC
  • Wing: CDC
  • Legs: Partridge


Put the hook into the vise, do a layer of thread and tie in a stripped peacock quill. Wind the quill around the hook shank and catch it with the tying thread.


Put a little drop of Tack Free UV Resin on the stripped peacock quill and spread it on the abdomen. Cure it with your UV torch.


Tie in two CDC feathers for the wing case. Then tie in the tip of another white CDC feather as a crippled wing.


Dub the body and tie in some partridge fibres to imitate the legs. Fold each CDC feather to the hook eye and catch it with the tying thread. The CDC wing should be exactly in the middle of the feathers.


Cut the CDC feathers for the wing case and do some turns with your whip finisher to create a little head. Varnish the head, if you like. That’s it, ready for fishing. ;-)

tight lines

Holger Lachmann

Grey Magnus Step By Step


This pattern is so famous….no more words about it, let’s start tying! ;-)


Materials:

  • Hook: Gamakatsu SS15/T # 4
  • Tail: Grey Grizzly Marabou / Chrystal Flash Pearl
  • Ribbing: Mono
  • Body: Hare’e Ice Dub Hare’s Ear from Hareline / Grizzly Hackle
  • Front Hackle: Dun Grizzly Saltwater Hackle
  • Eyes: Bead Chain Eyes


Do a layer of thread on the hook shank and tie in the grizzly marabou as a tail.


Tie in two strands of pearl crystal flash on each side of the marabou and fix the mono for the ribbing.


Spin some dubbing around the thread and dub the body. Don’t dub the body to tight, because we want to brush it later.


Tie in a smaler grizzly hackle and wind the hackle from the front to the back around the dubbing body. Rib the dubbing body and the hackle turns with the mono from the back to the front and catch the mono with your tying thread. Give the body a nice brush with your velcro-brush.


Take a dun grizzly saltwater hackle and prepare it like shown on the picture. Tie it in and wind it around the hook to create the front hackle.


Take some bead chain eyes and tie them in. After some turns around the eyes, put a drop of super glue between the eyes to secure them, then keep winding the thread around the eyes. That’s how you create a strong bead chain head. If you fix the eyes with loose turns of thread, they will slip around the hook shank. That’s it, the Grey Magnus.

tight lines

Holger Lachmann

Zonker-Fish step by step


Zonker stripes are one of my favorite materials for tying streamers. The Zonker-Fish is a really simple pattern made out of a zonker stripe, which is very durable and, most important, it catches fish.

You can find a lot of color examples in my photo album Streamers.

Materials:

  • Hook: Gamakatsu F 314 # 4
  • Weight: Lead
  • Ribbing: Mono
  • Body: Flash Dubbing
  • Wing: Zonker Stripe
  • Flash: Krinkle Mirror Flash
  • Head: Flash Dubbing, Clear Cure Goo
  • Eyes: Clear Cure Eyes Solar Flare


Wind on some lead wire and secure it with super glue.


Tie in a piece of mono for ribbing.


Mix two colors of flash dubbing.


Split the thread and put the dubbing in the gap. Then spin the bobbin to twist the dubbing.


Wind the dubbing around the hook shank and brush it with your velcro brush.


Tie in a zonker stripe at the front and rib it with the mono from the back to the front.


Tie in a strand of krinkle mirror flash on each side and form a little head with flash dubbing.


Use some super glue for fixing the Clear Cure Eyes on each side and fill the space between the eyes on top and bottom with Clear Cure Goo to create a durable head.

tight lines

Holger Lachmann

The Soft Brown Grizzly


Another all around seatrout fly. This pattern is inspired by the famous fly „Omøborsten“. This fly is mainly tied out of soft Keough grizzly saltwater hackles, which pulsate strongly in the water. I made a little video at the end of the tutorial, where you can get a slightly impression, how the fly mowes in the water.

Materials:

  • Hook: Partridge CS 54 # 6
  • Weight: Lead Wire
  • Tail: Dubbing & Keough Grizzly Saltwater Hackle
  • Ribbing: Mono
  • Body: SLF Dubbing & SLF Prism Dubbing, Keough Grizzly Saltwater Hackle
  • Front: Keough Grizzly Saltwater Hackle
  • Hot Spot: Fluo Thread


Wind the lead wire around the front part of the hook and secure it with super glue. Then create a little dubbing ball at the end of the fly.


Tie in a really big and soft hackle.


Wind the hackle around the hook shank.


Tie in some pheasant tippets.


Tie in the mono for ribbing. Then split the thread, put the dubbing in the gap and spin the bobbin to twist the thread and the dubbing. Wind the Dubbing around the shank.


Tie in another hackle…


…wind it towards the end of the fly. Secure the hackle by ribbing the it with the mono. Then brush the body, so the dubbing strands are mixed with the hackle fibres.


Tie in another big hackle at the front. This big front hackle pushes the water and creates much turbulance.


Create a nice little hot spot with your fluo thread and varnish it. That’s it!

tight lines

Holger Lachmann

click to play the video[vimeo]http://vimeo.com/36655237[/vimeo]

Poor Mans Pattegrisen

The famous shrimp fly „Pattegrisen“ is one of the most popular seatrout patterns of the last years for the fly fishermen at the Baltic sea. It’s a very large fly with a great movement in the water. The key-material are Rooster Spey Hackles from Whiting dyed in the colour salmon. The long soft  fibres pulsate, when retrieving with some stops . Lovely!

But there’s a little problem…. the original Whiting Rooster Spey Hackles are expansive. Some years ago you payed about 35,- € for a bronze grade cape, now about 80,- to 90,- €!

That’s the reason I tied the „Poor Mans Pattegrisen“. This pattern is much cheaper, easy to tie and, believe me, it looks really nice in the water! The main ingredient are Whiting HEN Spey Hackles dyed in salmon. They are much cheaper and softer as rooster hackles, but not as long as the original.

Just give the Poor Mans Pattegrisen a try, maybe also in different colours, it’s worth it!


Materials:

  • Hook: Partridge CS 54 # 6
  • Weight: Lead Wire
  • Feeler: Whiting Hen Spey Hackles, Fluo Fibre, Krinkle Mirror Flash
  • Ribbing: Mono
  • Eyes: Black Shrimp Eyes
  • Body: Whiting Hen Spey Hackles, Spectra Dubbing
  • Roof: Whiting Hen Spey Hackles
  • Hot Spot: UTC Thread fluo. pink


Wind some lead wire around the front part of the hook shank and secure it with super glue.


Tie in a spey hackle with the tip first.


Wind the hackle towards the hook eye and catch it with your tying thread.


Tie some strands of fluo fibre on each side of the feeler.


Tie in a strand of krinkle mirror flash on each side and form a little dubbing ball.


Tie in the shrimp eyes. The dubbing ball helps to split the eyes nicely.


Tie in a piece of mono and a spey hackle.


Dub the first part of the body, wind the spey hackle around it and catch it with your thread.


Tie in another spey hackle and dub the rest of the body.


Wind the hackle around the dubbed body and secure it with your thread, then rib the body with the mono to make it strong and durable.


Brush the fly with your velcro brush, so the dubbing fibres are mixed with the hackle fibres.


Tie in another spey hackle…


… wind it around and secure it with your thread.


Take 3-4 spey hackle and equalize the length.


Tie in the spey hackles as a roof of the fly.


If you want, you can create a little hot spot with fluo tying thread.


Varnish the head or put some uv-resin on it. Voilà! The „Poor Mans Pattegrisen“!

tight lines

Holger Lachmann

Quill CDC Emerger

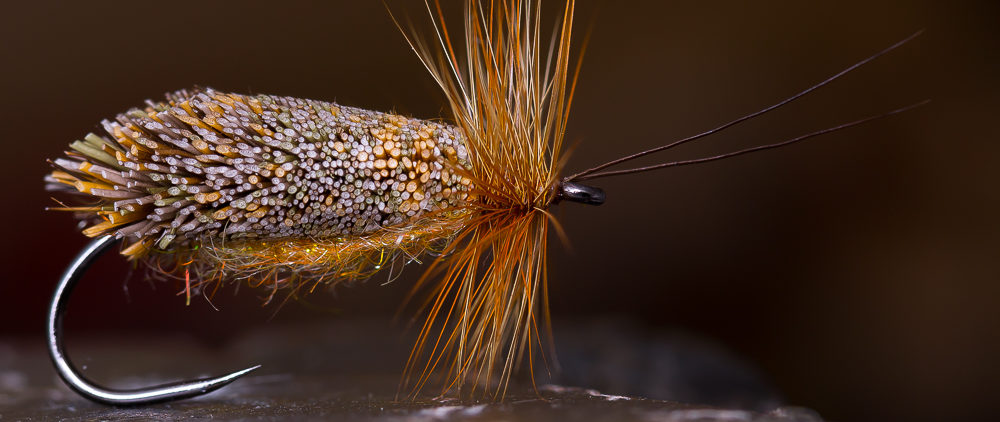
A simple, but quiet effective mayfly emerger.Tie it in different sizes and colours to match the hatch. The body of the emerger should hang deep in the surface. Never put some floatant on the body, only a bit on the thorax and the wings if necessary. With the amount of uv-resin on the quill, you can control, how deep the fly should hang in the surface.

This pattern often made my day, when other patterns were ignored.

Materials:

  • Hook: TMC 212Y # 13
  • Abdomen: Stripped Peacock Quill and UV-Resin (use tack free resin, if not, you have to coat the resin with nail polish)
  • Thorax: Alpaka Dubbing
  • Wings: CDC and for splitting some Yarn


Tie in a stripped peacock quill.


Wind the stripped quill around the hook shank and catch it with your thread.


Put a layer of uv-resin around the quill body to secure it.


Tie in a piece of yarn.


Tie in a bunch of CDC fibres.


Spin the dubbing around the thread.


Dub the thorax.


Fold the yarn to the front to split the CDC and catch it with your thread.


Whip finish the fly and cut the CDC in shape.


View from underneath.

tight lines

Holger Lachmann

Wiggle Fox step by step

Material:

  • Hooks: Gamakatsu F 314 # 6
  • Tail: Fox Tail Hair
  • Body: SLF Saltwater Dubbing, SLF Prism Dubbing and a Hackle
  • Ribbing: Mono
  • Weight: Tungsten Bead or Lead Wire
  • Optional: 3 D Eyes secured with UV-Resin


Put a hook in the vise and tie in some fox tail hair. Put a strand of krinkle mirror flash on each side and tie it in.


Mix the dubbing. I used SLF Saltwater Dub in pearl and ginger and a little bit of SLF Prism dub.


Tie in the mono for ribbing, split the thread, put the dubbing in the gap and spin the bobbin to twist the dubbing and the thread.


Wind around the dubbing, tie in a hackle next to the hook eye and wind it backwards, then wind the ribbing to the front to secure the hackle. Catch the ribbing and do a whip finish. Use a velcro brush to comb the fly.


Cut the hook bend.


Put another hook in the vise and wind some lead wire on the front of the hook.


Tie in a piece of mono for the connection between the two pieces.


Connect the two pieces like above. Use super glue to fix everything.


Tie in another piece of mono for ribbing, then split the thread and put the dubbing in the gap. Spin the bobbin to twist the dubbing and wind it around to the front.


Wind around a hackle and rib it with mono like you’ve done with the first section.


You can finish the fly or dub a little head, put some 3 D eyes on each side and secure them with uv-resin.

tl                                                                                                                                        Holger Lachmann