Laser Eel – Step By Step

I love to fish and tie sandeel patterns for sea trout in the Baltic Sea (a friend also caught Stripers and False Albacore with it very well btw).

My „Baltic Candy„, a variation of Bob Popovics famous Surf Candy, is after some years in use quite well known among the coastal fishermen, which makes me pretty happy and proud, to be honest.

This Laser Eel is another variation, which is quite easy to tie, maybe easier than the original Baltic Candy. The only difficulty is the use of uv resin on/in the Laser Dubbing, but there is no extra weight used, so the body becomes easily slick.

Just give this fly a try, it looks even better in the water. ;-)

Materials:

  • Hook: Gamakatsu SC 15 # 1
  • Thread: Mono
  • Tail: Polar Fibre white and olive
  • Flash: Angel Hair Holographic Silver
  • Inner Body: Laser Flash Rainbow
  • Body: Senyo’s Laser Dub white and olive
  • Eyes: 3D-Eyes yellow 3mm
  • UV Resin: Bug Bond

Place the hook in the vise, tie in a piece of polar fibre in white, then a couple of strands of angelhair and another piece of polar fibre, this time in olive. It’s very important to comb the material carefully.

Wind some strands of the laser Flash rainbow around the hook shank and catch it with your thread.

Tie in a bunch of Senyo’s Laser Dub on top and underneath the hook shank and comb it backwards. Bring the thread to the hook eye and do a whip finish. Put the eyes on right place on both sides.

Put some Bug Bond on the head and let it soak into the Laser Dubbing. Cure it with your Bug Bond uv torch.

Apply another coating of Bug Bond to make the head nice and slick.

That’s it! The finished fly, very durable and fishy! Hopefully it brings a nice bend in your rod!


Light Sandeel-Pattern

This little Sandeel is made out of a hook, thread, eyes, holographic flash, polar fibre, angel hair and Bug Bond uv resin.

I want to use it in the Baltic Sea chasing seatrout during calm conditions and clear water.

Bad Ass Bass Banger – Step By Step

The Bad Ass Bass Banger – A streamer perfect for bass/perch and zander/walleye. It has a great action under water, because of the excellent moving tail, the jigging and the massiv front collar, which pushes a lot of water. It’s easy and fast to tie, durable and just a great fishing fly. The jigging can be controled by the weight of the brass dumbells.

Materials:

  • Hook: Gamakatsu F 314 # 4
  • Thread: Dyneema white and UTC fluo green
  • Dubbing: Ice Dubbing Chartreuse
  • Tail/Body: Tiger Barred Rabbit Stripes
  • Front Collar: Tiger Barred Rabbit Stripes
  • Head: Brass Dumbells with Eyes, Senyo’s Laser Dub fluo chartreuse + green/ chartruese, Bug Bond
  • Flash: Krinkle Mirror Flash


Put the hook in the vise, wind a good basement of thread and tie in the dumbell eyes. Use super glue during the tying, so the dumbells won’t slip around the hook shank during fishing.


Splitt the thread or make a dubbing loop, but the ice dubbing in the gap and twist it, then brush ist with your velcro-brush and wind it from the back to the front behind the dumbells. Then brush the dubbing body again.

Jab the hook through the leather of the rabbit stripe and tie the stripe right behind the dumbells down. Secure the punctured stripe with a little drop of super glue.


Bad Ass Bass Banger (15) (Mittel)

Tie in the krinkle mirror flash an each side. I prefer to use two or more different colors of flash. Split the thread again and put some rabbit stripe in a material clamp and cut away the leather. Put the rabbit stripe hair into the thread gap and twist the thread, then wind it around the hook next to the dumbells.


Bad Ass Bass Banger (17) (Mittel)

Change the thread and tie in the laser dub like shown on the pictures above on top and on the underside. The lighter color always belong to the underside.


Finish with a nice massive thread-head, which pushes the senyo back.


Push the senyo dubbing on the underside to the back and apply the Bug Bond on the underside and on the head.

Ready to fish! Wish you a lot of fun with the Bad Ass Bass Banger!

tl

Holger Lachmann

Super Easy Anti-Crinkle Bite Tippet For Pike and Musky

Galerie

I always hated to fish bite tippets made out of steel wire, because after a short time they started to crinkle. Since two years, I fish bite tippets made out of „Knot2Kinky“. No more crinkle during normal fishing, cheap, easy … Weiterlesen

Articulated Pike Streamer In The Water

I made two short videos how the articulated pike streamer move in the water. The blue streamer is the same as the white/olive one, just another color. Due to the big head made from uv-resin, the craft fur keep its volume in the current and moves really nicely!

[vimeo]https://vimeo.com/52331026[/vimeo]


p1120427-mittel


[vimeo]https://vimeo.com/52330517[/vimeo]

p1120302-mittel


Easy Pike Zonker Step By Step

One of my most fished patterns for pike. It’s easy to tie, very durable, you can tie it in the length you want and it wiggles nice through the water. You can also use arctic fox for the front collar instead of finn raccoon. Works well, too.

Materials: 

  • Hook: Gamakatsu F 314 # 1/0
  • Ribbing: Mono
  • Body: Ice Dub Holographic Silver and Ice Dub Pearl mixed together
  • Wing/Tail: Finn Raccoon
  • Flash: Gliss’n Glow Pearl, Krinkle Mirror Flash Pearl and Lateral Scale Pearl
  • Front Collar: Finn Raccoon or Arctic Fox
  • Hot Point: Fluo Thread
  • Eyes: Deer Creek
  • Head: Bug Bond

Tie in a piece of mono for the ribbing and mix ice dub pearl and ice dub holographic silver. Then split the thread and put the dubbing mix into the gap. Spin the bobbin to twist the dubbing. Wind the dubbing hank around the hook shank and give it a good brush with your velcro.

Tie in a piece of finn raccoon zonker 5mm next to the hook eye. Then ribb the raccoon zonker with the mono to secure it on the hook shank and catch the mono with your thread.

Tie in the krinkle mirror flash and the gliss’n glow. Then form a loop with your thread and wax the loop. Put a piece of finn raccoon in the loop and cut away the leather. Twist the loop with the raccoon slowly. When the fur is secured in the loop, wind the raccoon around the shank to the hook eye. Comb the twisted raccoon after every turn.


Tie in a strand of lateral scale pearl on each side and split the thread. Put again some dubbing in the gap und twist the bobbin Wind the twisted dubbing around and brush it with your velcro to give the head some extra sparcle.


If you like it, you can do a little hot point with some fluo thread. Glue some sexy eyes on the head and secure the head with Bug Bond.

Ready for pike!

tl Holger Lachmann

Articulated Pike Streamer Step By Step

Here’s an example for an articulated pike streamer, which is easy to cast, because we try to create volume without putting to much material into the fly. To much material makes the just inflexible (and expensive ;-) )

I used for this pattern the new articulated shanks from the Flymen Fishing Co. in 35mm to get the right movement and position of the hook.


Material:

  • Hook: Gamakatsu SL 12 S # 4/0  (be carefull, they are soooooo sharp!)
  • Articulated Shank: 35mm from Flymen Fishing Co.
  • Tail and Wing: Arctic Fox chartreuse and black
  • Feather: Green Grizzly Hackle
  • Body: Ice Dub Pearl
  • Flash: Krinkle Mirror Flash pearl and Flashabou Mirage Saltwater
  • Eyes: Hareline fluo yellow
  • UV-Resin: Bug Bond


Put the hook into the vise, do some turns with your thread and tie in the fox as tail and some strands Flashabou Mirage.


Split your tying thread or form a dubbing loop and put the ice dub between and twist it. Then brush it with your velcro and wind it around the hook shank.


Tie in some fox with the tips pointing to the hook eye, cut the waste, put again some dubbing between the thread, twist it and wind it to the front. Then go with the thread between the fox hair to the hook eye.


Push the fox hair with an empty pen towards the hook bend. Then tie in a green grizzly hackle on each side and some strands of krinkle mirror flash. Whip finish and secure with super glue.


Attach the hook with the articulated shank and put the shank into your vise. Then close the gap with a strong thread and super glue (the little pearls on the thread) to fix the hook. This will hold forever!


Create another dubbing hank and wind it around to create a little bump. Then tie in a bunch of artic fox on the hook shank and a bunch underneath. Comb the hair carefully. Another dubbing hank will follow.


Tie in two green grizzy hackles and some krinkle mirror flash. Then comb a bunch of black arctic fox and tie it in like shown on the picture. Trim away the waste and do some rounds with dubbing and do a quick whip finish secured with super glue.

Push the black fox backwards, attach the eyes and secure the whole head with Bug Bond.

That’s it! Ready to go. Have fun with the pikes!

Holger Lachmann

Poxy-Fox

When I first tied this pattern, I used epoxy for it. That’s why there’s „Poxy“ in the name of the fly. Today I use uv-resin for it, but I didn’t wanted to chance the name. ;-)

When you tie this pattern, it’s very important, that the resin soaks into the braid at the end of the fly to fix the marble fox, so it won’t tangle around the hook bend while casting. The materials used are:

  • Gamakatsu F314 # 2
  • Mono thread
  • 3D Eyes
  • Marble Fox olive
  • Krinkle Mirror Flash
  • Ice Dub golden olive
  • Felix Cord olive
  • Permanent Markers
  • UV-Resin

You can also tie in some lead wire if you want, to create a jigging effect for example.

The Poxy-Fox looks really massive on the picture, but in the water it got some translucency. That’s the reason, why you should dub a thin body before slipping the flexi cord around the hook shank.

tight lines

Holger Lachmann

Fleye Foil Fox Candy – Step By Step

Here’s a Surf Candy style pattern tied with the new Fleye Foils by Bob Popovics. The tail made out of arctic fox wiggles nice in the water. Much better than most synthetics. It’s not just a battern for the saltwater fisherman, you can also fish it in freshwater. Small sizes for trout and char for example, bigger ones for asp. Just give it a try.

Materials:

  • Hook: Gamakatsu SS15/T # 4
  • Thread: Mono
  • Tail: Arctic Fox
  • Flash: Krinkle Mirror Flash Pearl
  • Body: Senyo’s Laser Dub, Bob Popovics‘ Fleye Foils „Silverside“ and uv-resin


Tie in the arctic fox as tail and 3 strands of krinkle mirror flash, one on each side and one on top.


3mm in front of the fox, tie in a bunch of white senyo’s laser dub on the top of the hook shank and one underneath.


Do the same with a bunch of laser dub holographic minnow belly 3 mm infront of the white dub.

Now, pick two colors of laser dub of your liking, here it’s light olive and shrimp pink, and tie it in like you see above.

Pull the laser dub backwards, that’s how you put a bit of volume to the head, otherwise it won’t fit to the shape of the foil.

Put a foil on each side. Just tie in the little „nose“ of the foil with a couple of turns and whip finish the fly.

Pull the laser dub and the foils backwards and start to apply the uv resin on the body. The resin should soak into the dubbing, that gives the fly later some translucency. Mostly it’s easier to applicate two layers of uv resin. You got much more control of everything.

If you don’t use a tackfree uv resin, put a thin coating of nail varnish on the uv resin to get a tackfree glossy finish.

That’s it! Ready for fishing!

tl

Holger Lachmann

A closer look at: Bob Popovics‘ Fleye Foils

Lutz Schepers from www.theflypeople.com asked me some weeks ago, if I wanted to test the new Fleye Foils by Bob Popovics. I always liked the flies and ideas of Bob Popovics, so I surely wanted to test his newest idea. The foils imitate the eyes, the gills, the silver belly and flanks on one side of the fly with just one simple tying step.

I don’t know the reason why, but when I got the foils, I didn’t felt the inner drive to test them immediately. Maybe I didn’t wanted to do the normal Sury Candy with it.

This morning, I did the first tests with the smallest „Bay Anchovy“ foils. The fly you see below is the first try. It’s a really simple fly made out of a hook, mono thread, different colors of Senyo’s Laser Dub, Fleye Foils and uv resin. It doesn’t look to shabby for a first try, I think.

The Fleye Foils are easy to use. You just have to tie in the „nose“ next to the hook eye and push the sticky backsides of the foils against the flanks of the fly. One or two coatings of uv resin and you are done.

After tying some patterns with Fleye Foils, I have to say, that if you want to make Surf Candy-style flies as fast and easy as possible, the foils are an enrichment. The only thing I would suggest to improve is, to give more expression to the eyes.

tl Holger Lachmann

Quill Body CDC Emerger No. 2 – Step By Step

It’s the end of April and the trout and grayling season will start soon.

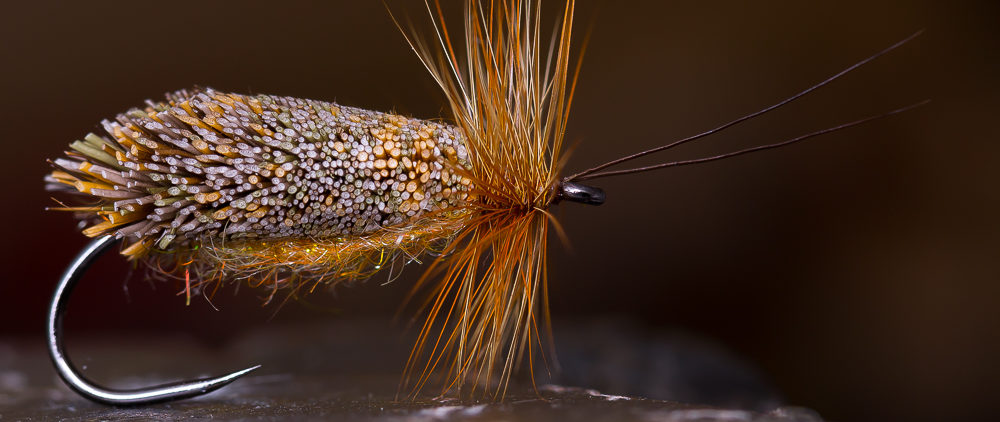
Here’s another very good emerger pattern, which imitates some different may fly species, depending on the colour and size. It’s tied on the new Daiichi 1167 Klinkhamer hook, designed by the famous dutch fly tyer Hans van Klinken.

The Daiichi 1167 got a stronger wire compared to the Tiemco 212Y for example, which makes sure, that the abdomen hangs deep in the surface. That’s really important and that’s the reason, why this pattern got no tail or a trailing shuck, to make sure, that the abdomen is hanging deep in the surface.

The quill body is covered with a thin coating UV Resin.


Materials:

  • Hook: Daiichi 1167 # 14
  • Abdomen: Polish Quills &Tack Free UV Resin
  • Thorax: Oliver Edwards Master Class Dubbing
  • Wing case: CDC
  • Wing: CDC
  • Legs: Partridge


Put the hook into the vise, do a layer of thread and tie in a stripped peacock quill. Wind the quill around the hook shank and catch it with the tying thread.


Put a little drop of Tack Free UV Resin on the stripped peacock quill and spread it on the abdomen. Cure it with your UV torch.


Tie in two CDC feathers for the wing case. Then tie in the tip of another white CDC feather as a crippled wing.


Dub the body and tie in some partridge fibres to imitate the legs. Fold each CDC feather to the hook eye and catch it with the tying thread. The CDC wing should be exactly in the middle of the feathers.


Cut the CDC feathers for the wing case and do some turns with your whip finisher to create a little head. Varnish the head, if you like. That’s it, ready for fishing. ;-)

tight lines

Holger Lachmann

Matuka Streamer

Here’s a step by step tutorial for a matuka streamer. This type of streamer is very old and you don’t see it to often in the fly boxes of the fishermen today, but the truth is, that the feathers move nicely, especially when you put some weight in the front of the fly, which causes a jigging effect.

Materials:

  • Hook: Gamakatsu F 314 # 4
  • Feathers: Keough Saltwater Grizzly Hackle, Keough Saltwater Hackle
  • Body: SLF Saltwater Dubbing white and ginger
  • Eyes: Deer Creek Gator Eyes
  • Flash: Krinkle Mirror Flash
  • UV-Resin: Deer Creek Diamond Hard Tack Free Resin
  • Weight: Lead Wire
  • Ribbing: Mono


Wind some lead wire around the shank and secure it with super glue.


Create a little dubbing ball at the end of the hook shank, tie in a saltwater hackle and wind it around. The dubbing ball pushes the fibres to the sides.


Tie in a piece of mono for ribbing. Split the tying thread and put the dubbing mix in the gap. Spin the bobbin to twist the dubbing. Wind the dubbing around the hook shank and brush it with your velcro .


Take two feathers and pull some fibres from one side as shown on the photo. Tie in the feather at the front and secure them by ribbing them with the mono. Catch the ribbing with your thread.


Tie in some strands of krinkle mirror on each side and do a whip finish with your thread. Take two gator eyes and put them on each side. You should use super glue to secure them. The fly is nearly finished. Just take some Diamond Hard Tack Free resin and let it run between the eyes, then cure it with your uv torch. Repeat this till the gap between the eyes is filled. This makes the fly very strong and durable.

tight lines

Holger Lachmann

Tungsten Quill Body Nymph Step By Step

Put a tungsten bead on the hook (here it’s a TMC 2312 #12)


Tie in some fibres from a Coq de Leon hackle as tail.


Tie in stripped peacock quill.


Create a tapered body with the tying thread.


Wind the quill around the hook shank. The dark side of the quill should point to the hook bend.


Put a small drop of uv-resin on the body and cover the quill with a small coat.


The uv-resin after curing. Now, the quill body looks really nice and it’s secured against the trouts teeth. A tack free uv-resin works best.


Tie in some pheasant tail fibres for the wing case.


Tie in a hen hackle with the tip first. The hackle will create the legs of the nymph.


Dub the thorax with a dubbing of your choice. I used SLF-Spicky-Dubbing.


Fold the hen hackle first and then the pheasant tail fibres to the hook eye and catch it with the thread close to the tungsten bead.


Cut the hen hackle and the pheasant tail fibres close to the tungsten head and make a whip finish.


Finish the fly with a drop of uv-resin on the wing case.

A heavy nymph with quiet a real shape, nice colours and very durable.


Holger